Abyss
Attack
A Site
Position 1 (A Main)
Tuck into this corner:
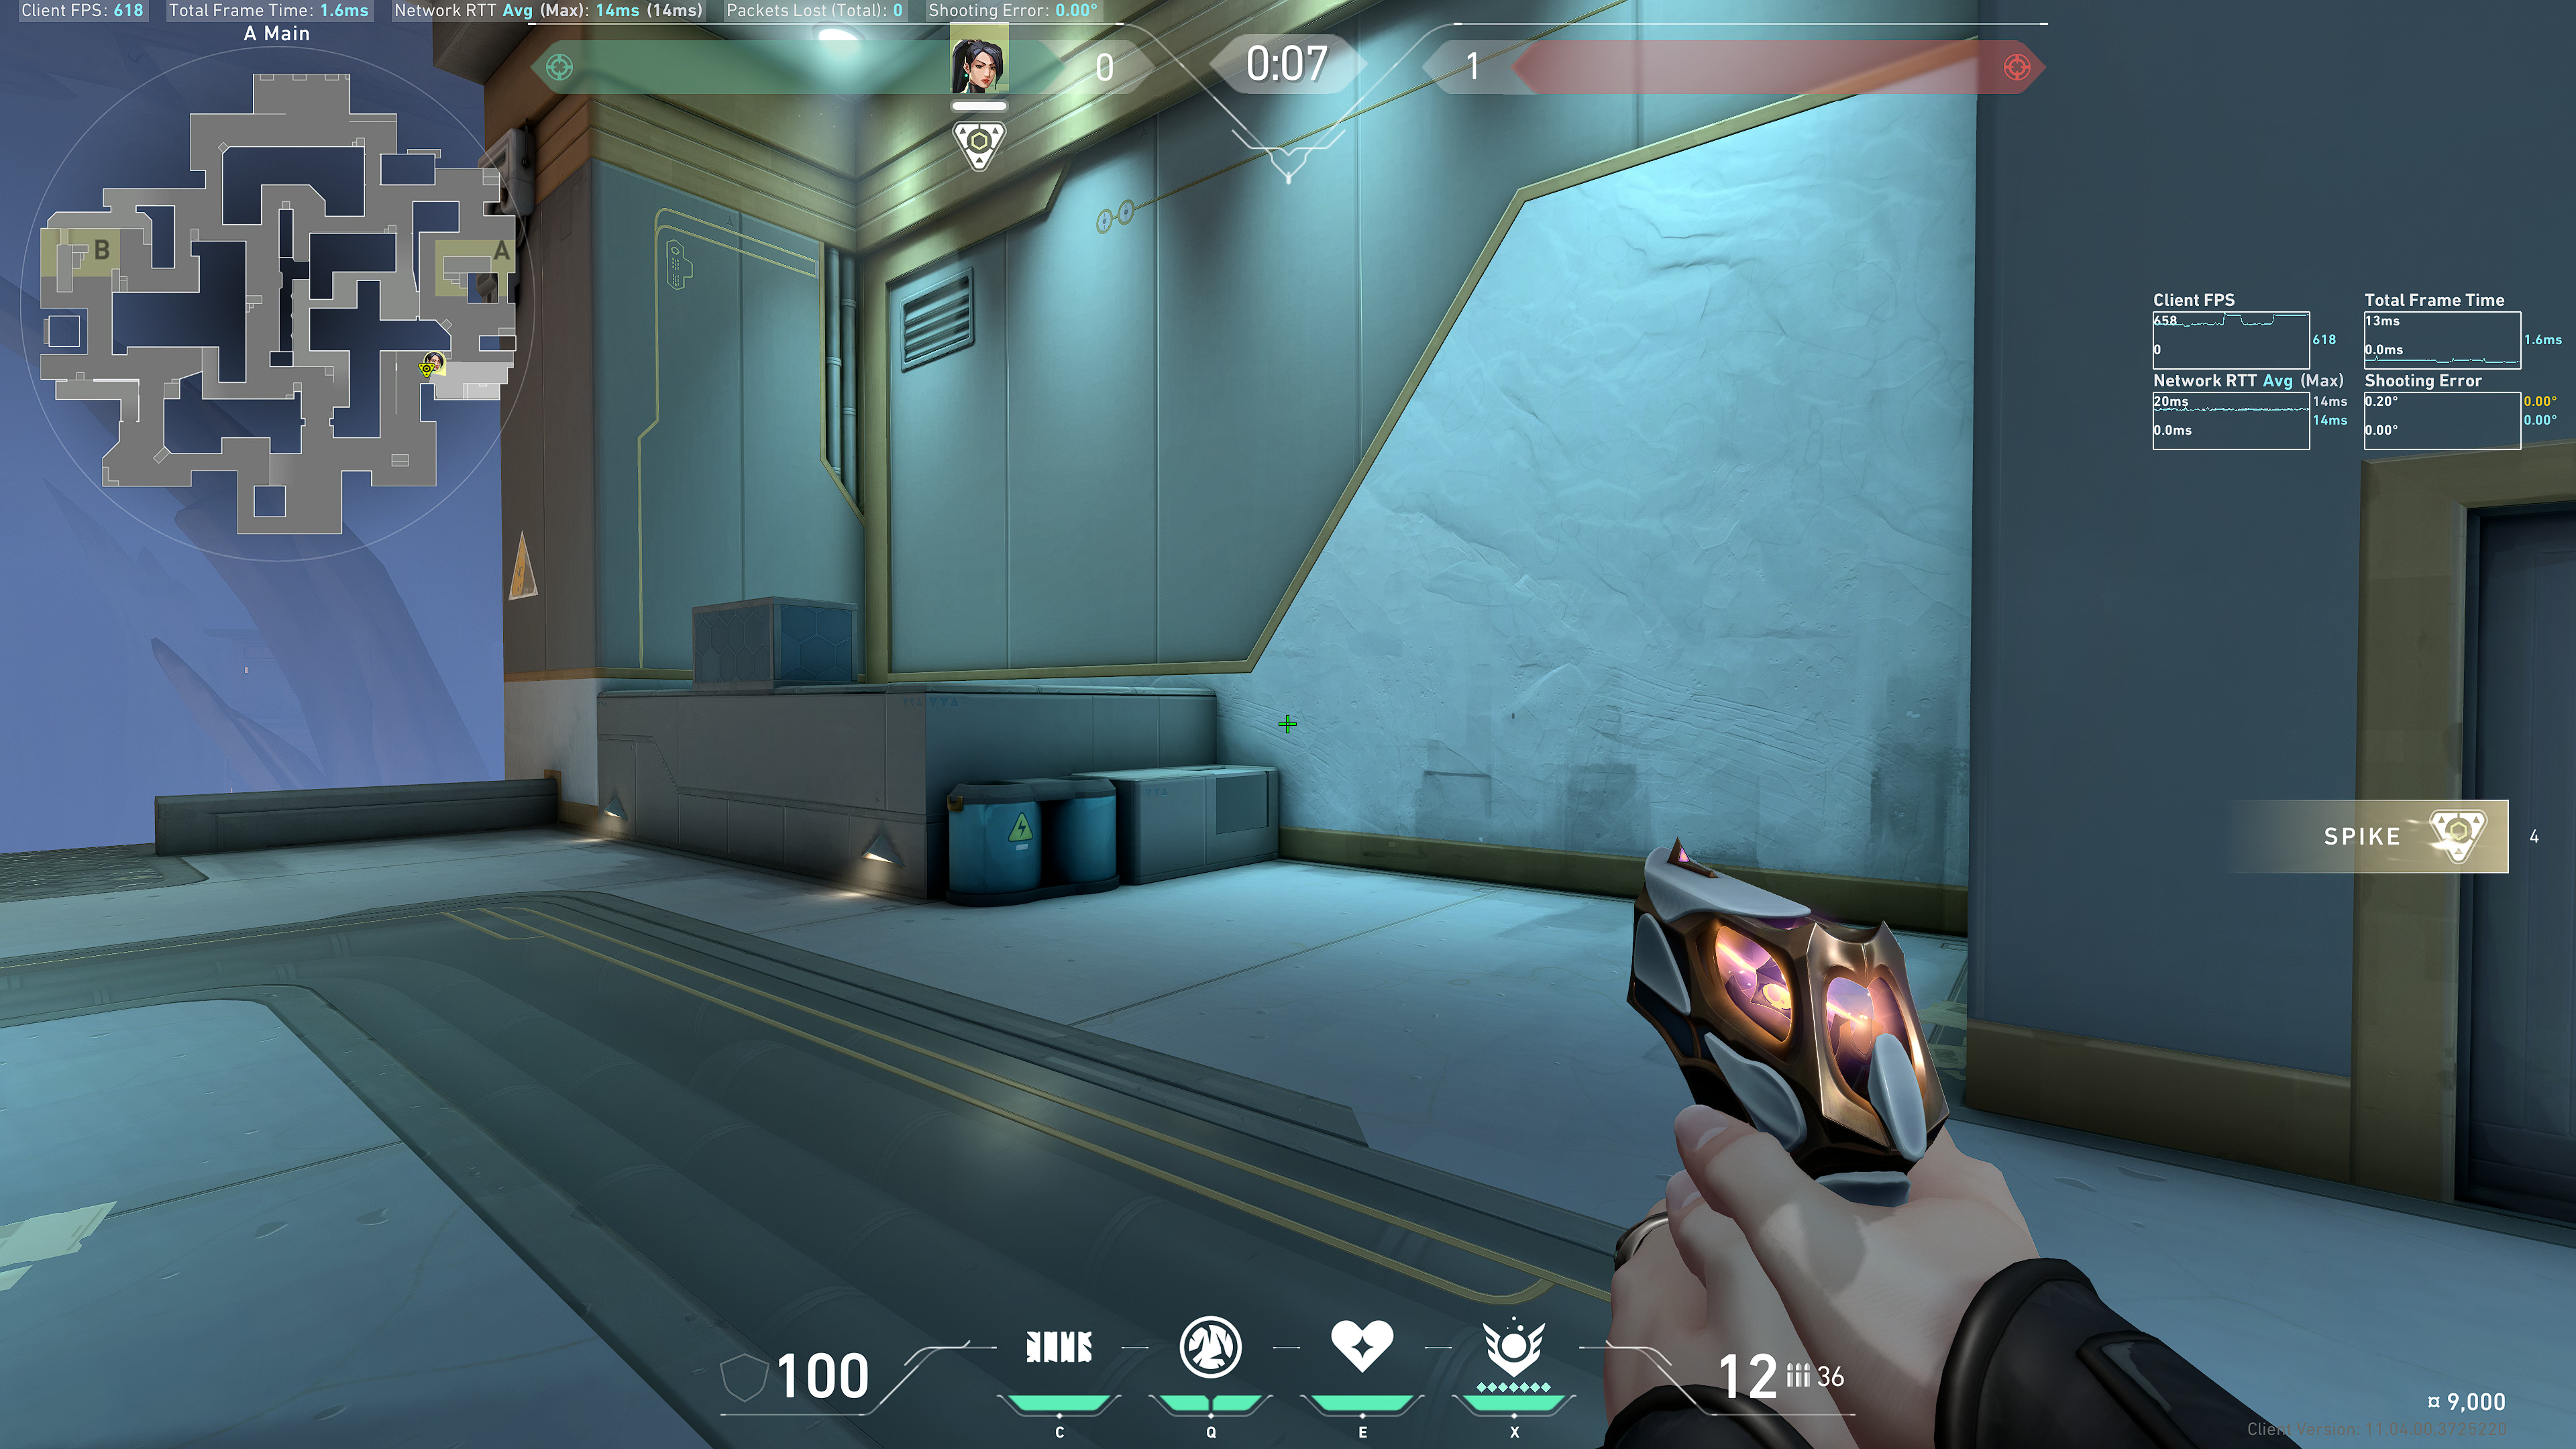
Back site (left side)
Note this white rectangle:
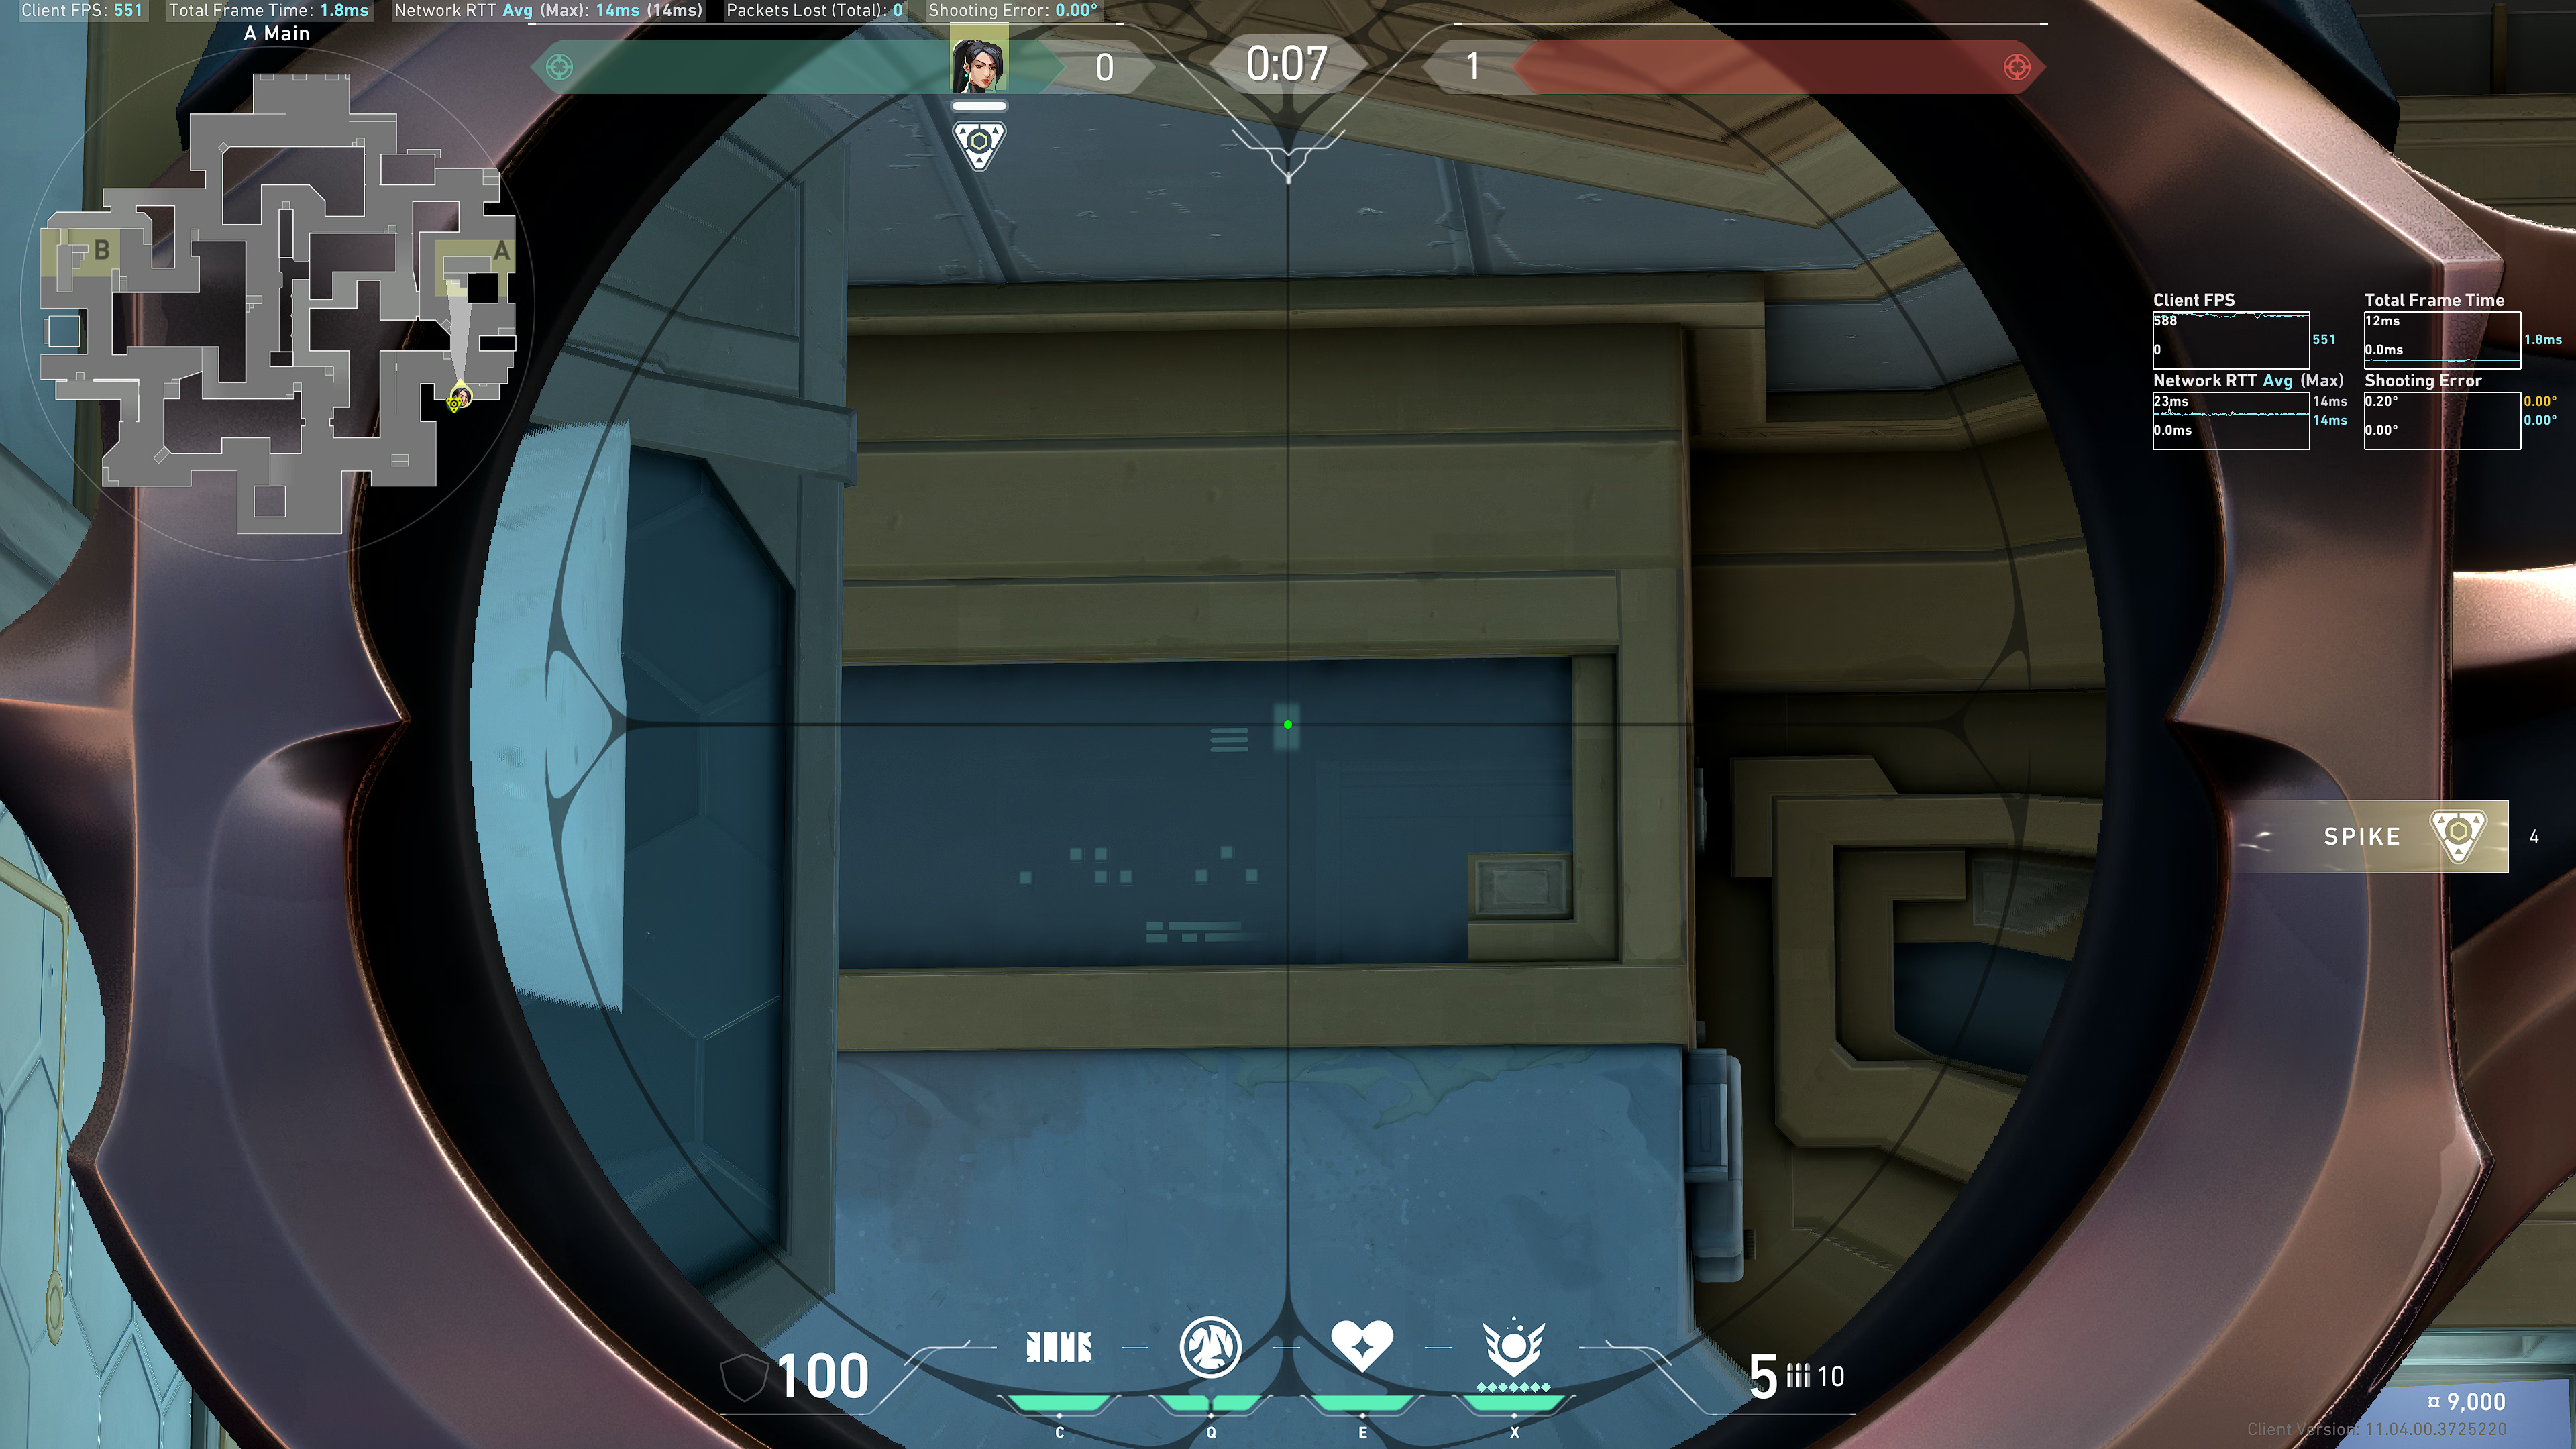
Aim at the horizontal line just above that white rectangle:
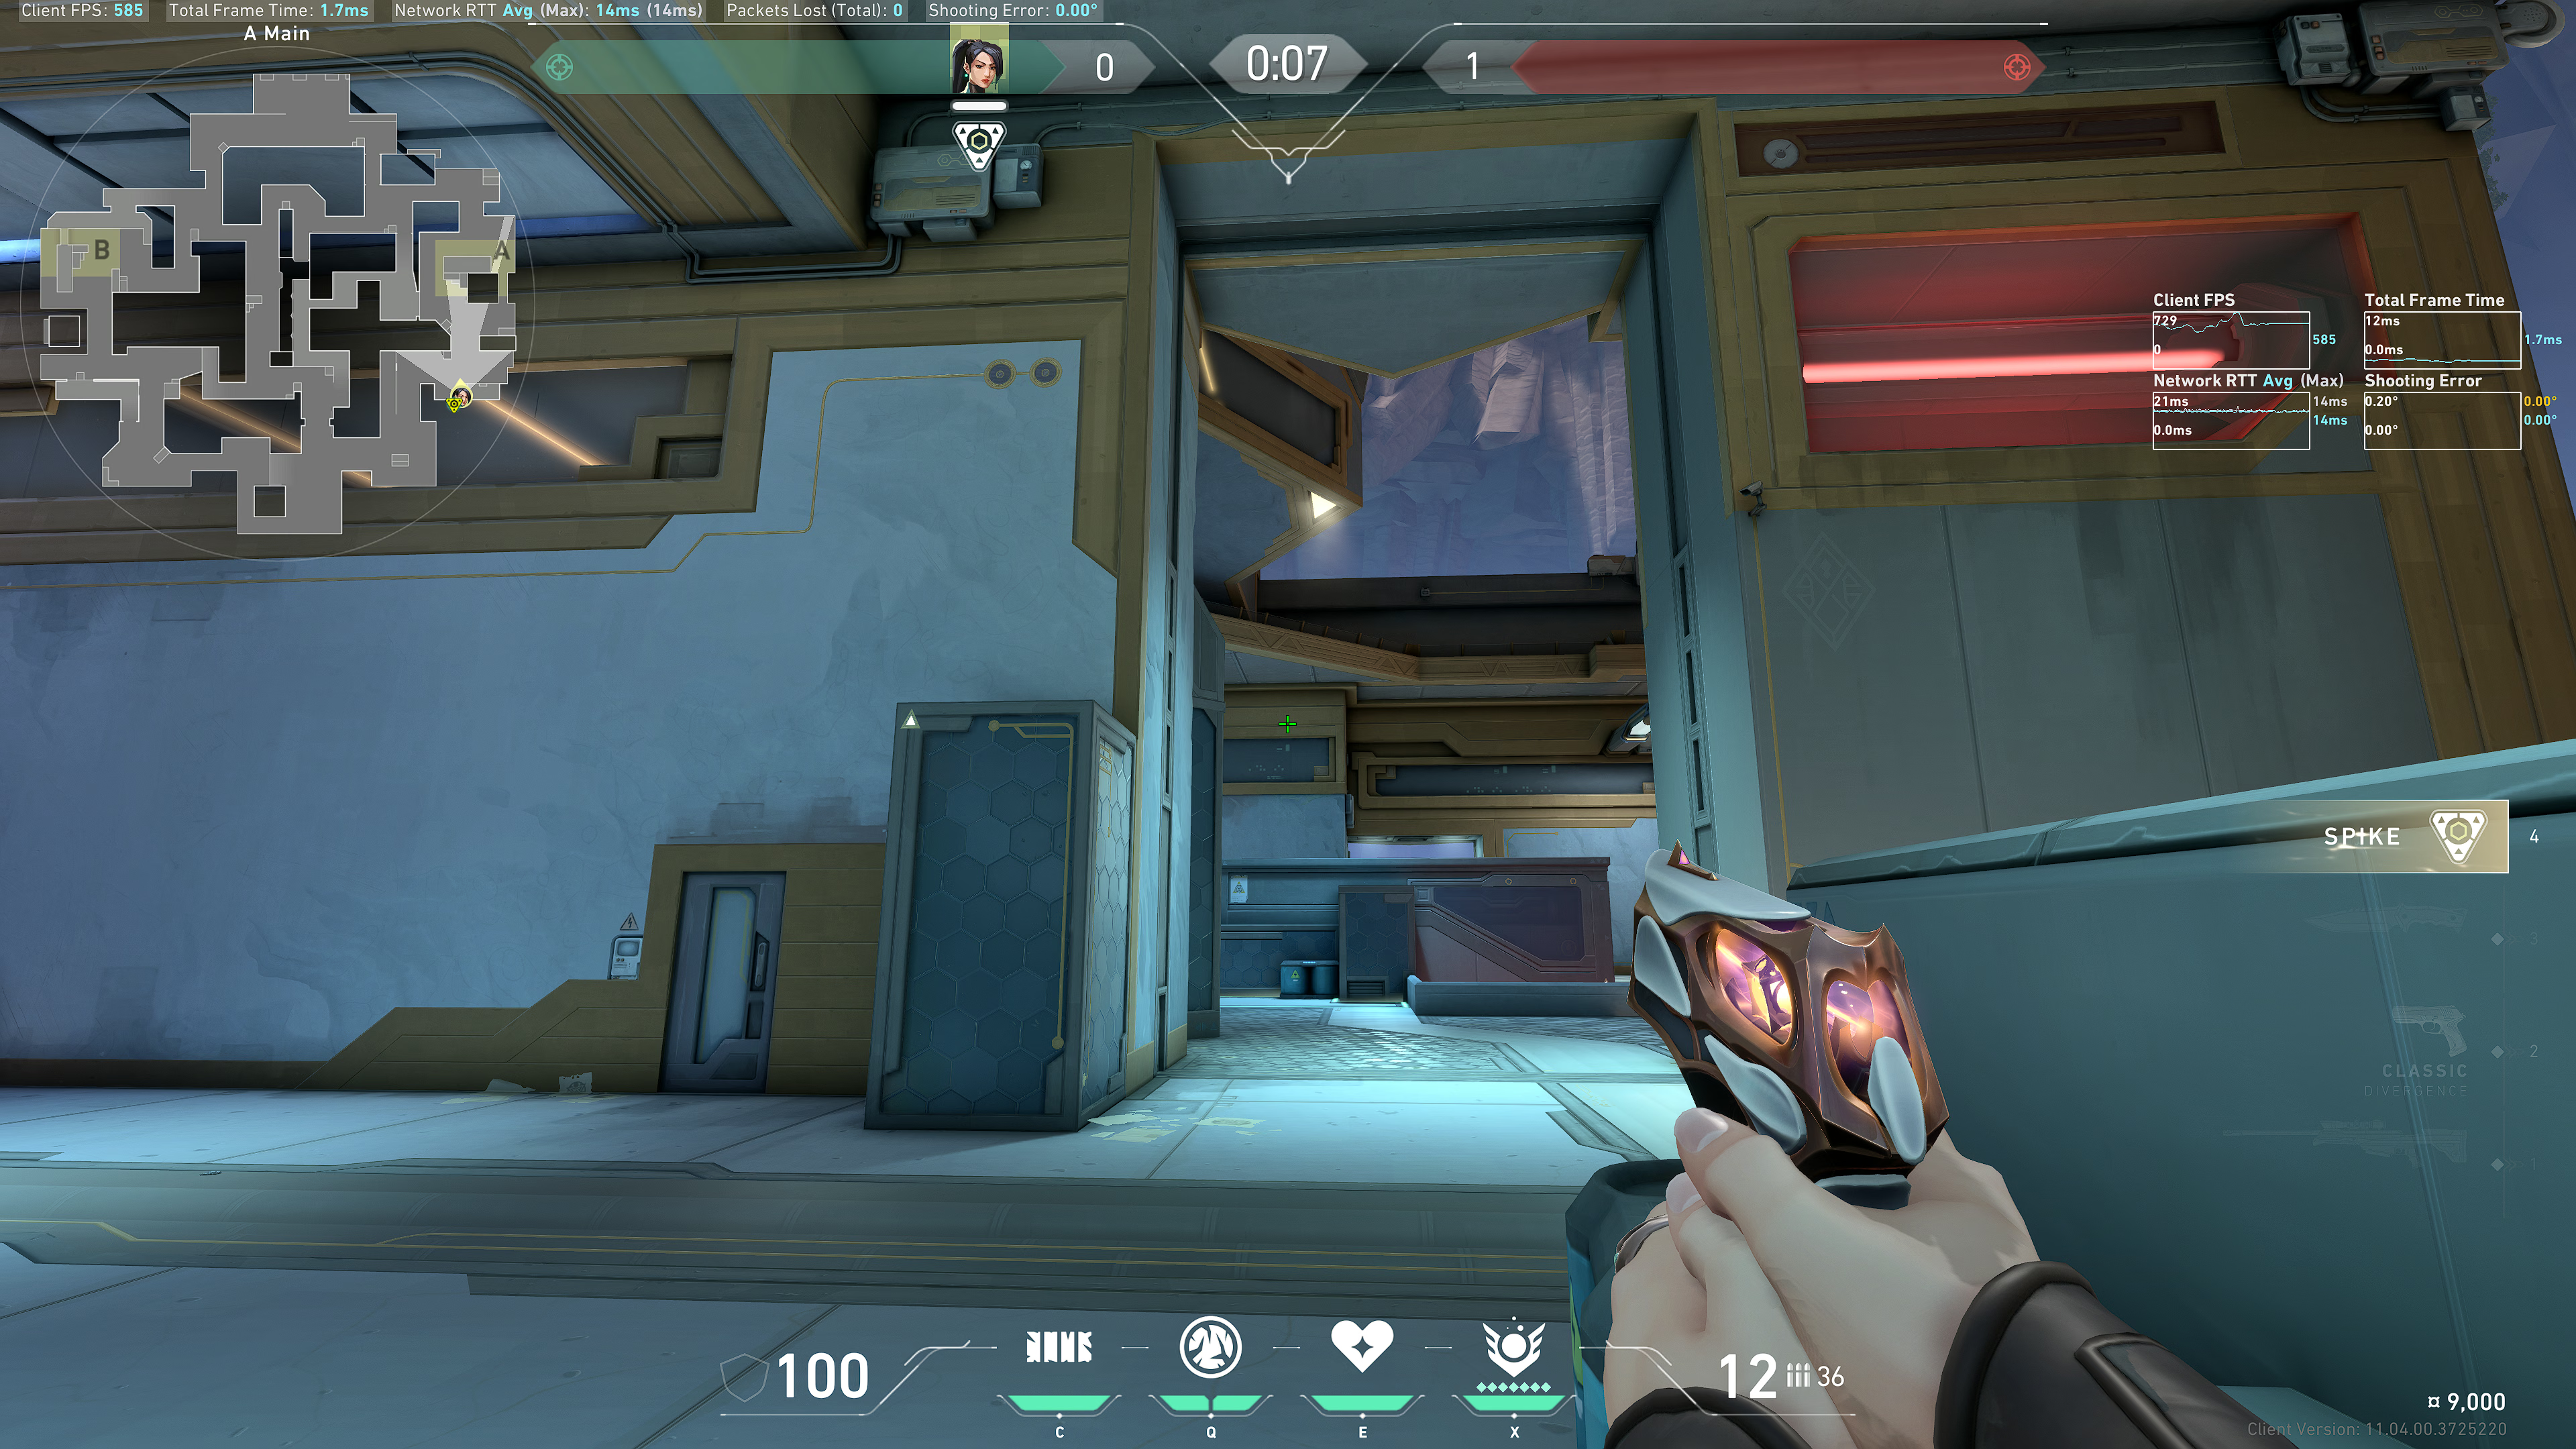
Result:
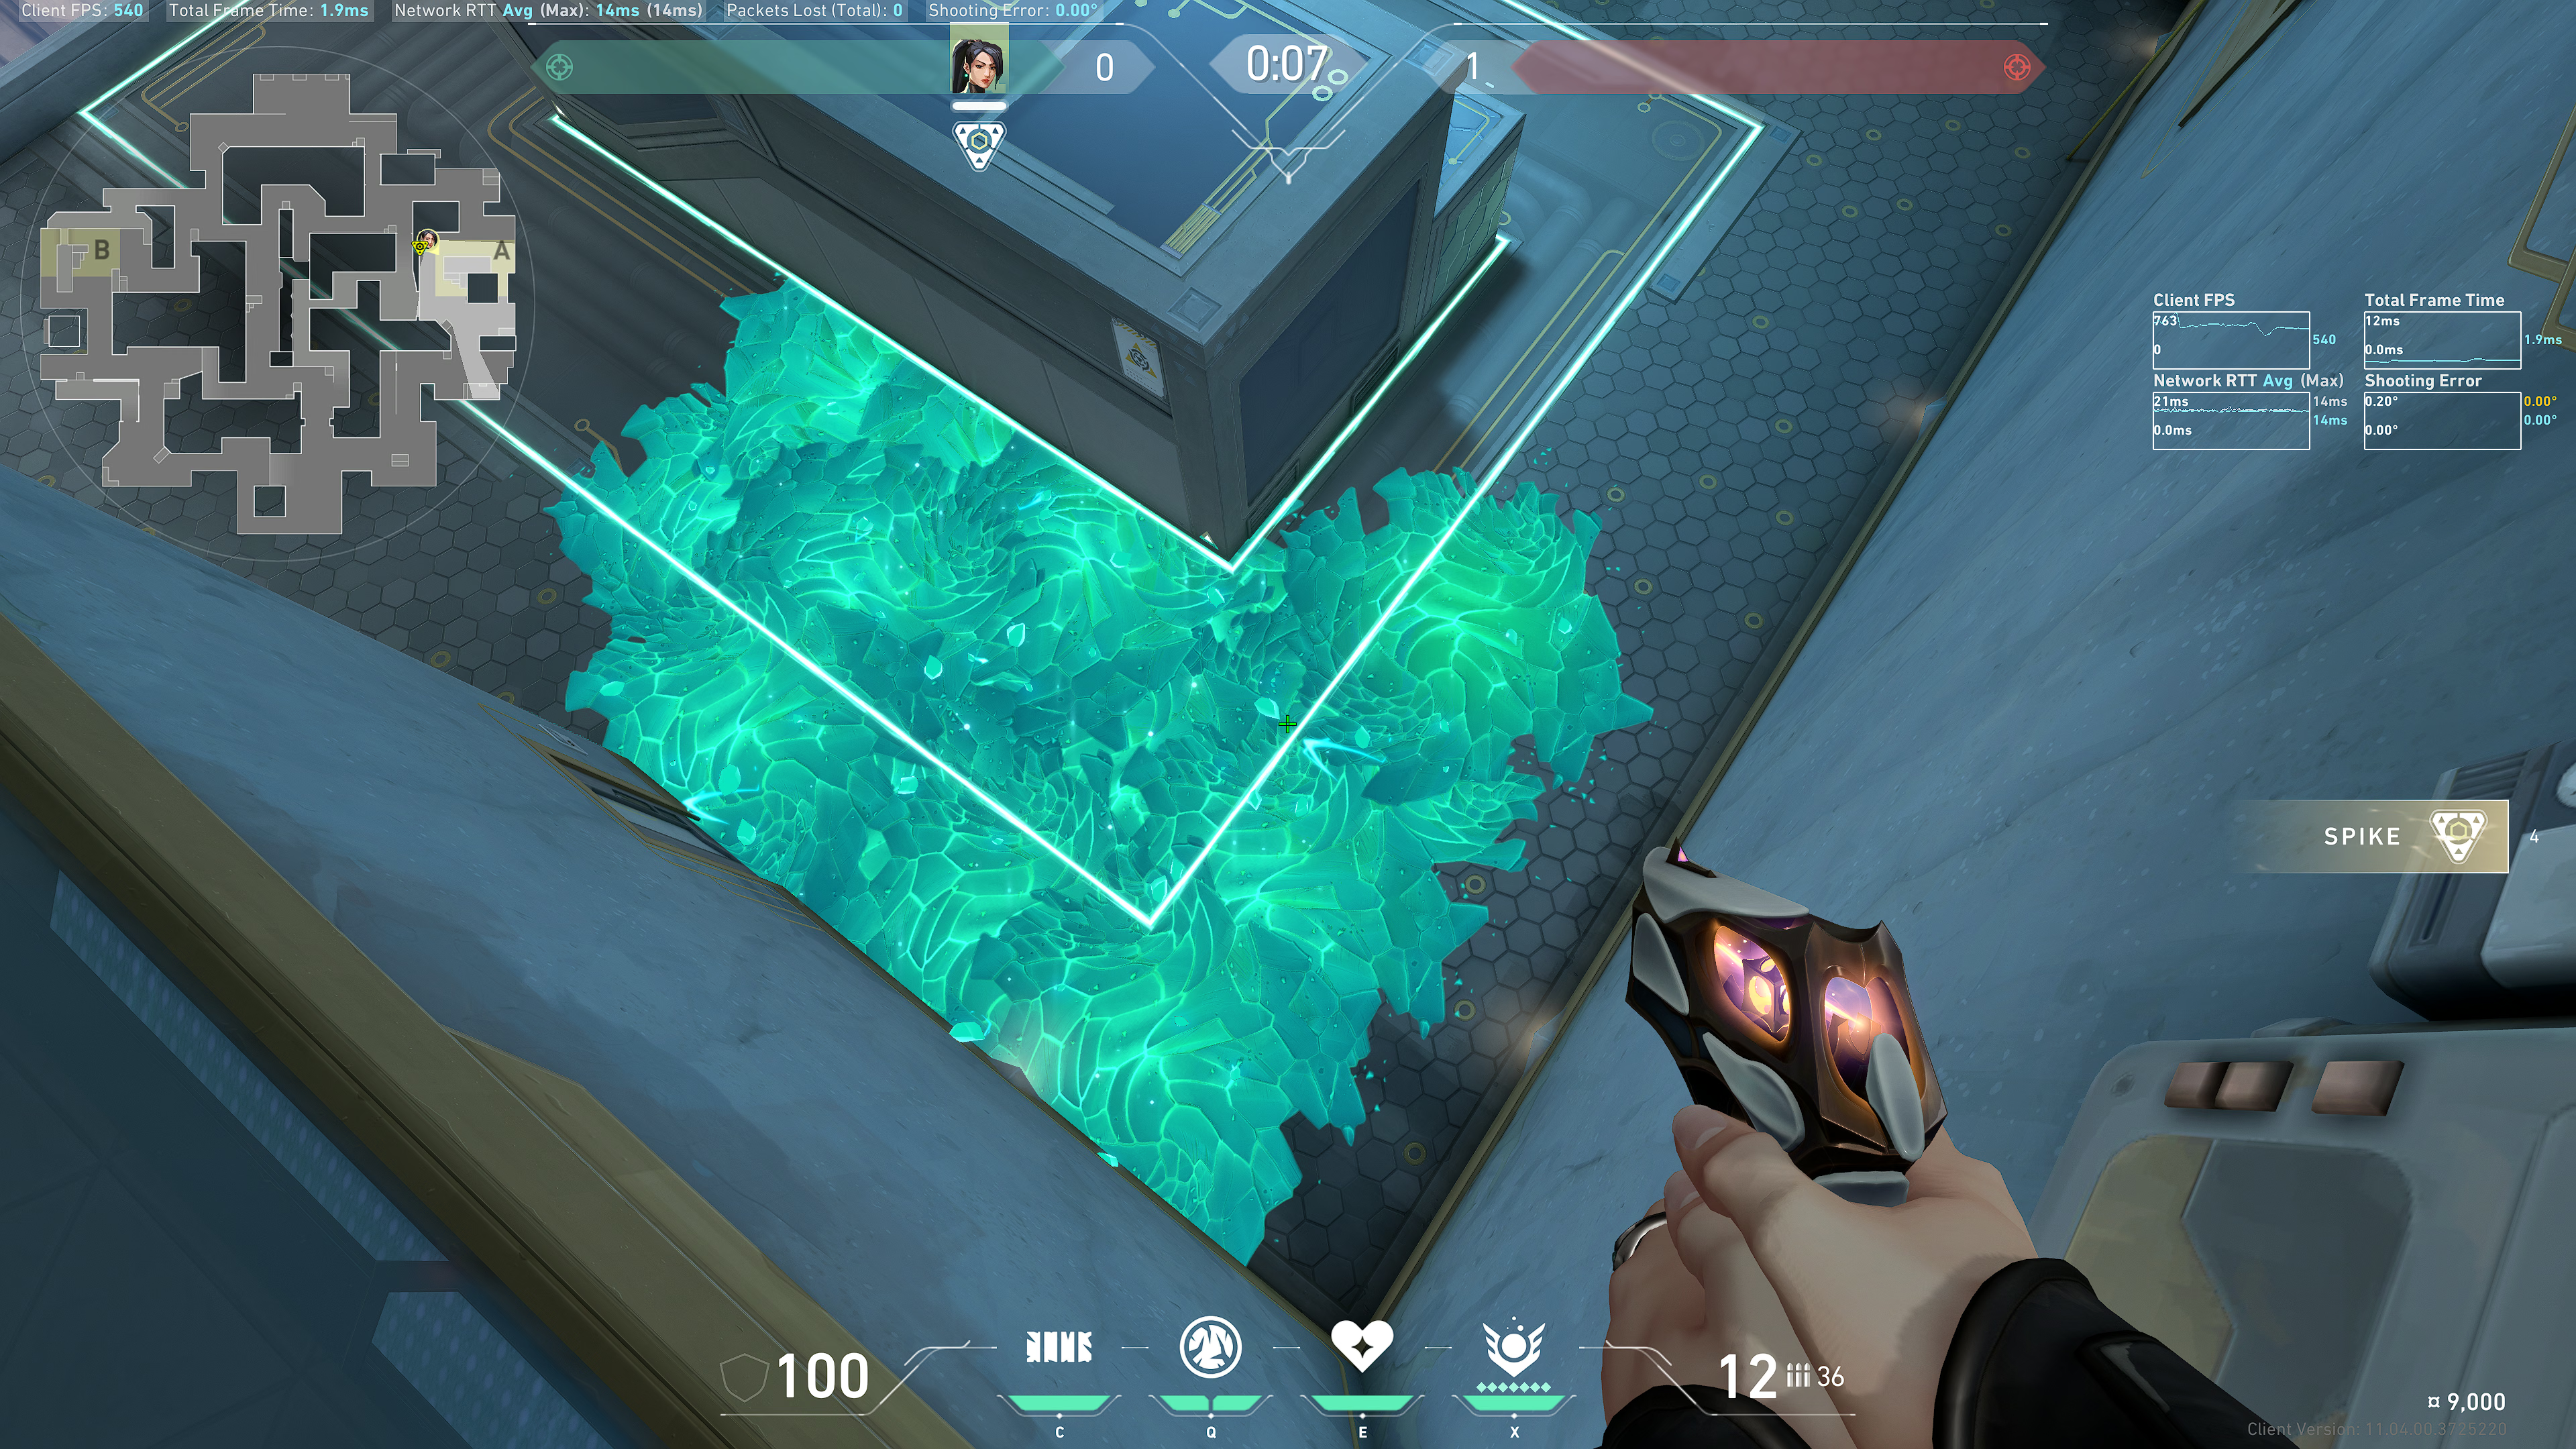
Back site (right side)
Note this triangle:
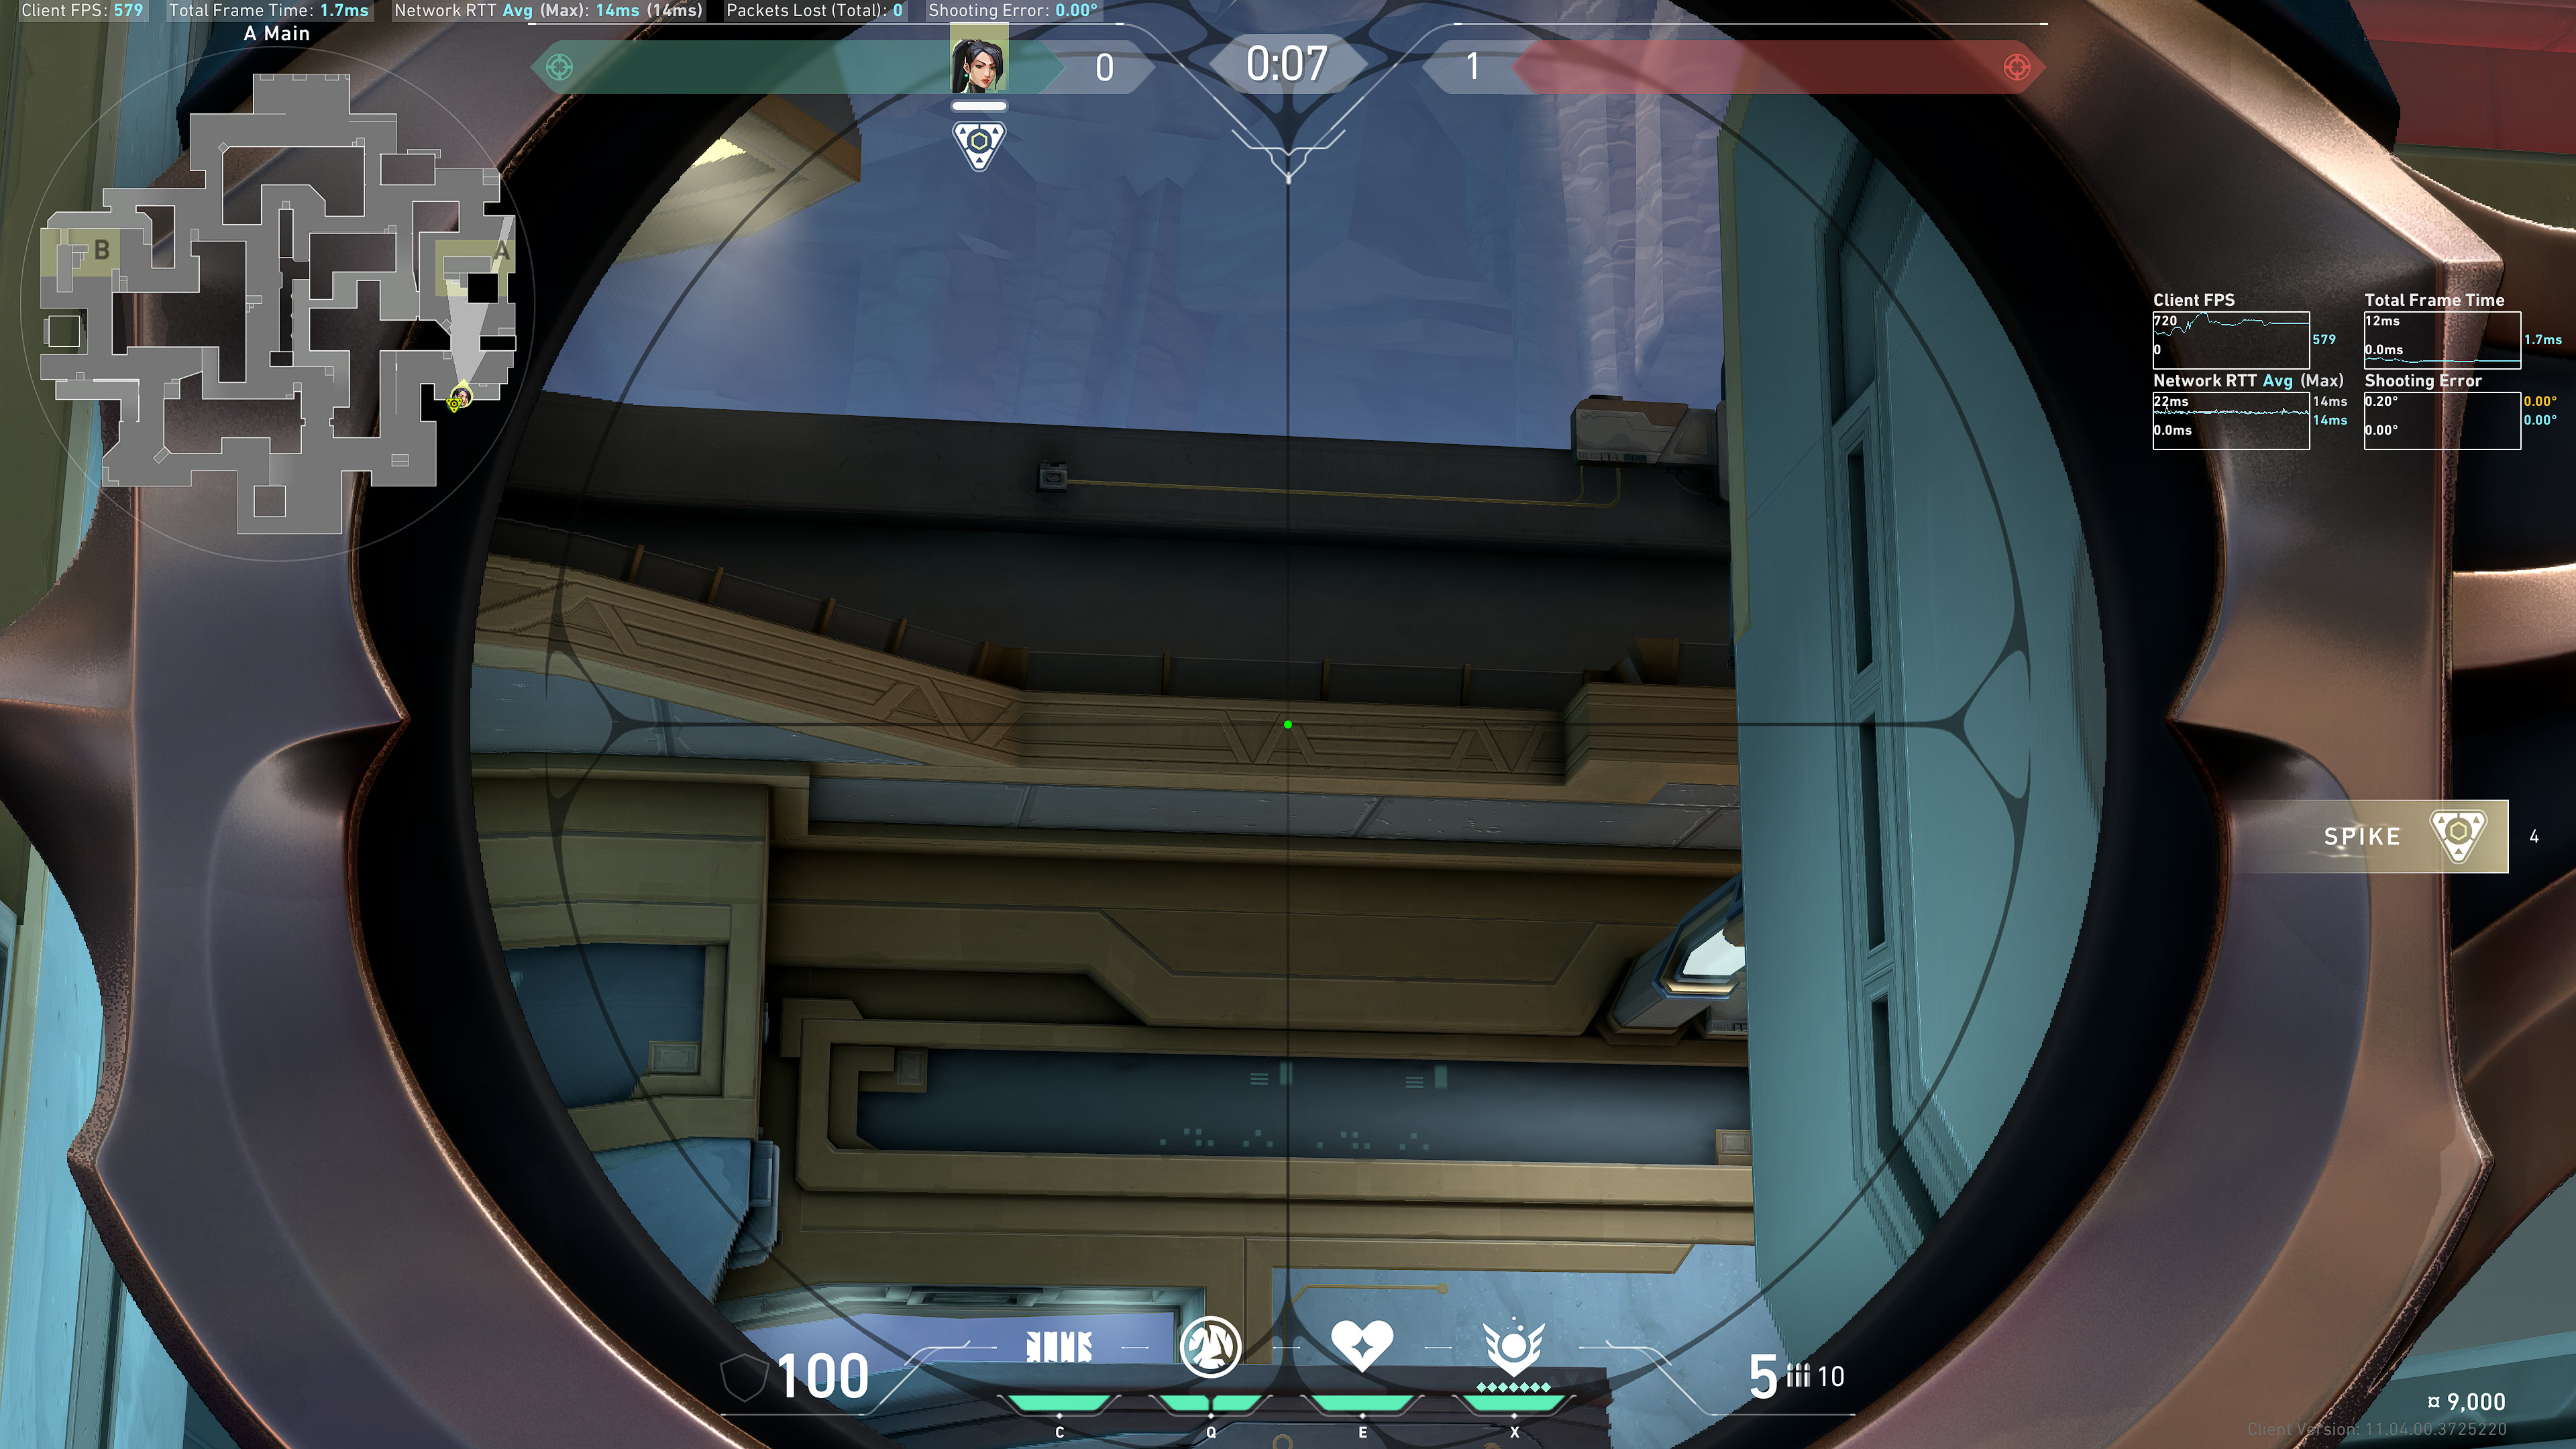
Aim at the tip of the triangle that points upward:
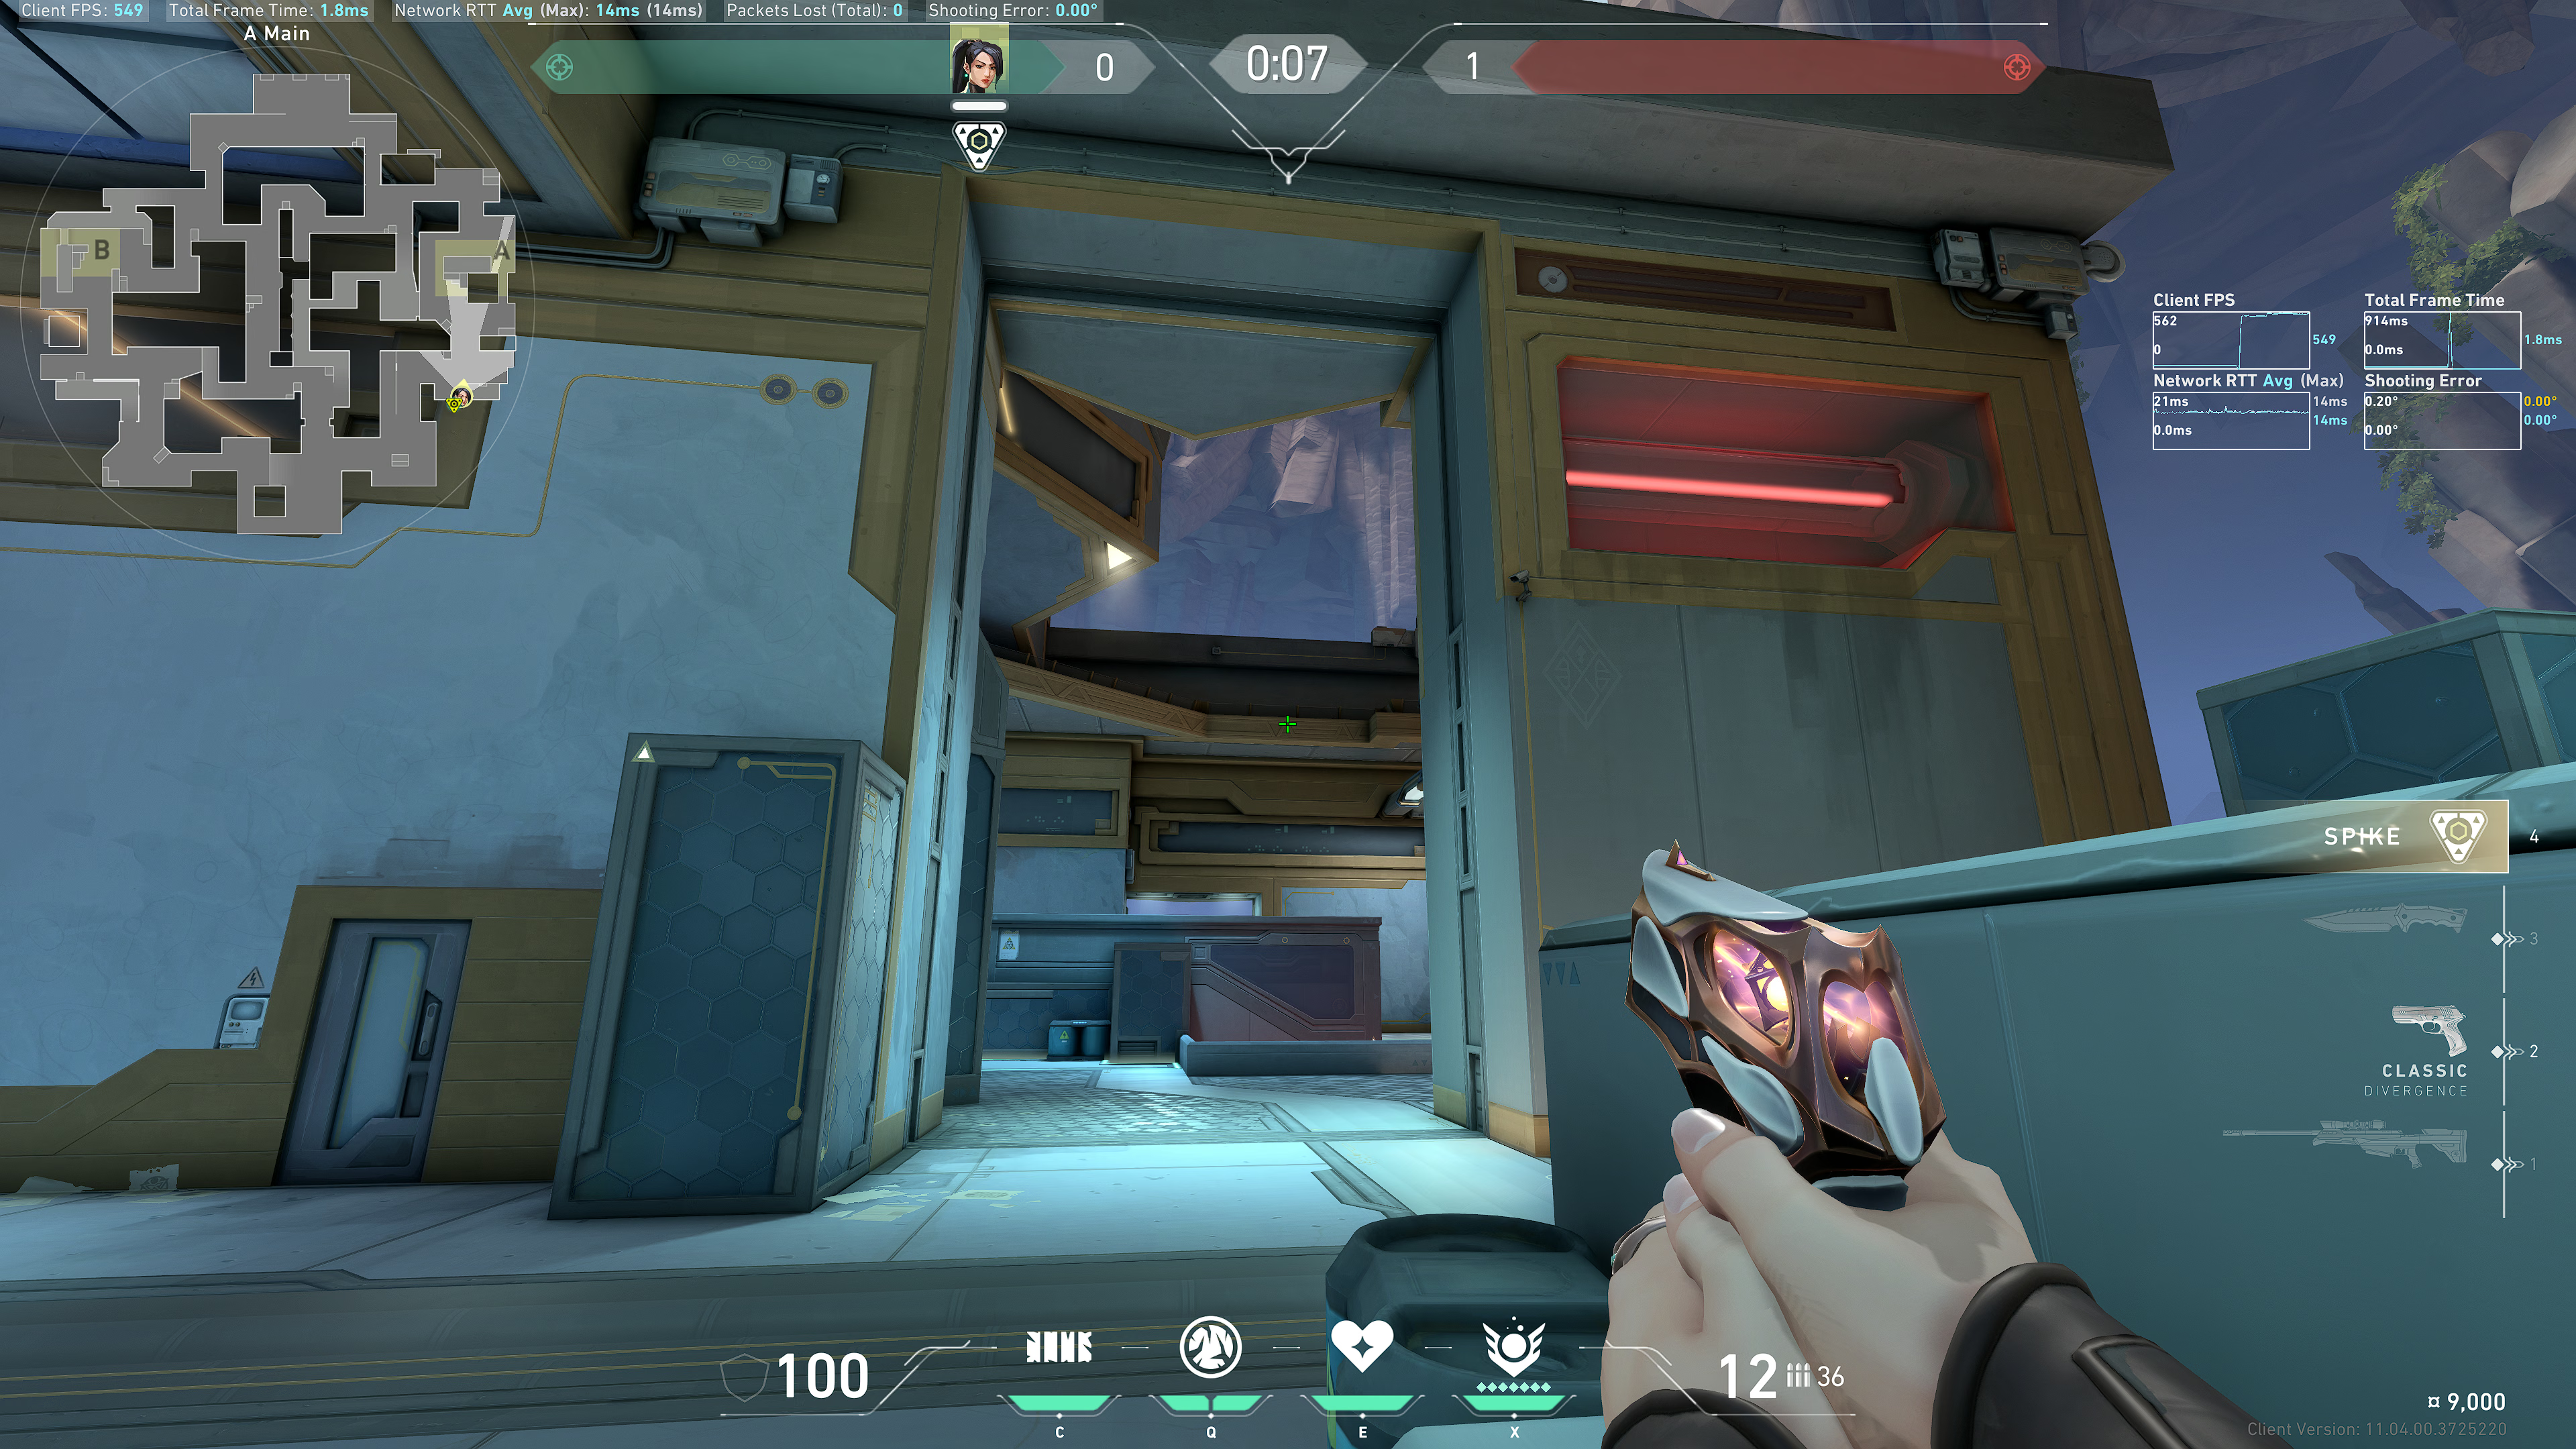
Result:
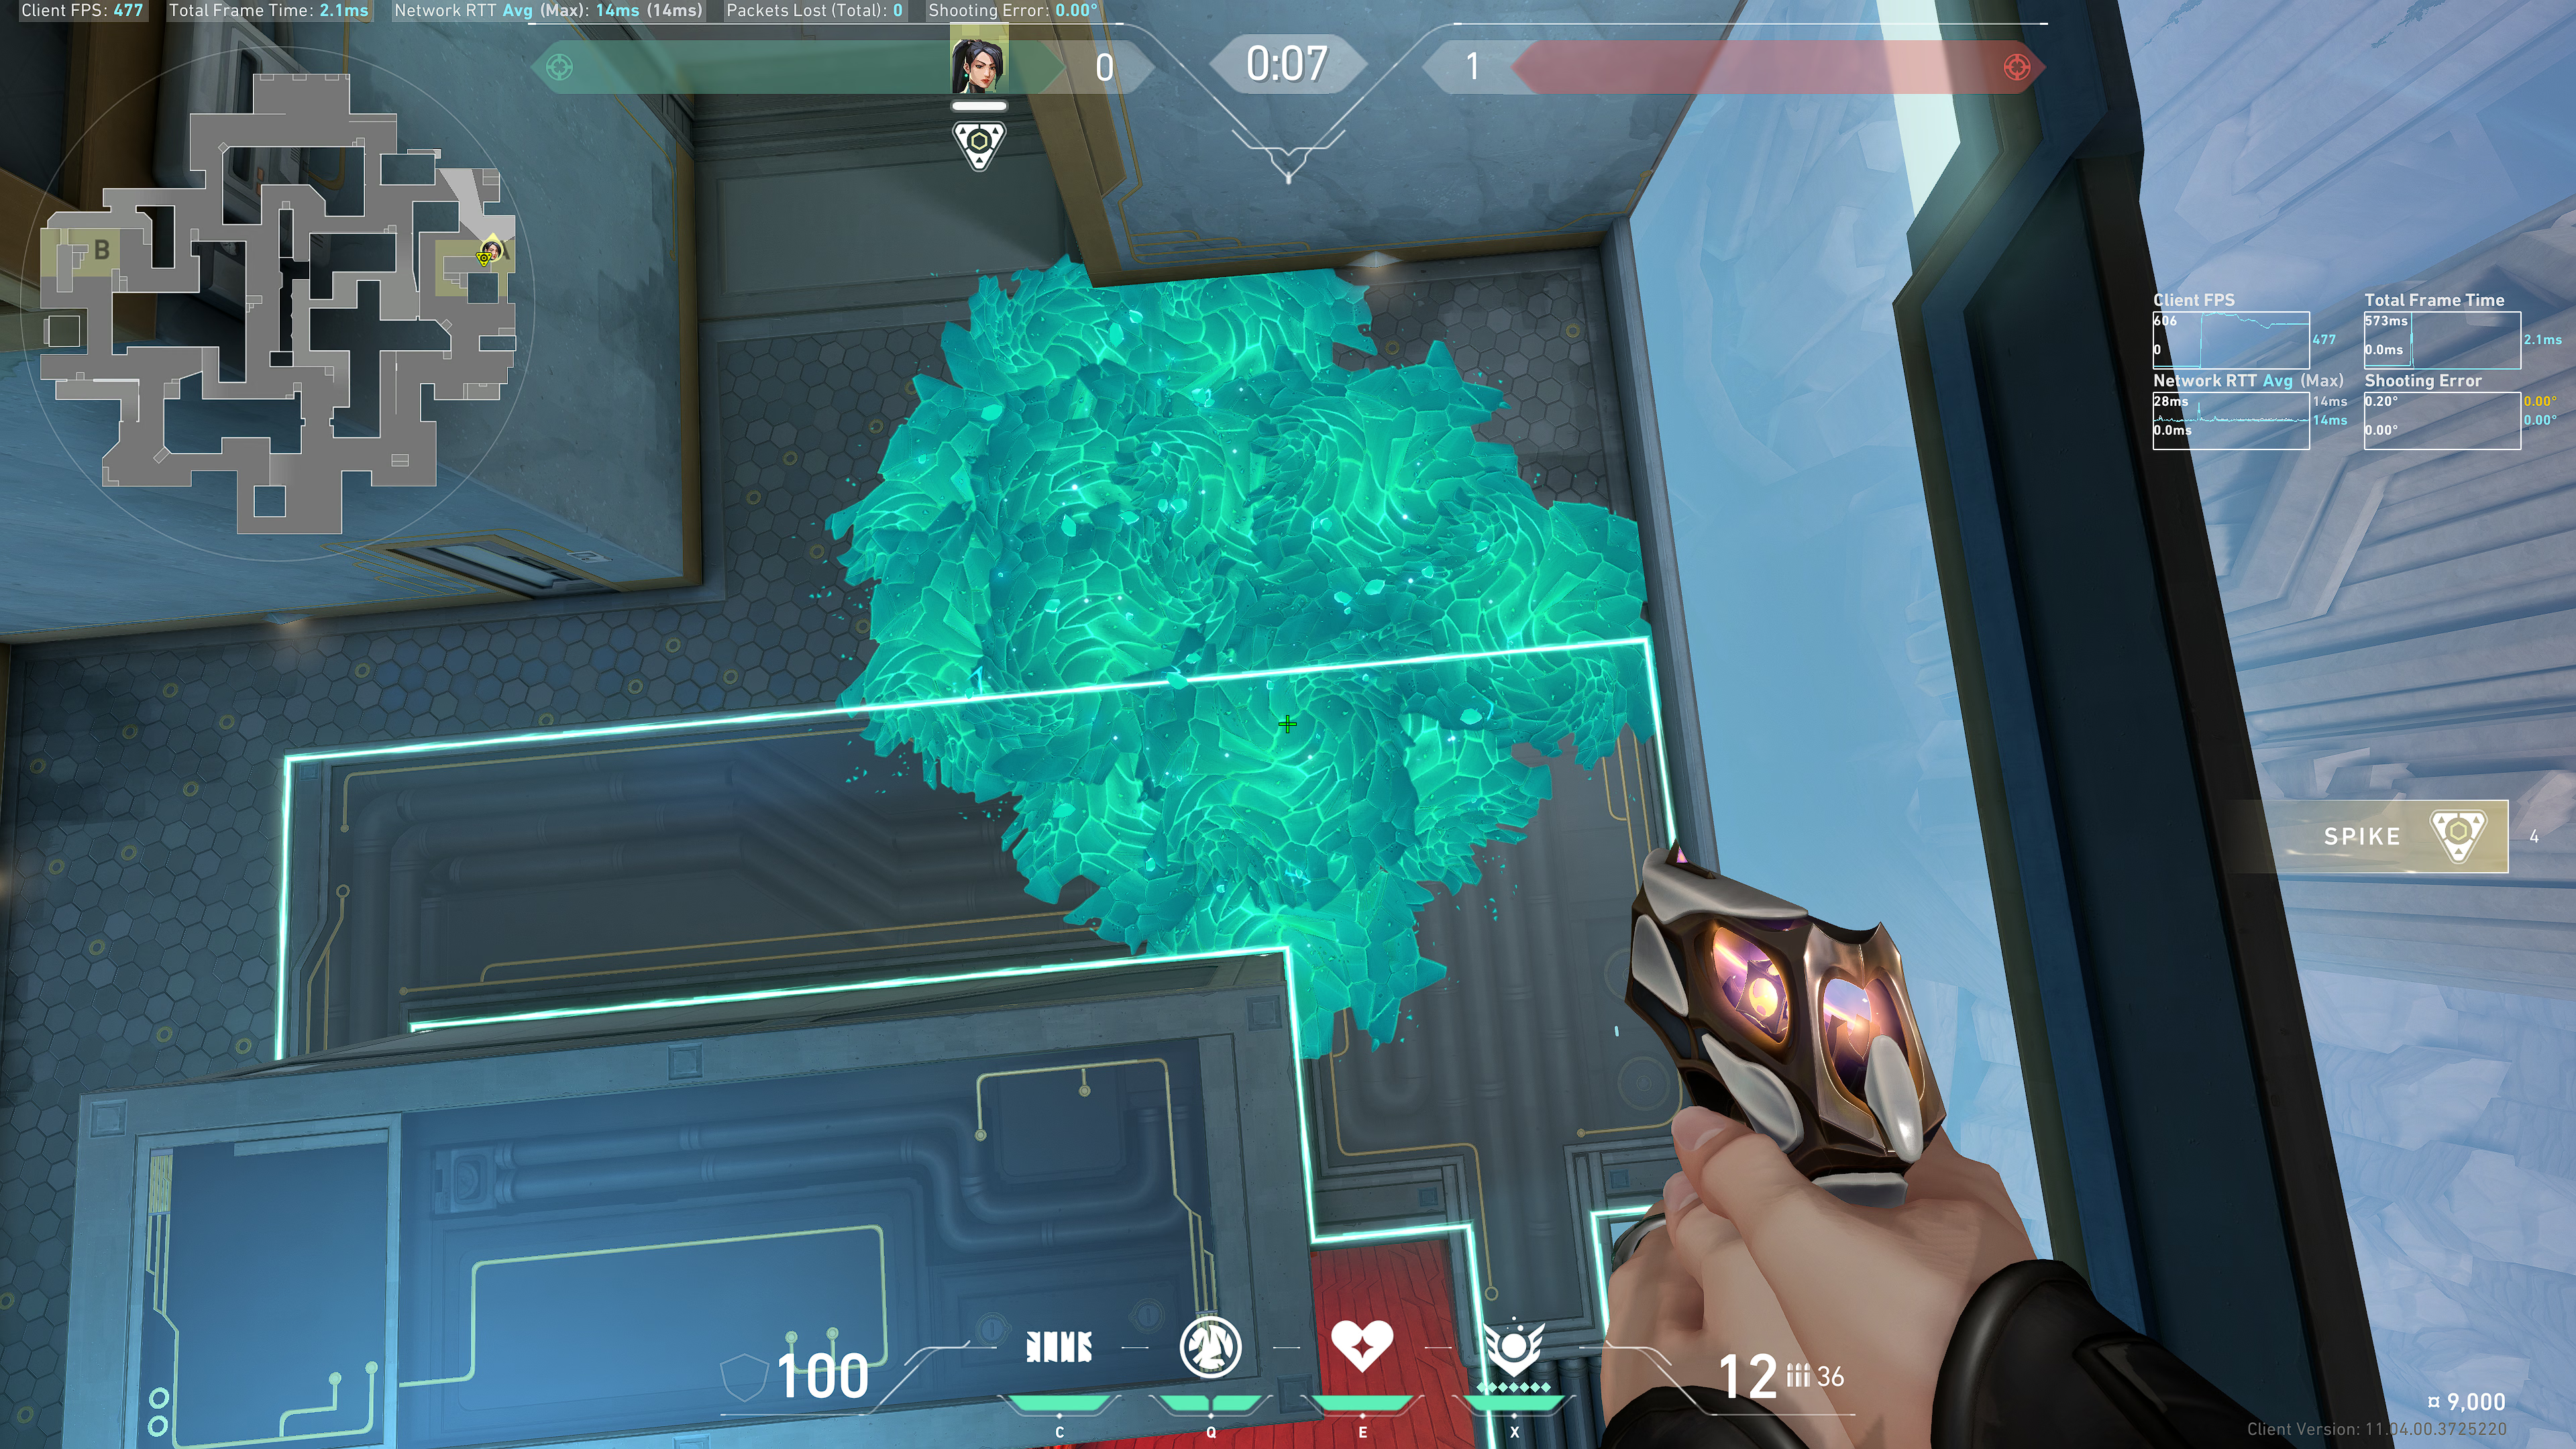
Back site (combined)
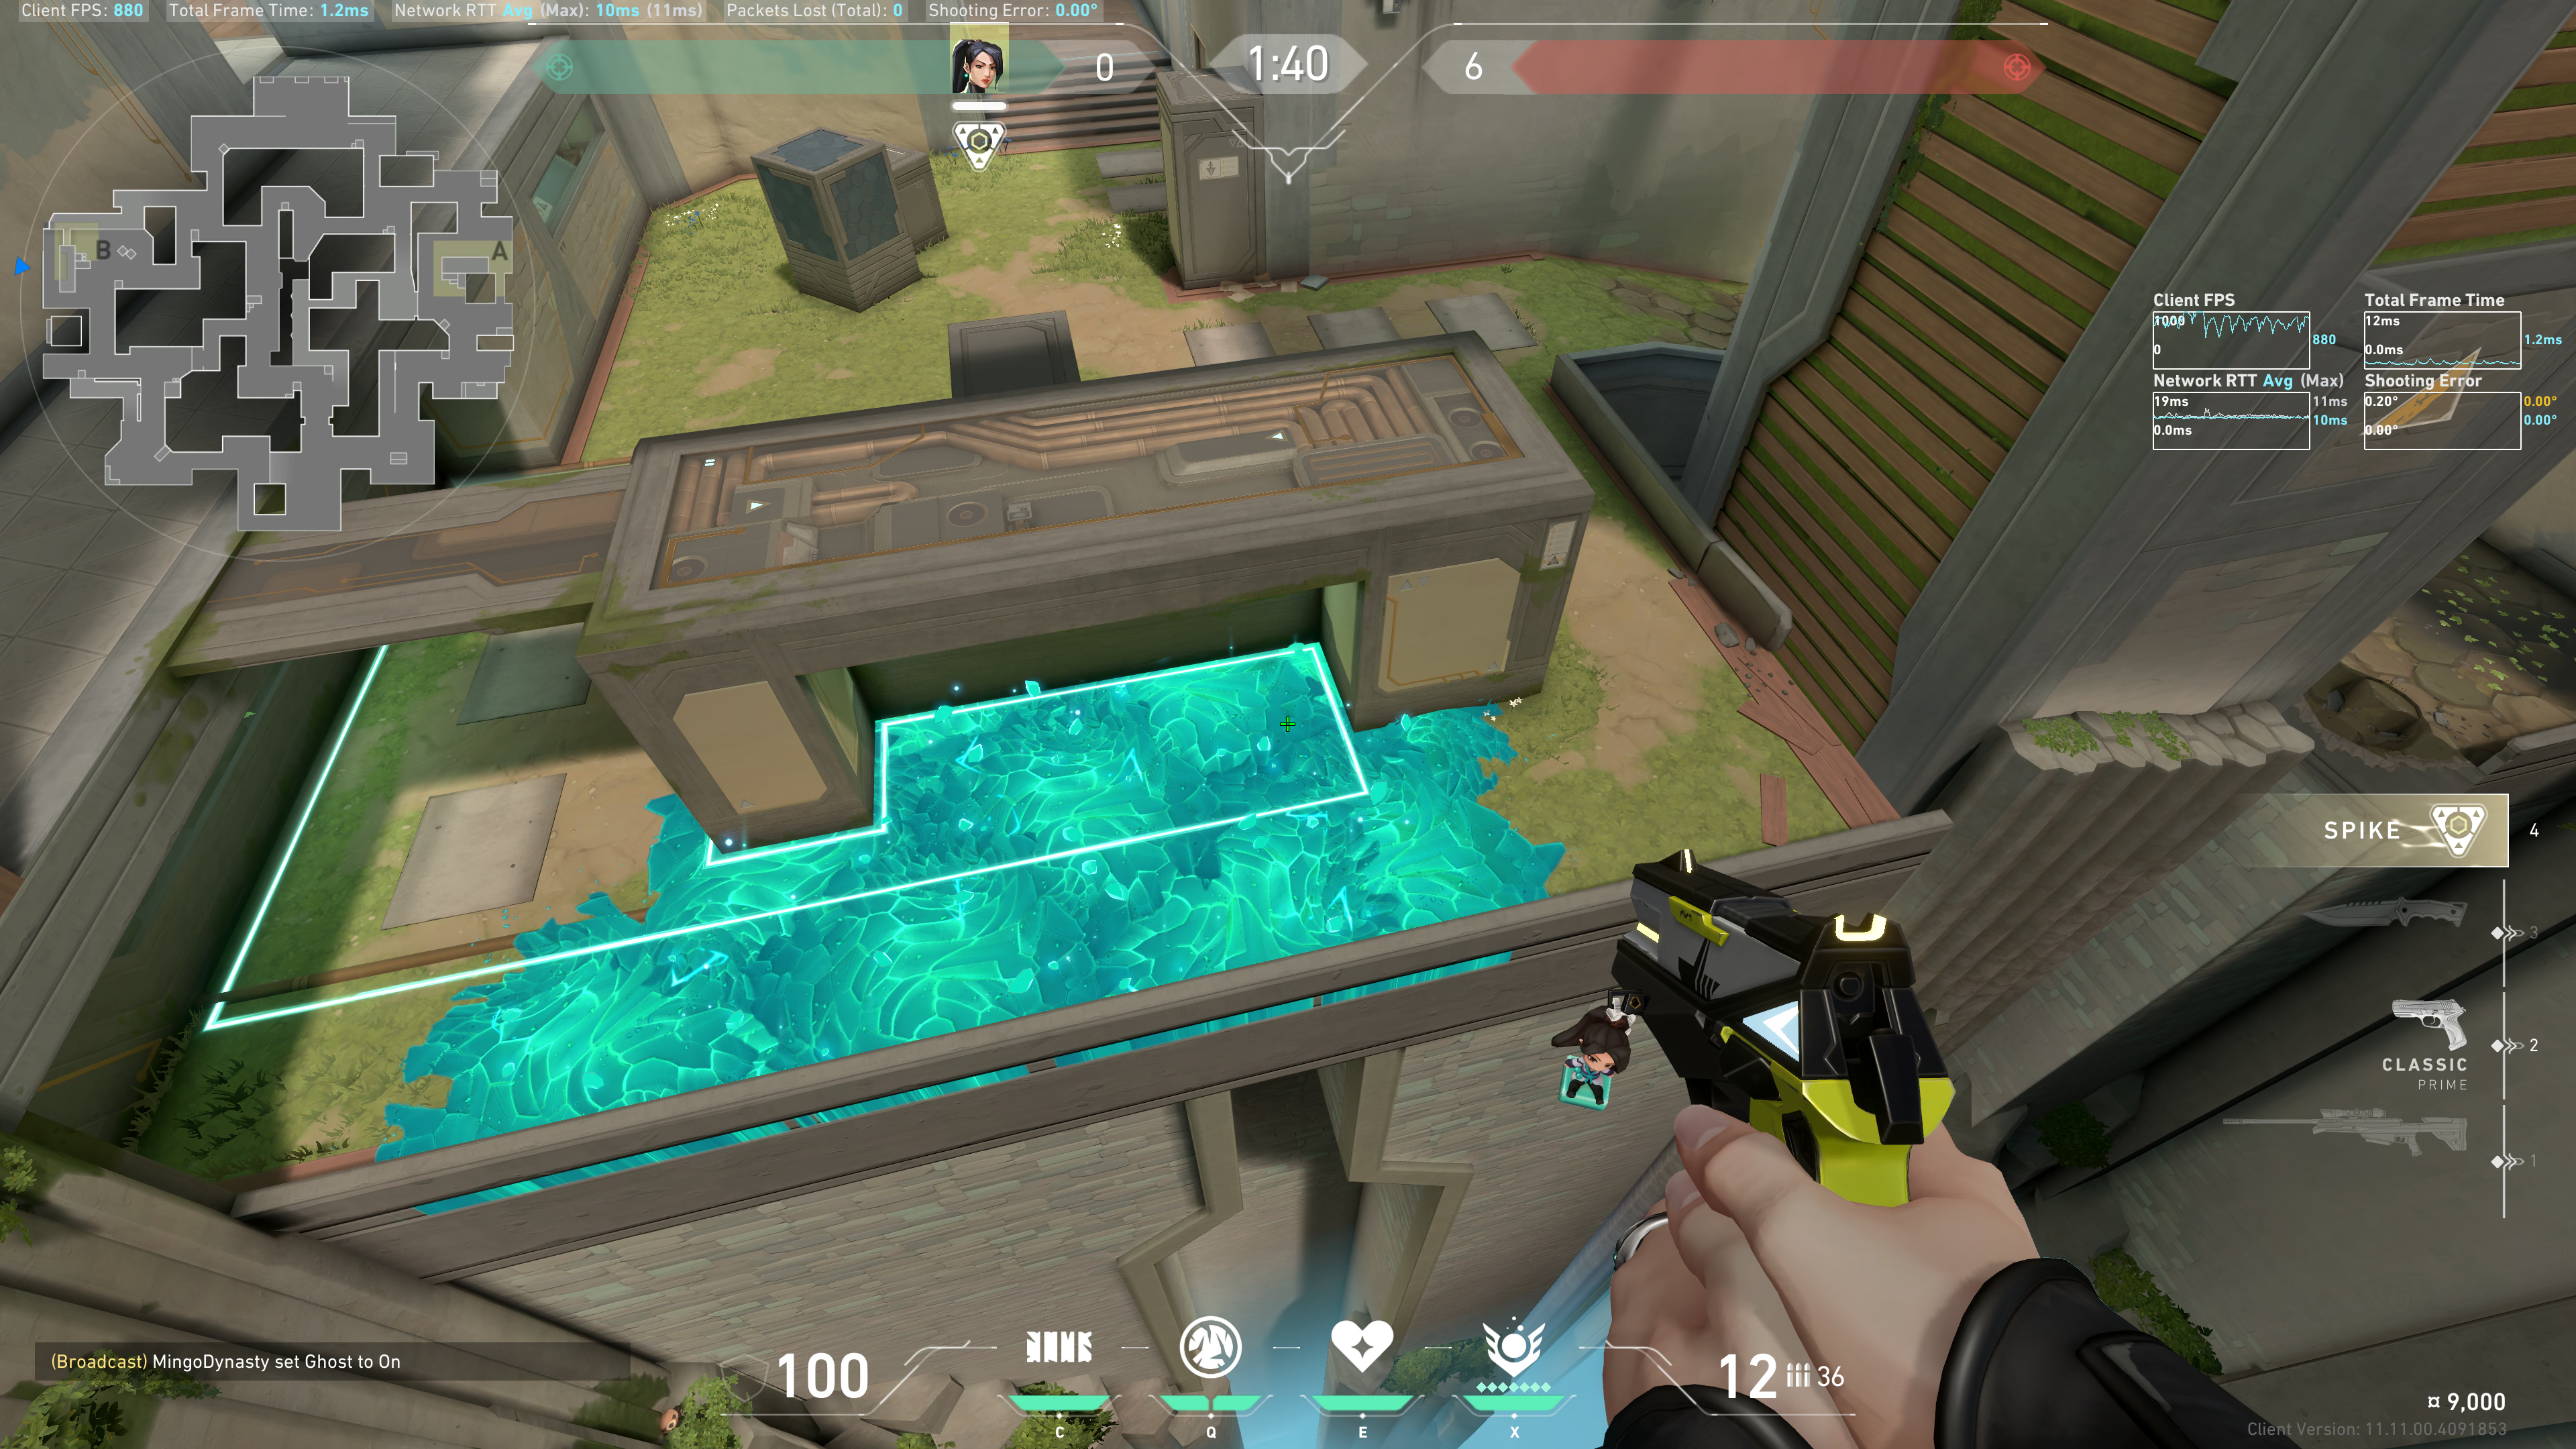
Results:
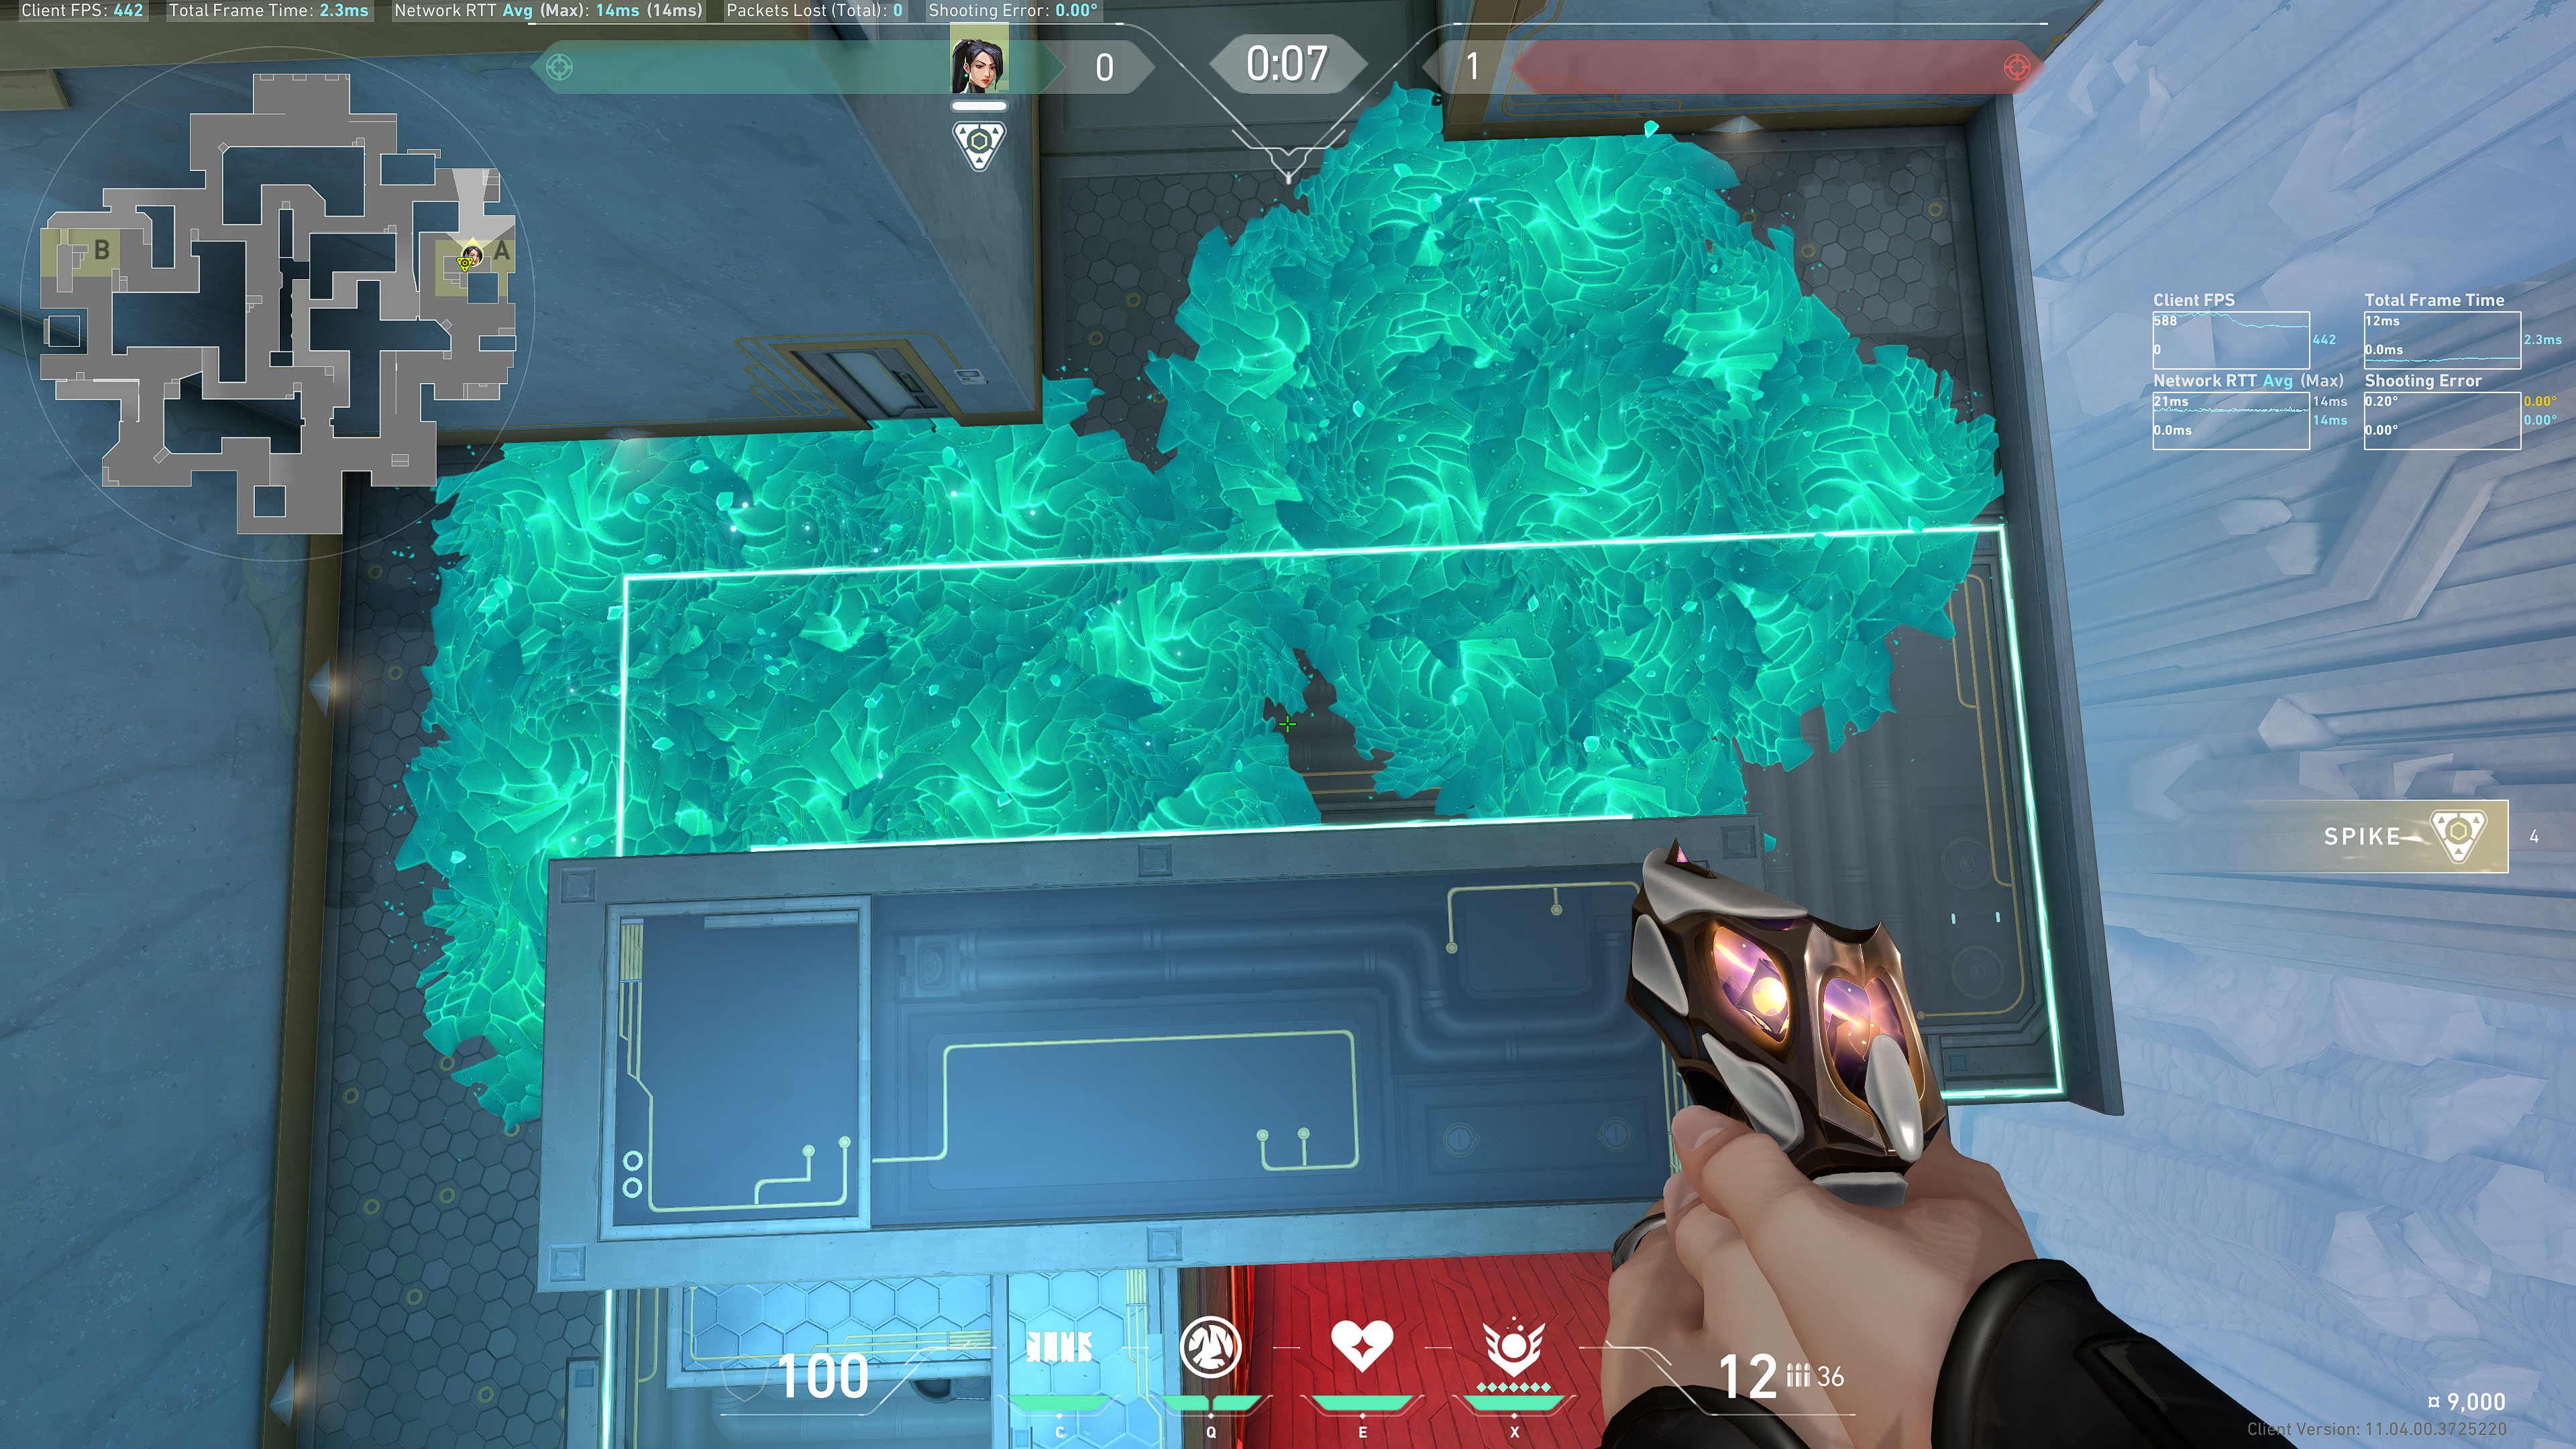
Note: if the choke is smoked off, then standing on the A Main platform (level 1 or 2) will produce relatively similar results.
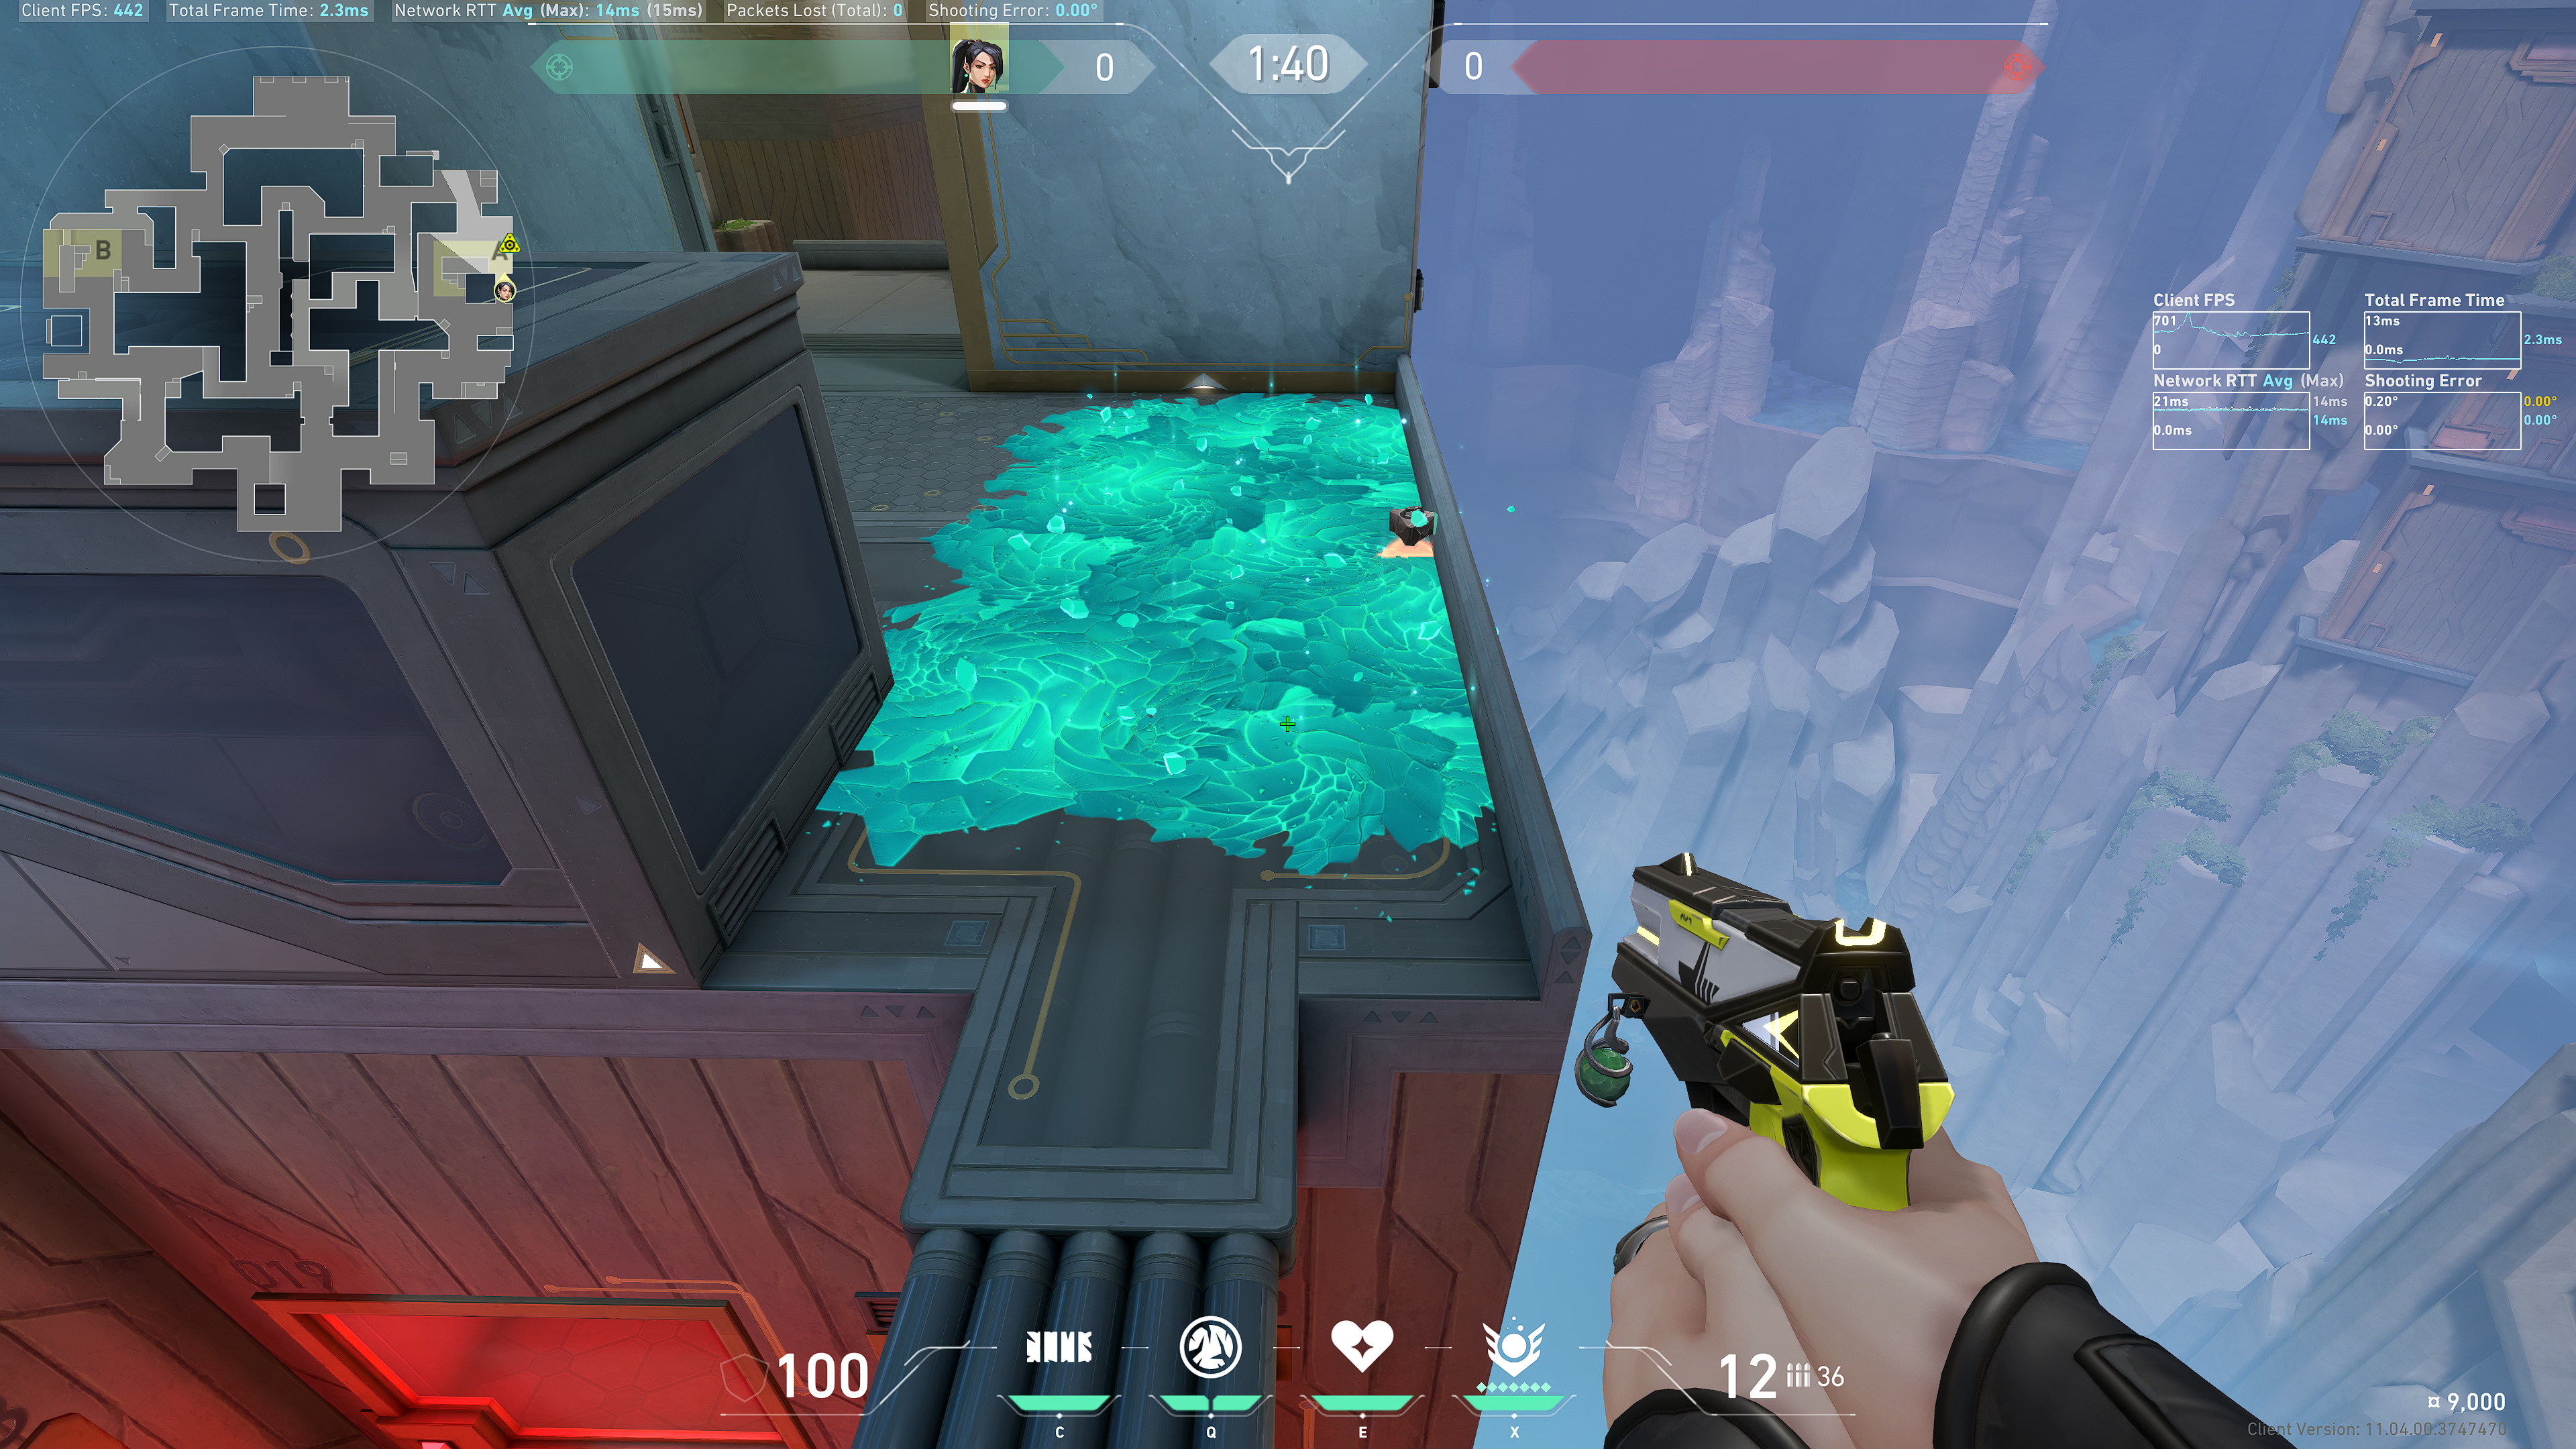
Position 2 (round start)
Tuck in between these two boxes:
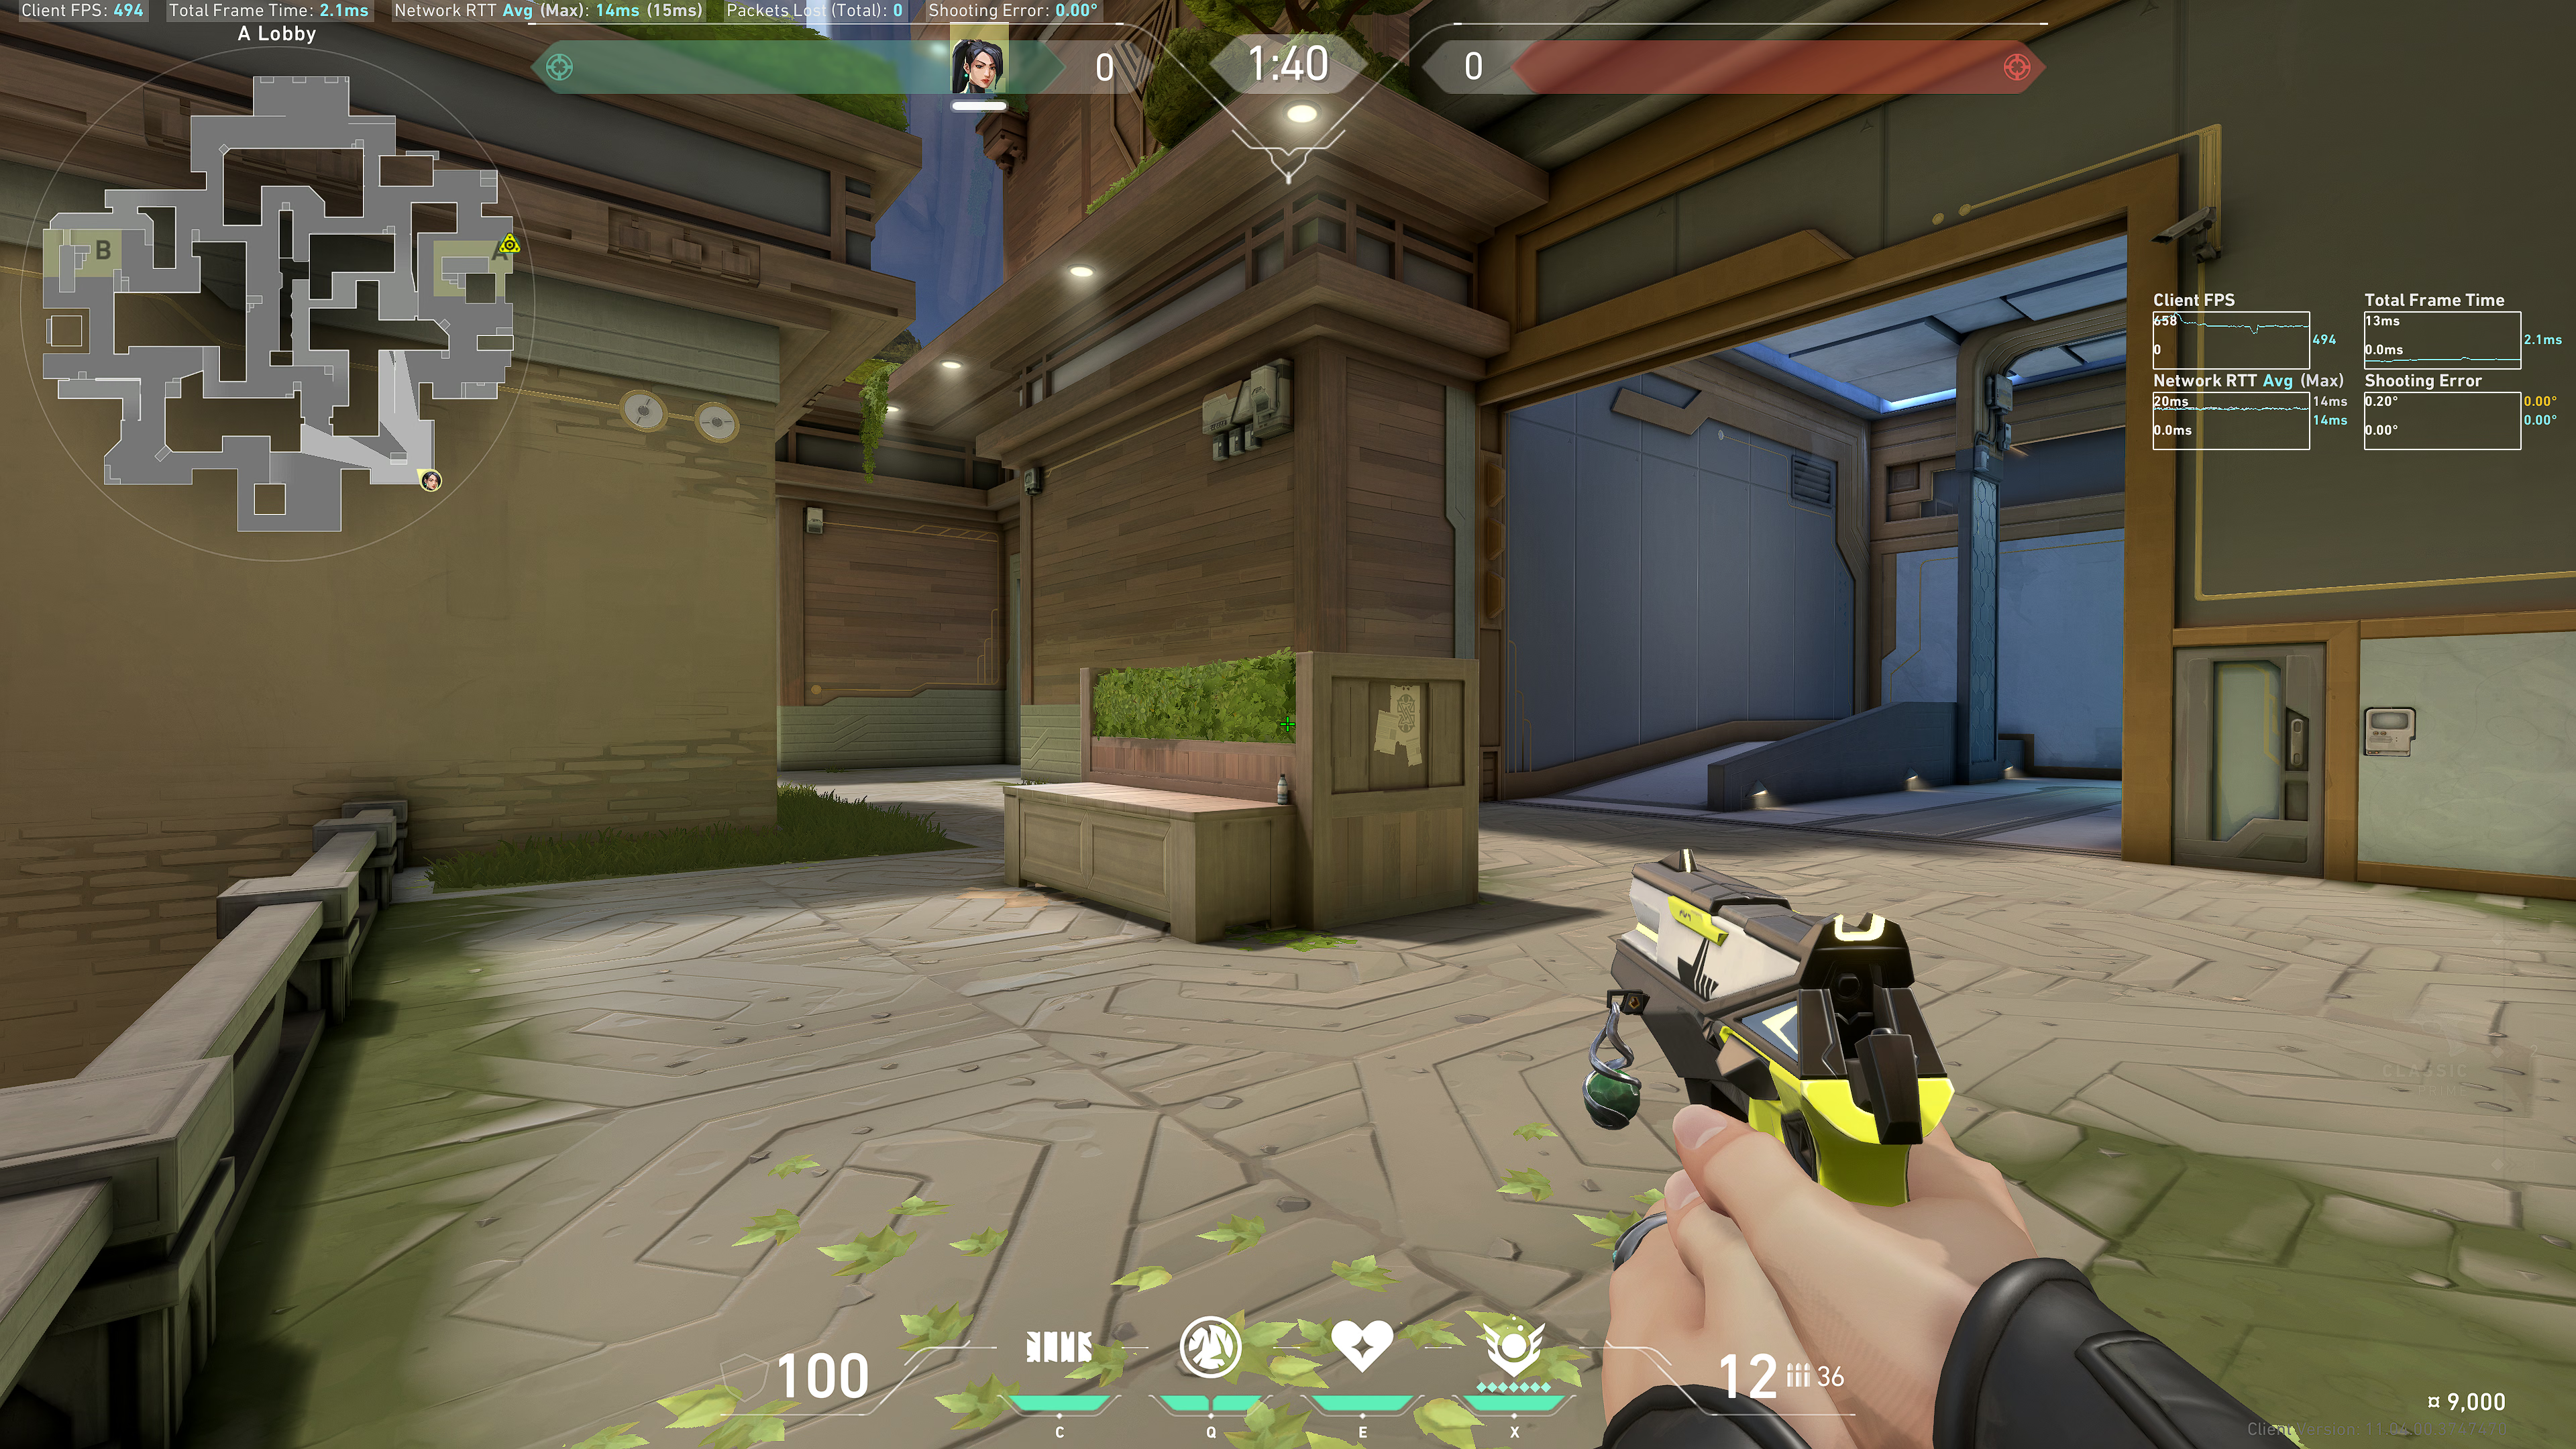
Back site (right side)
Take note of this camera:
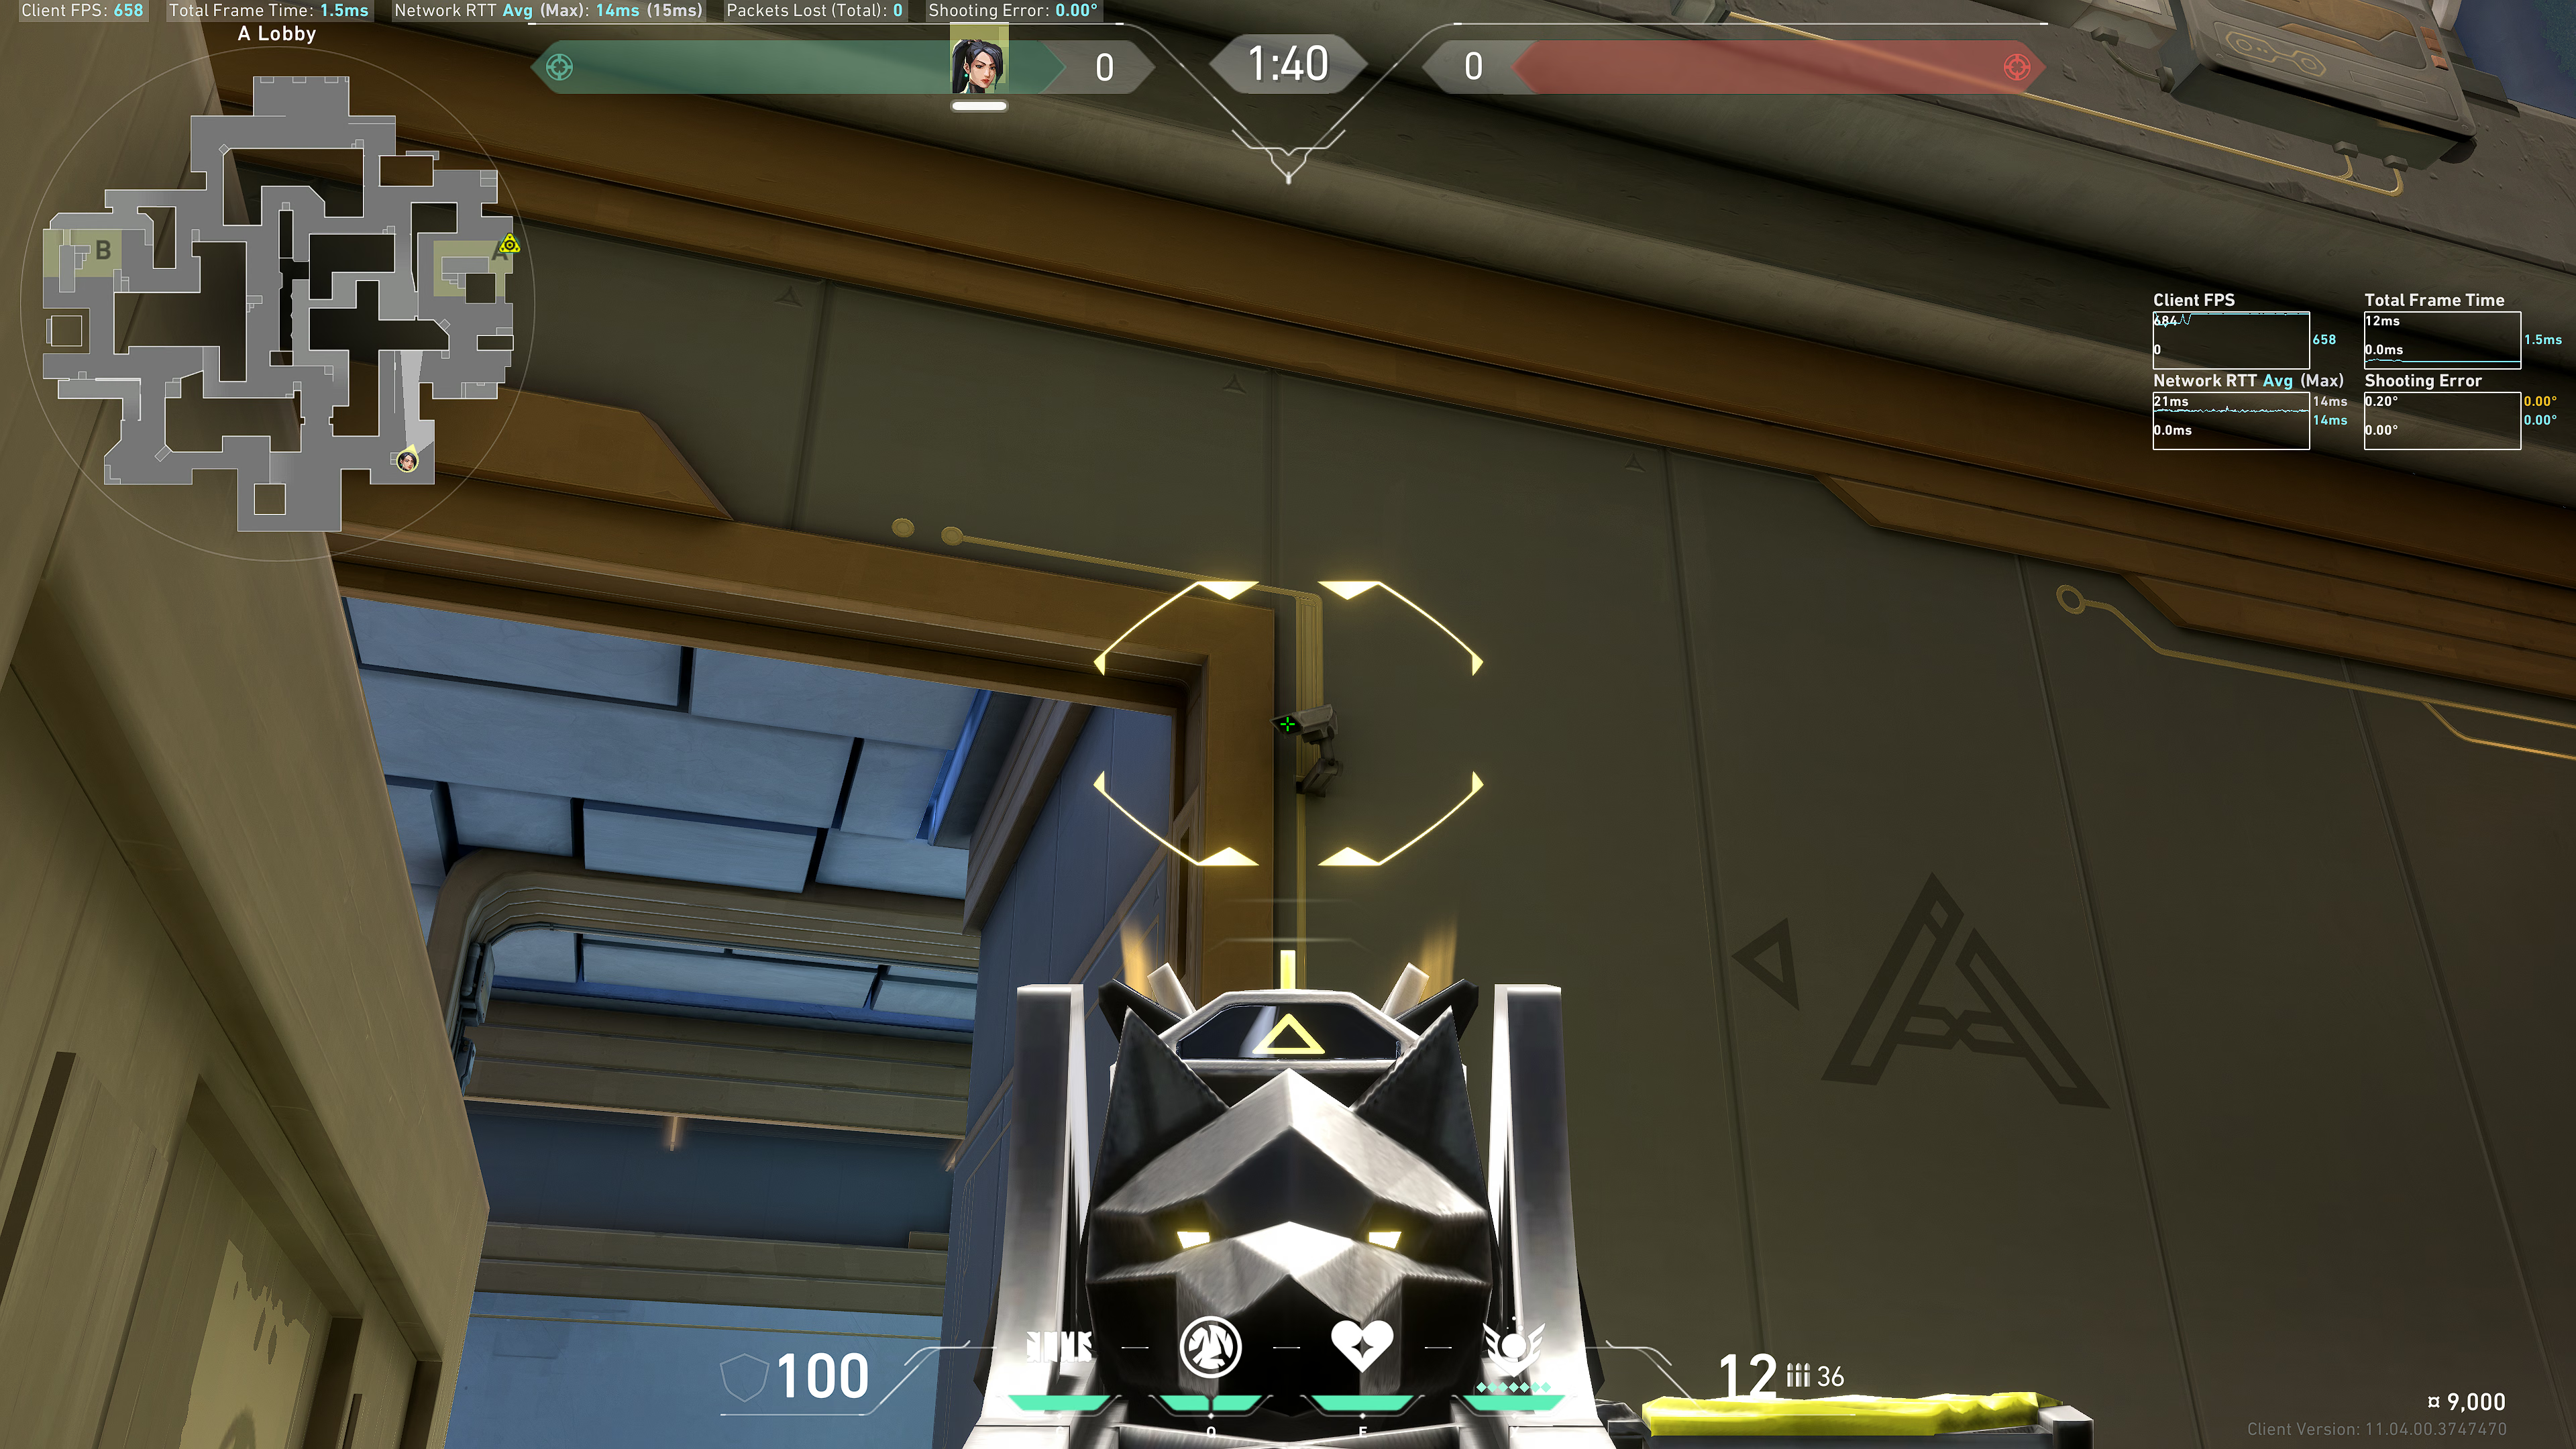
The separator bar between the Wall and Ice Orb symbols; place the right side of it slightly above the lens of that camera:
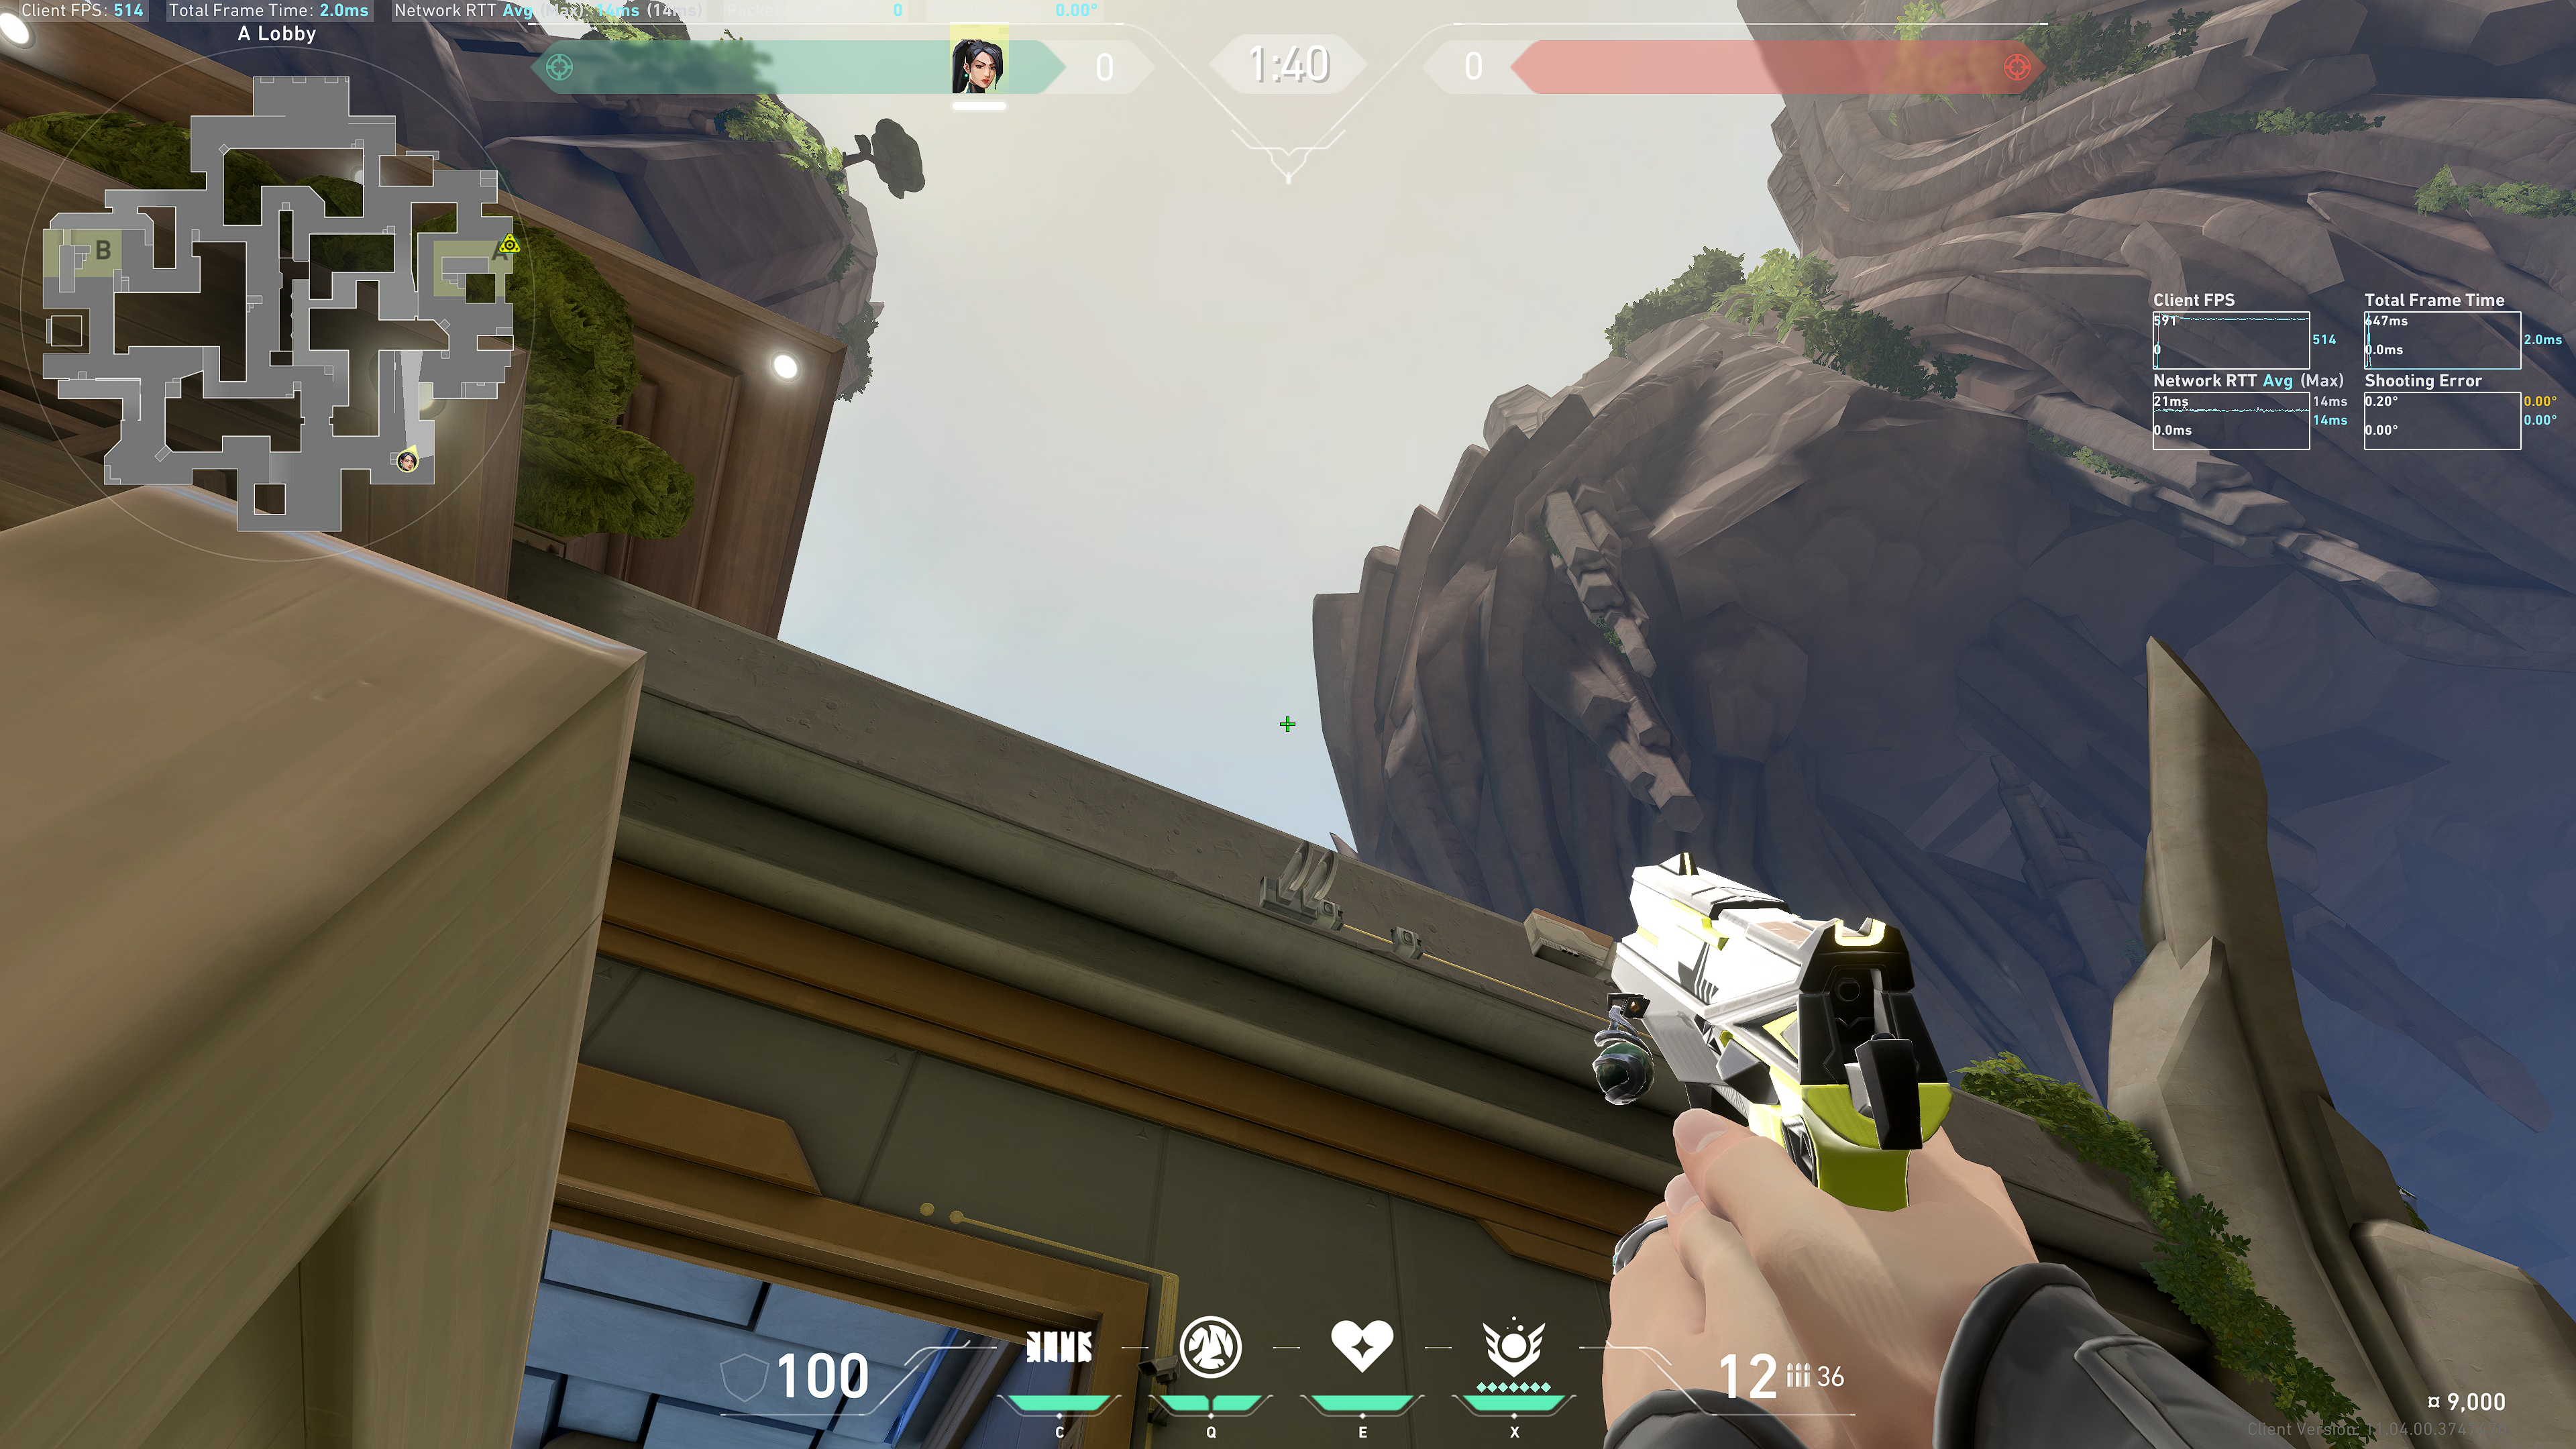
Result:
B Site
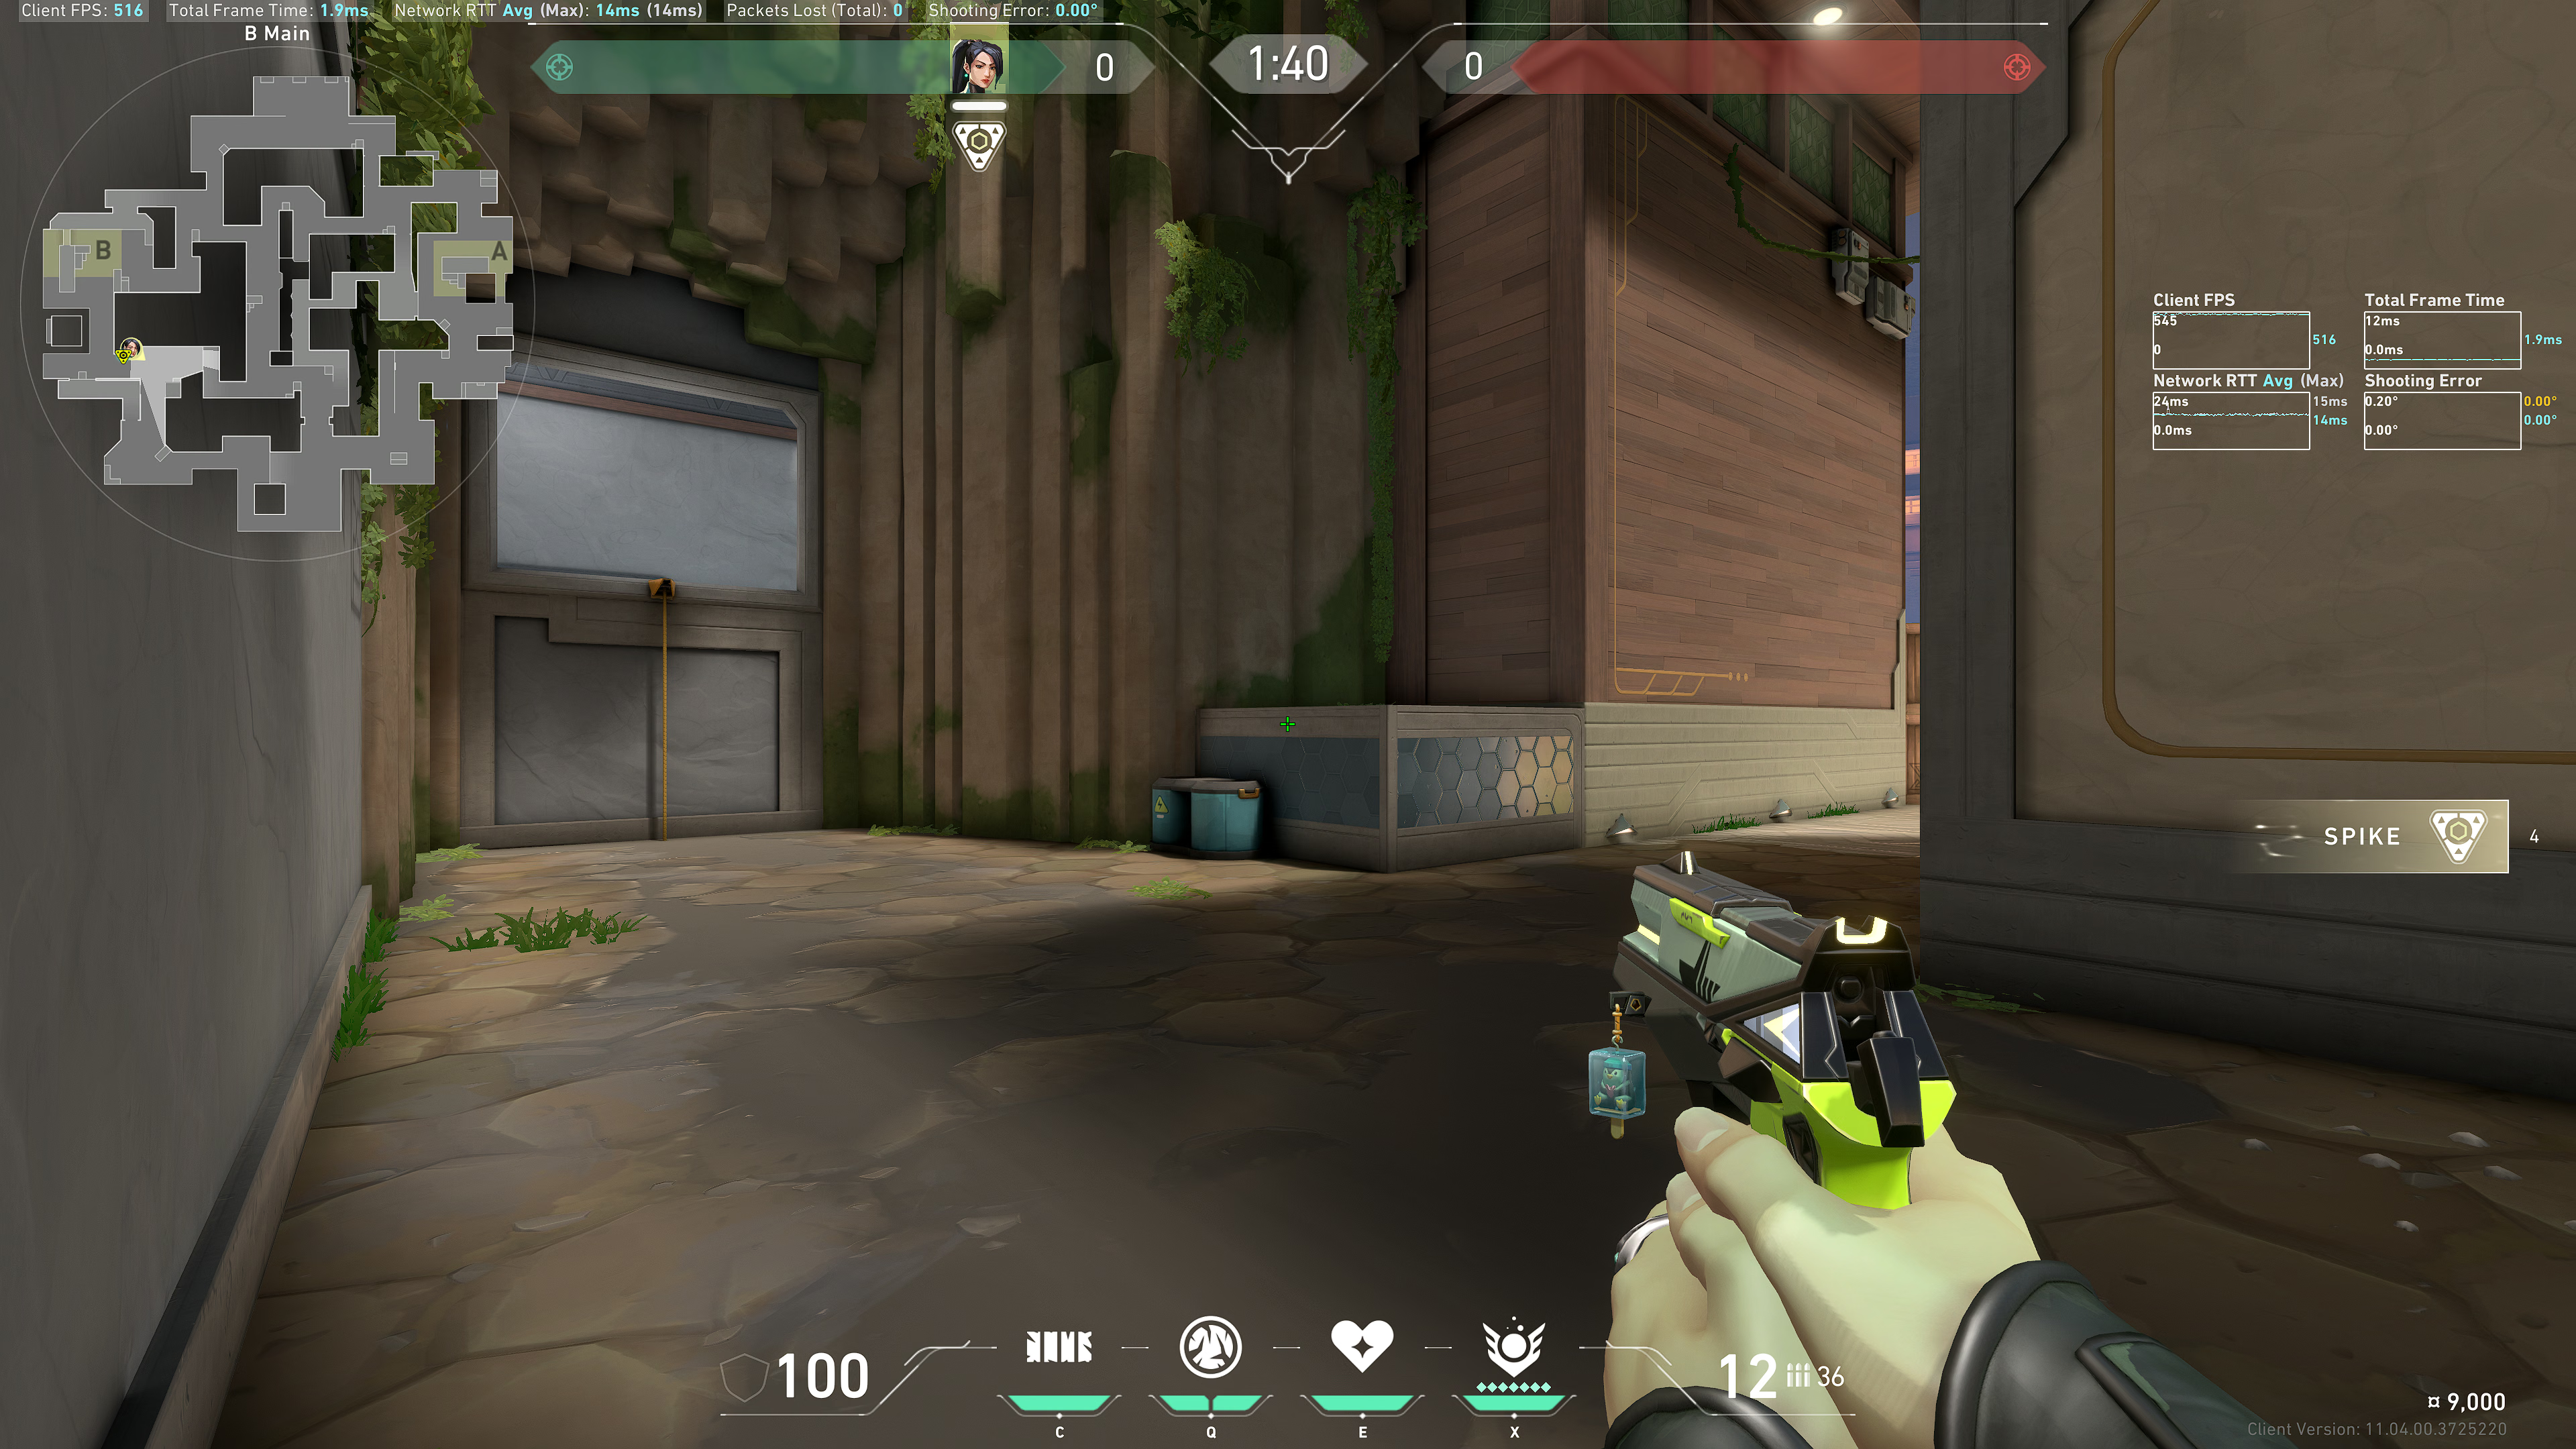
Position 1 (platform tuck)
Tradeoffs: this position is safer, but also slower. It also has more flexibility (more lineups available) and accuracy (tucked into a corner).
Tuck into this corner between the platform and small barrels:
Back Site
Note: often times your team wants to push left side. Communicate with your team before you use this so they know to play around it (e.g. dashing on top of site instead, or comboing with utility).
Note the corner of this wooden roof:
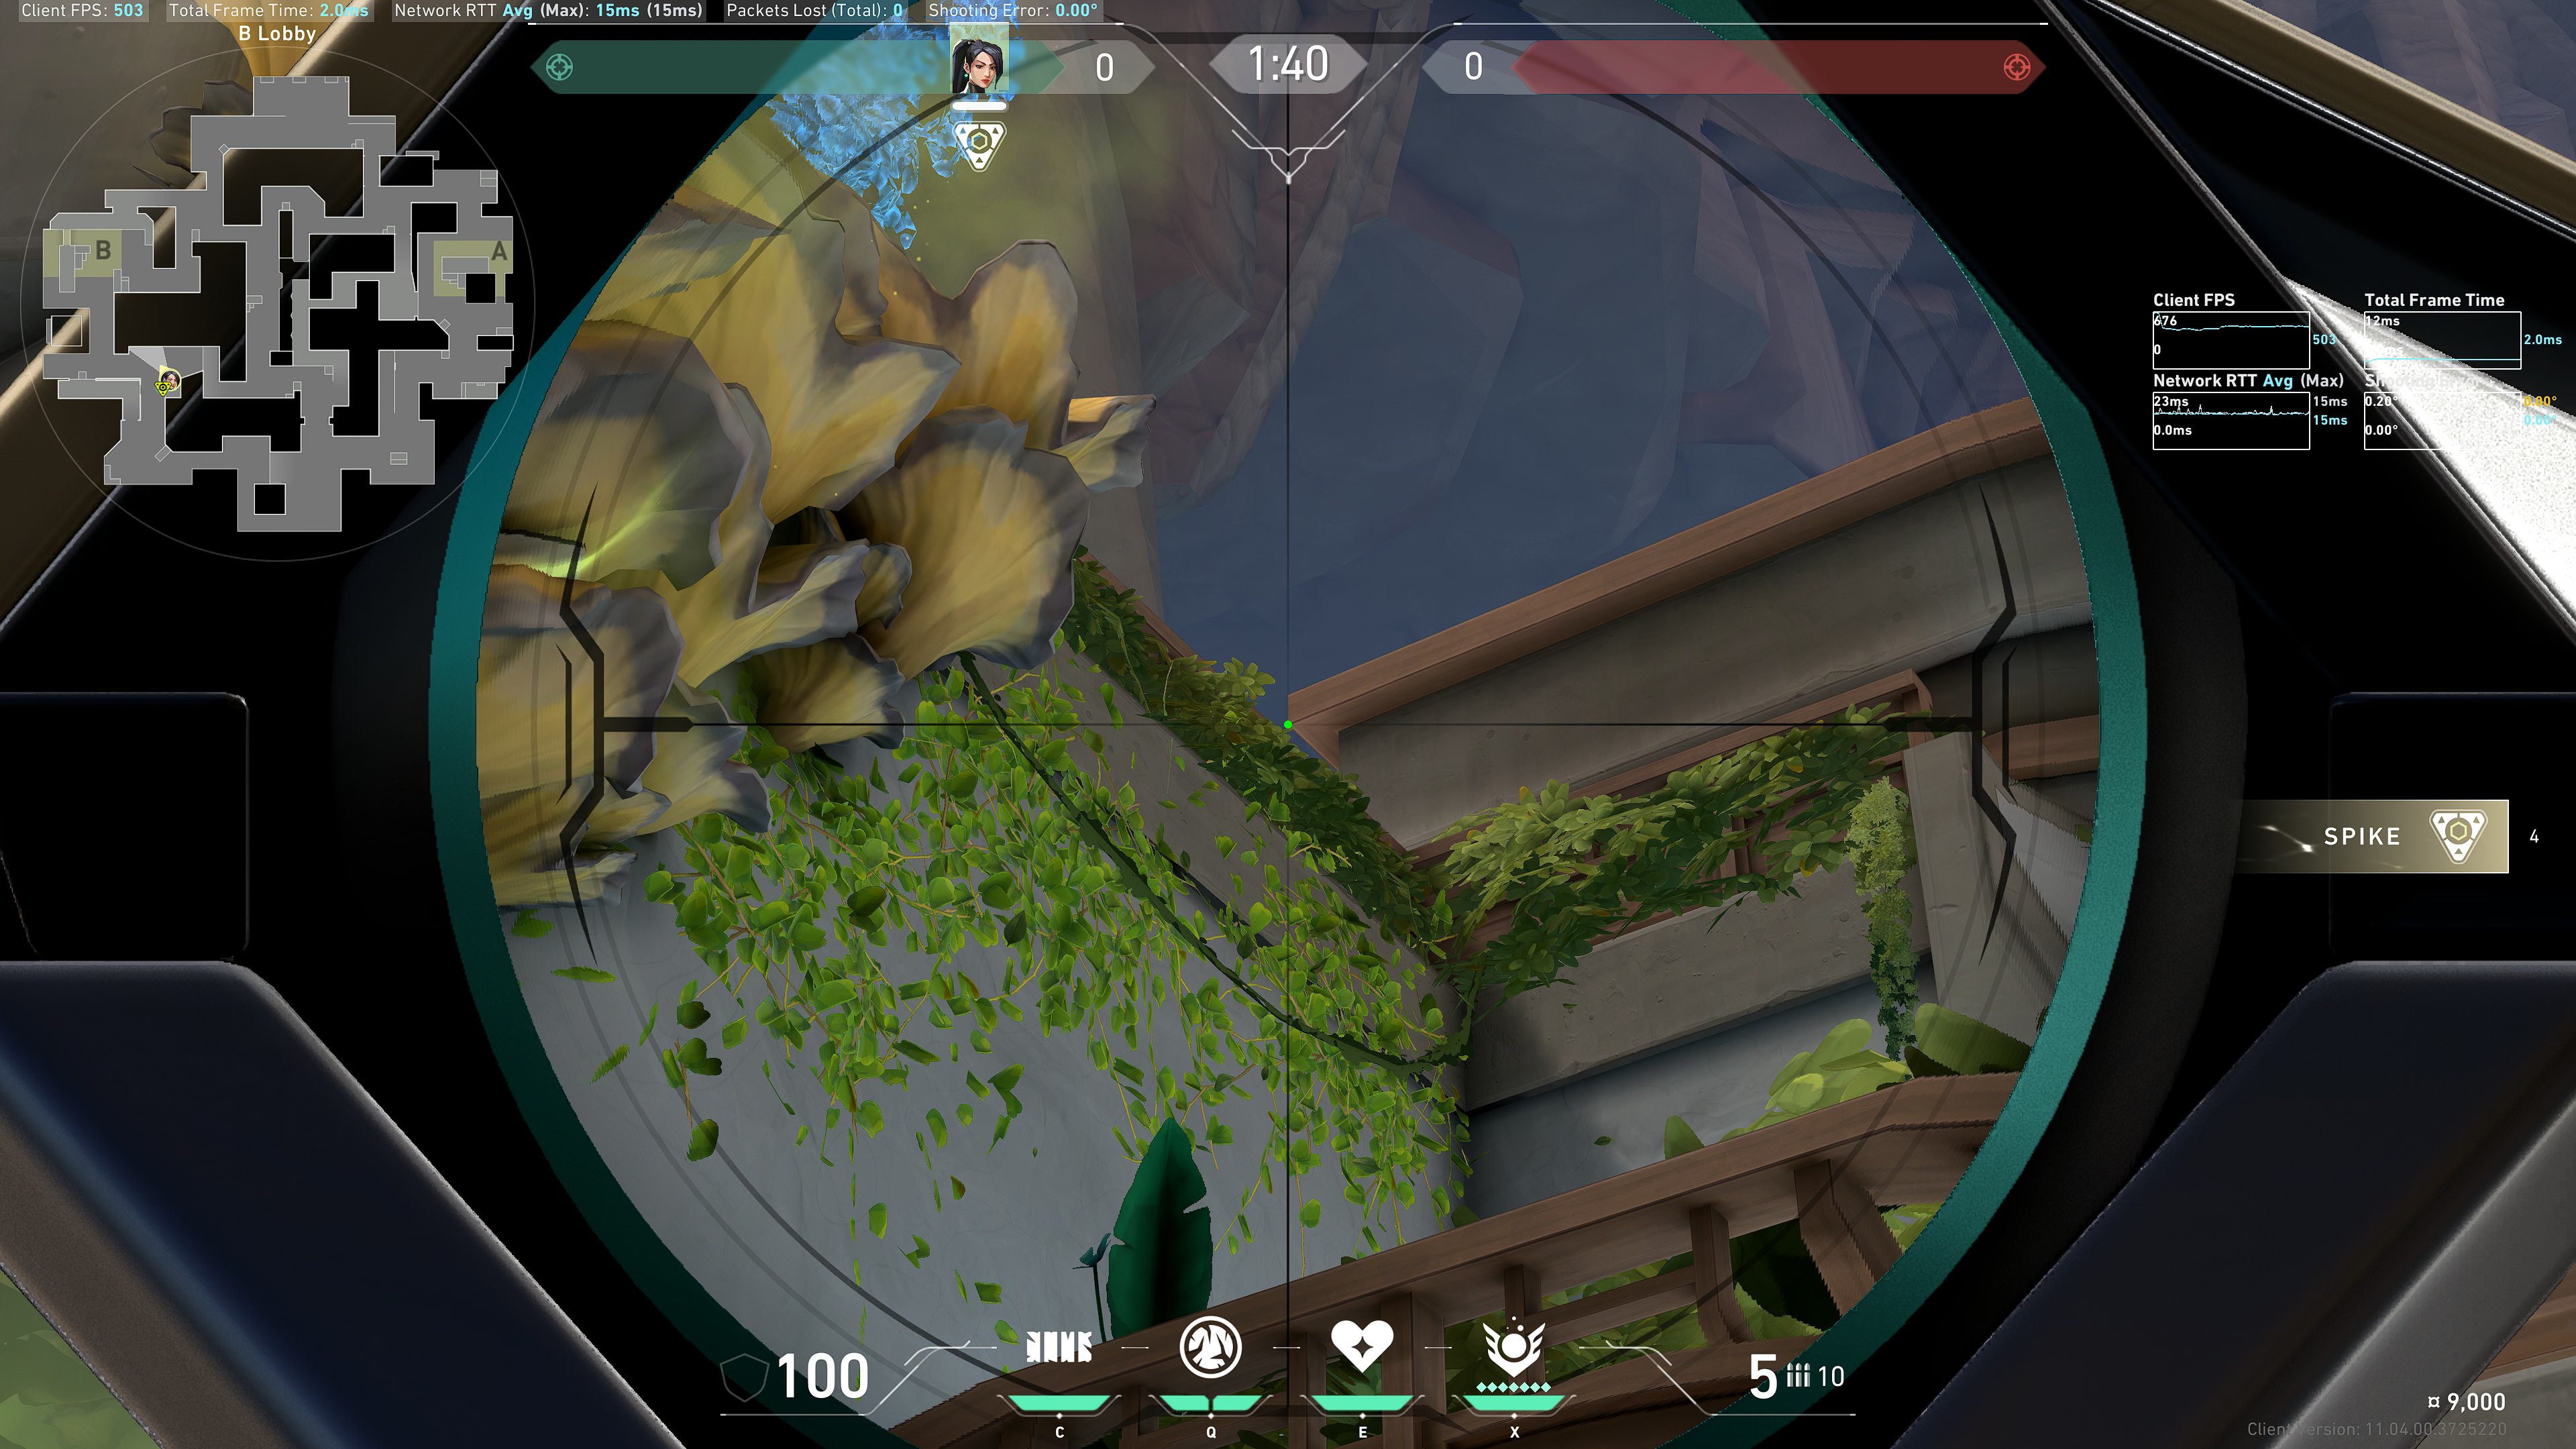
The separator bar between the Ice Orb and Heart symbols; line up the right side of it with the corner of the wooden roof:
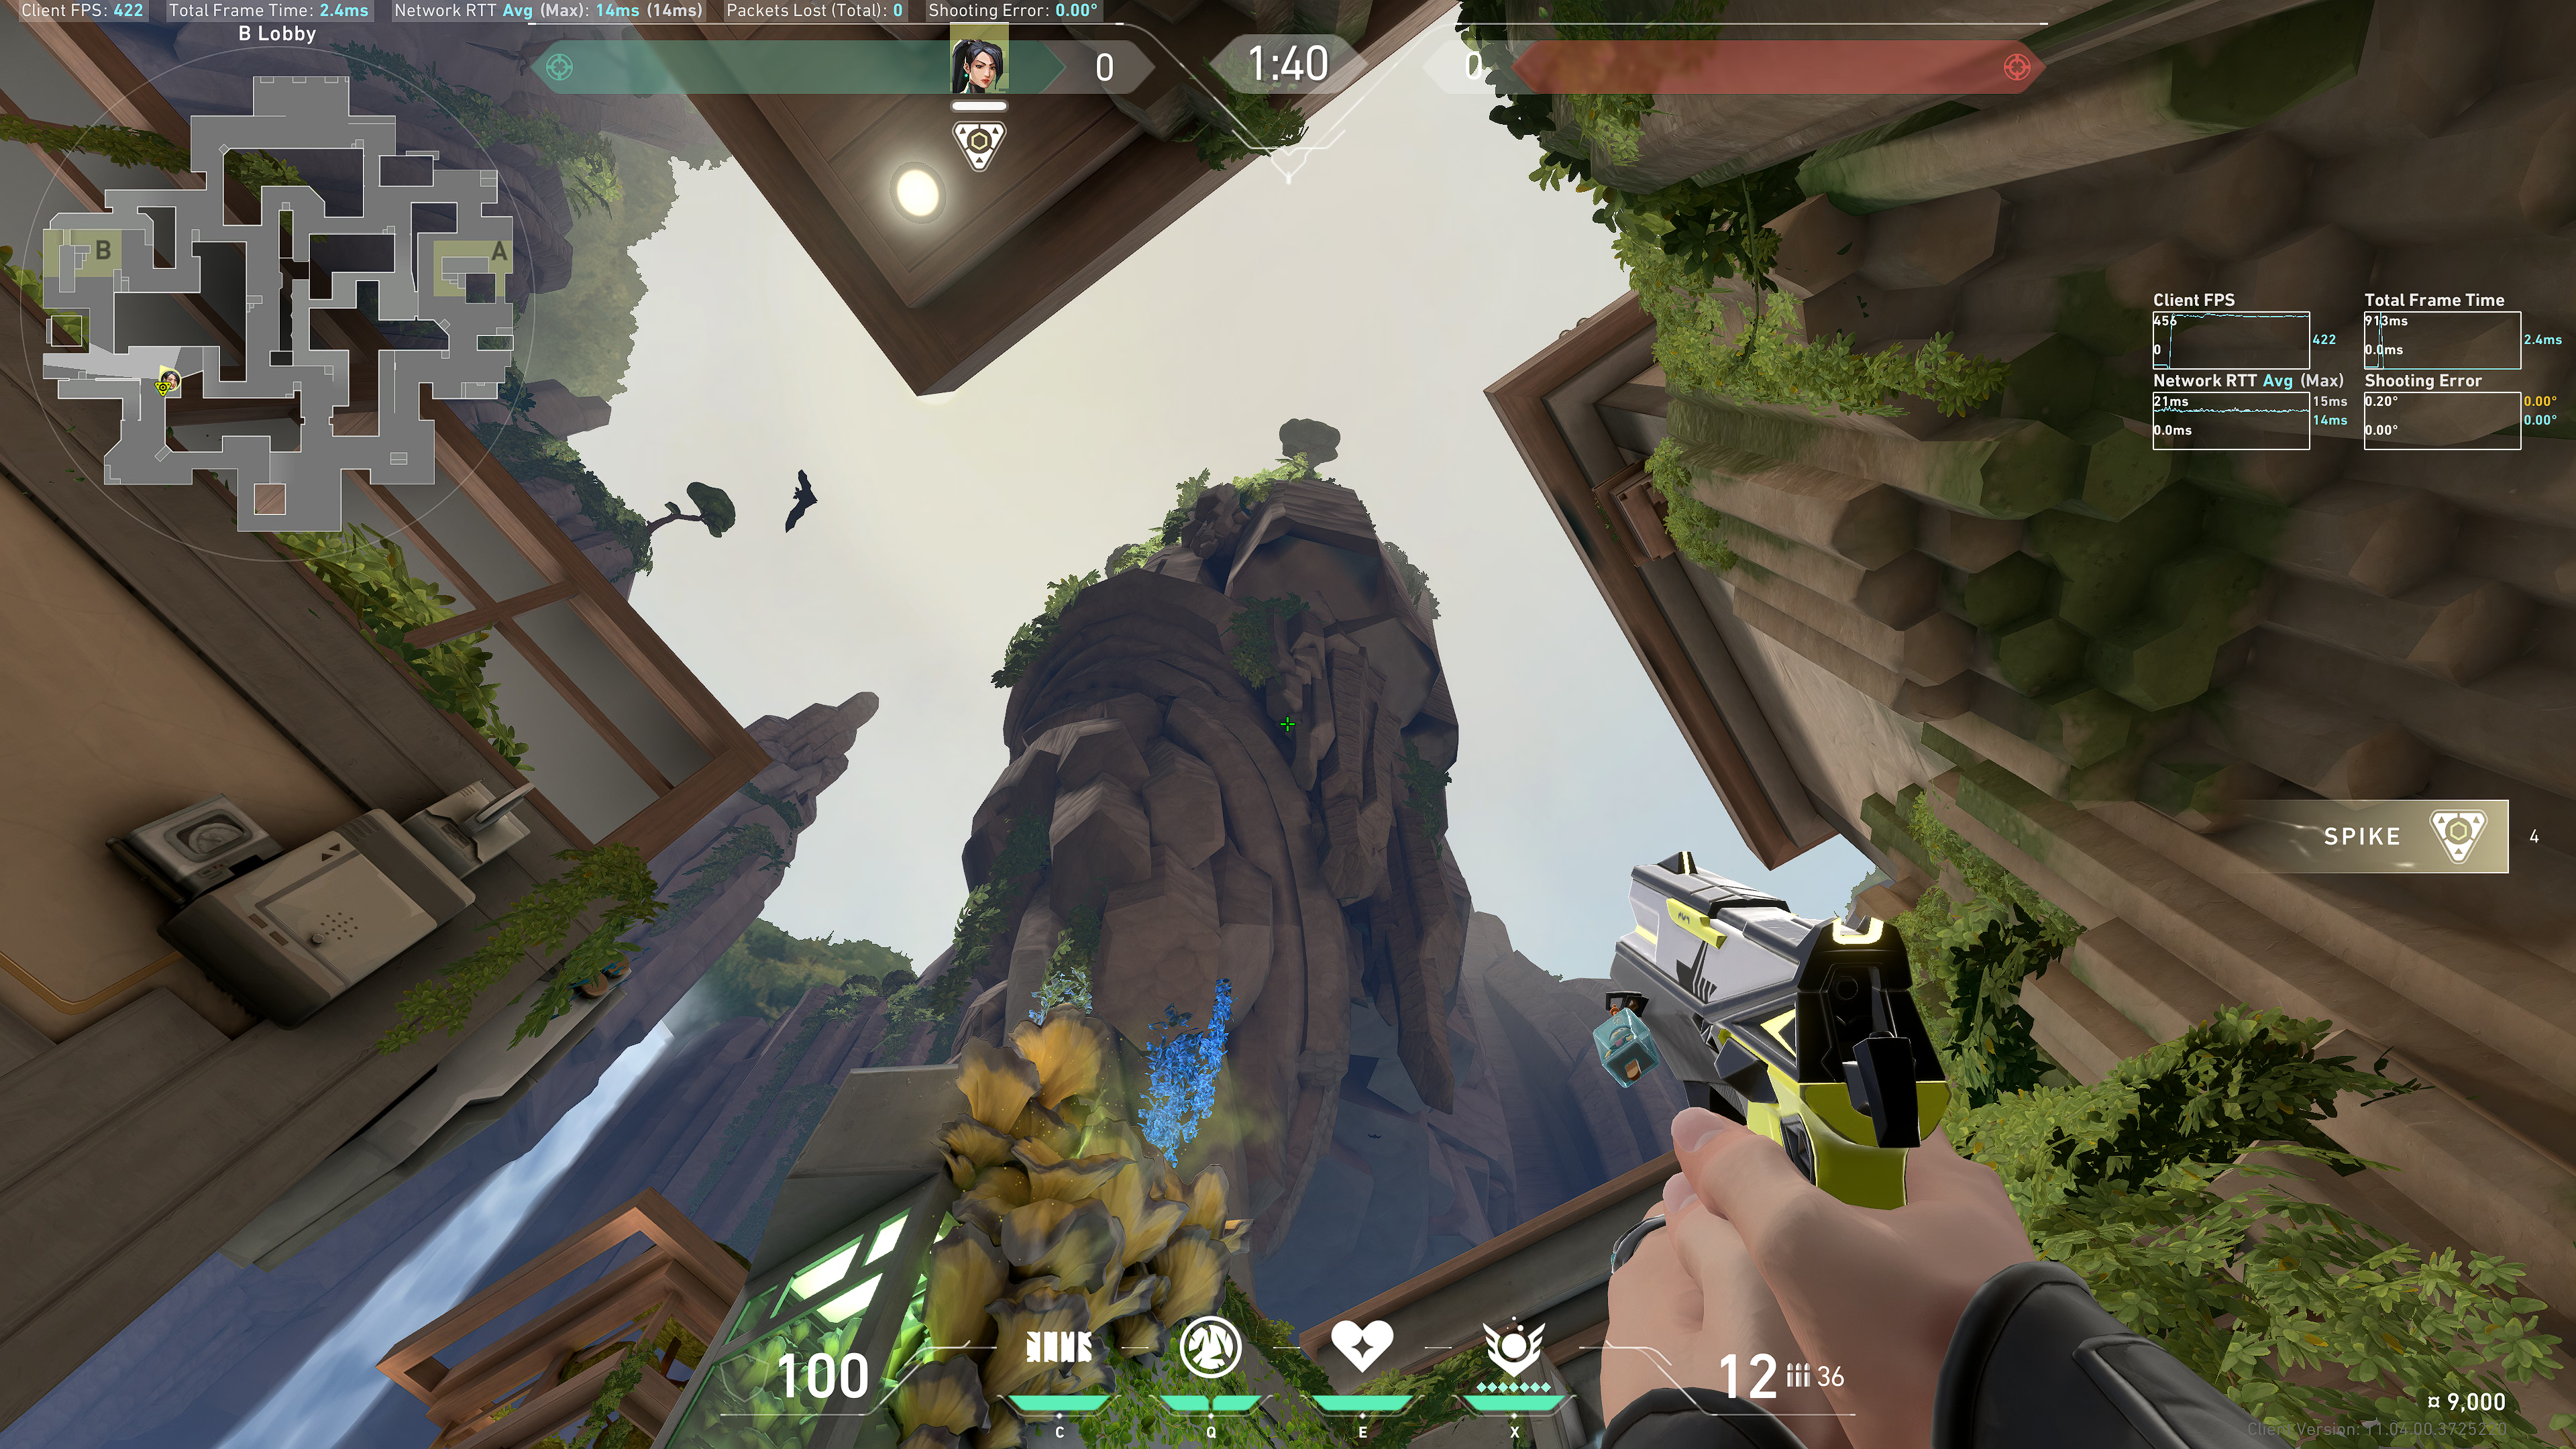
Result:
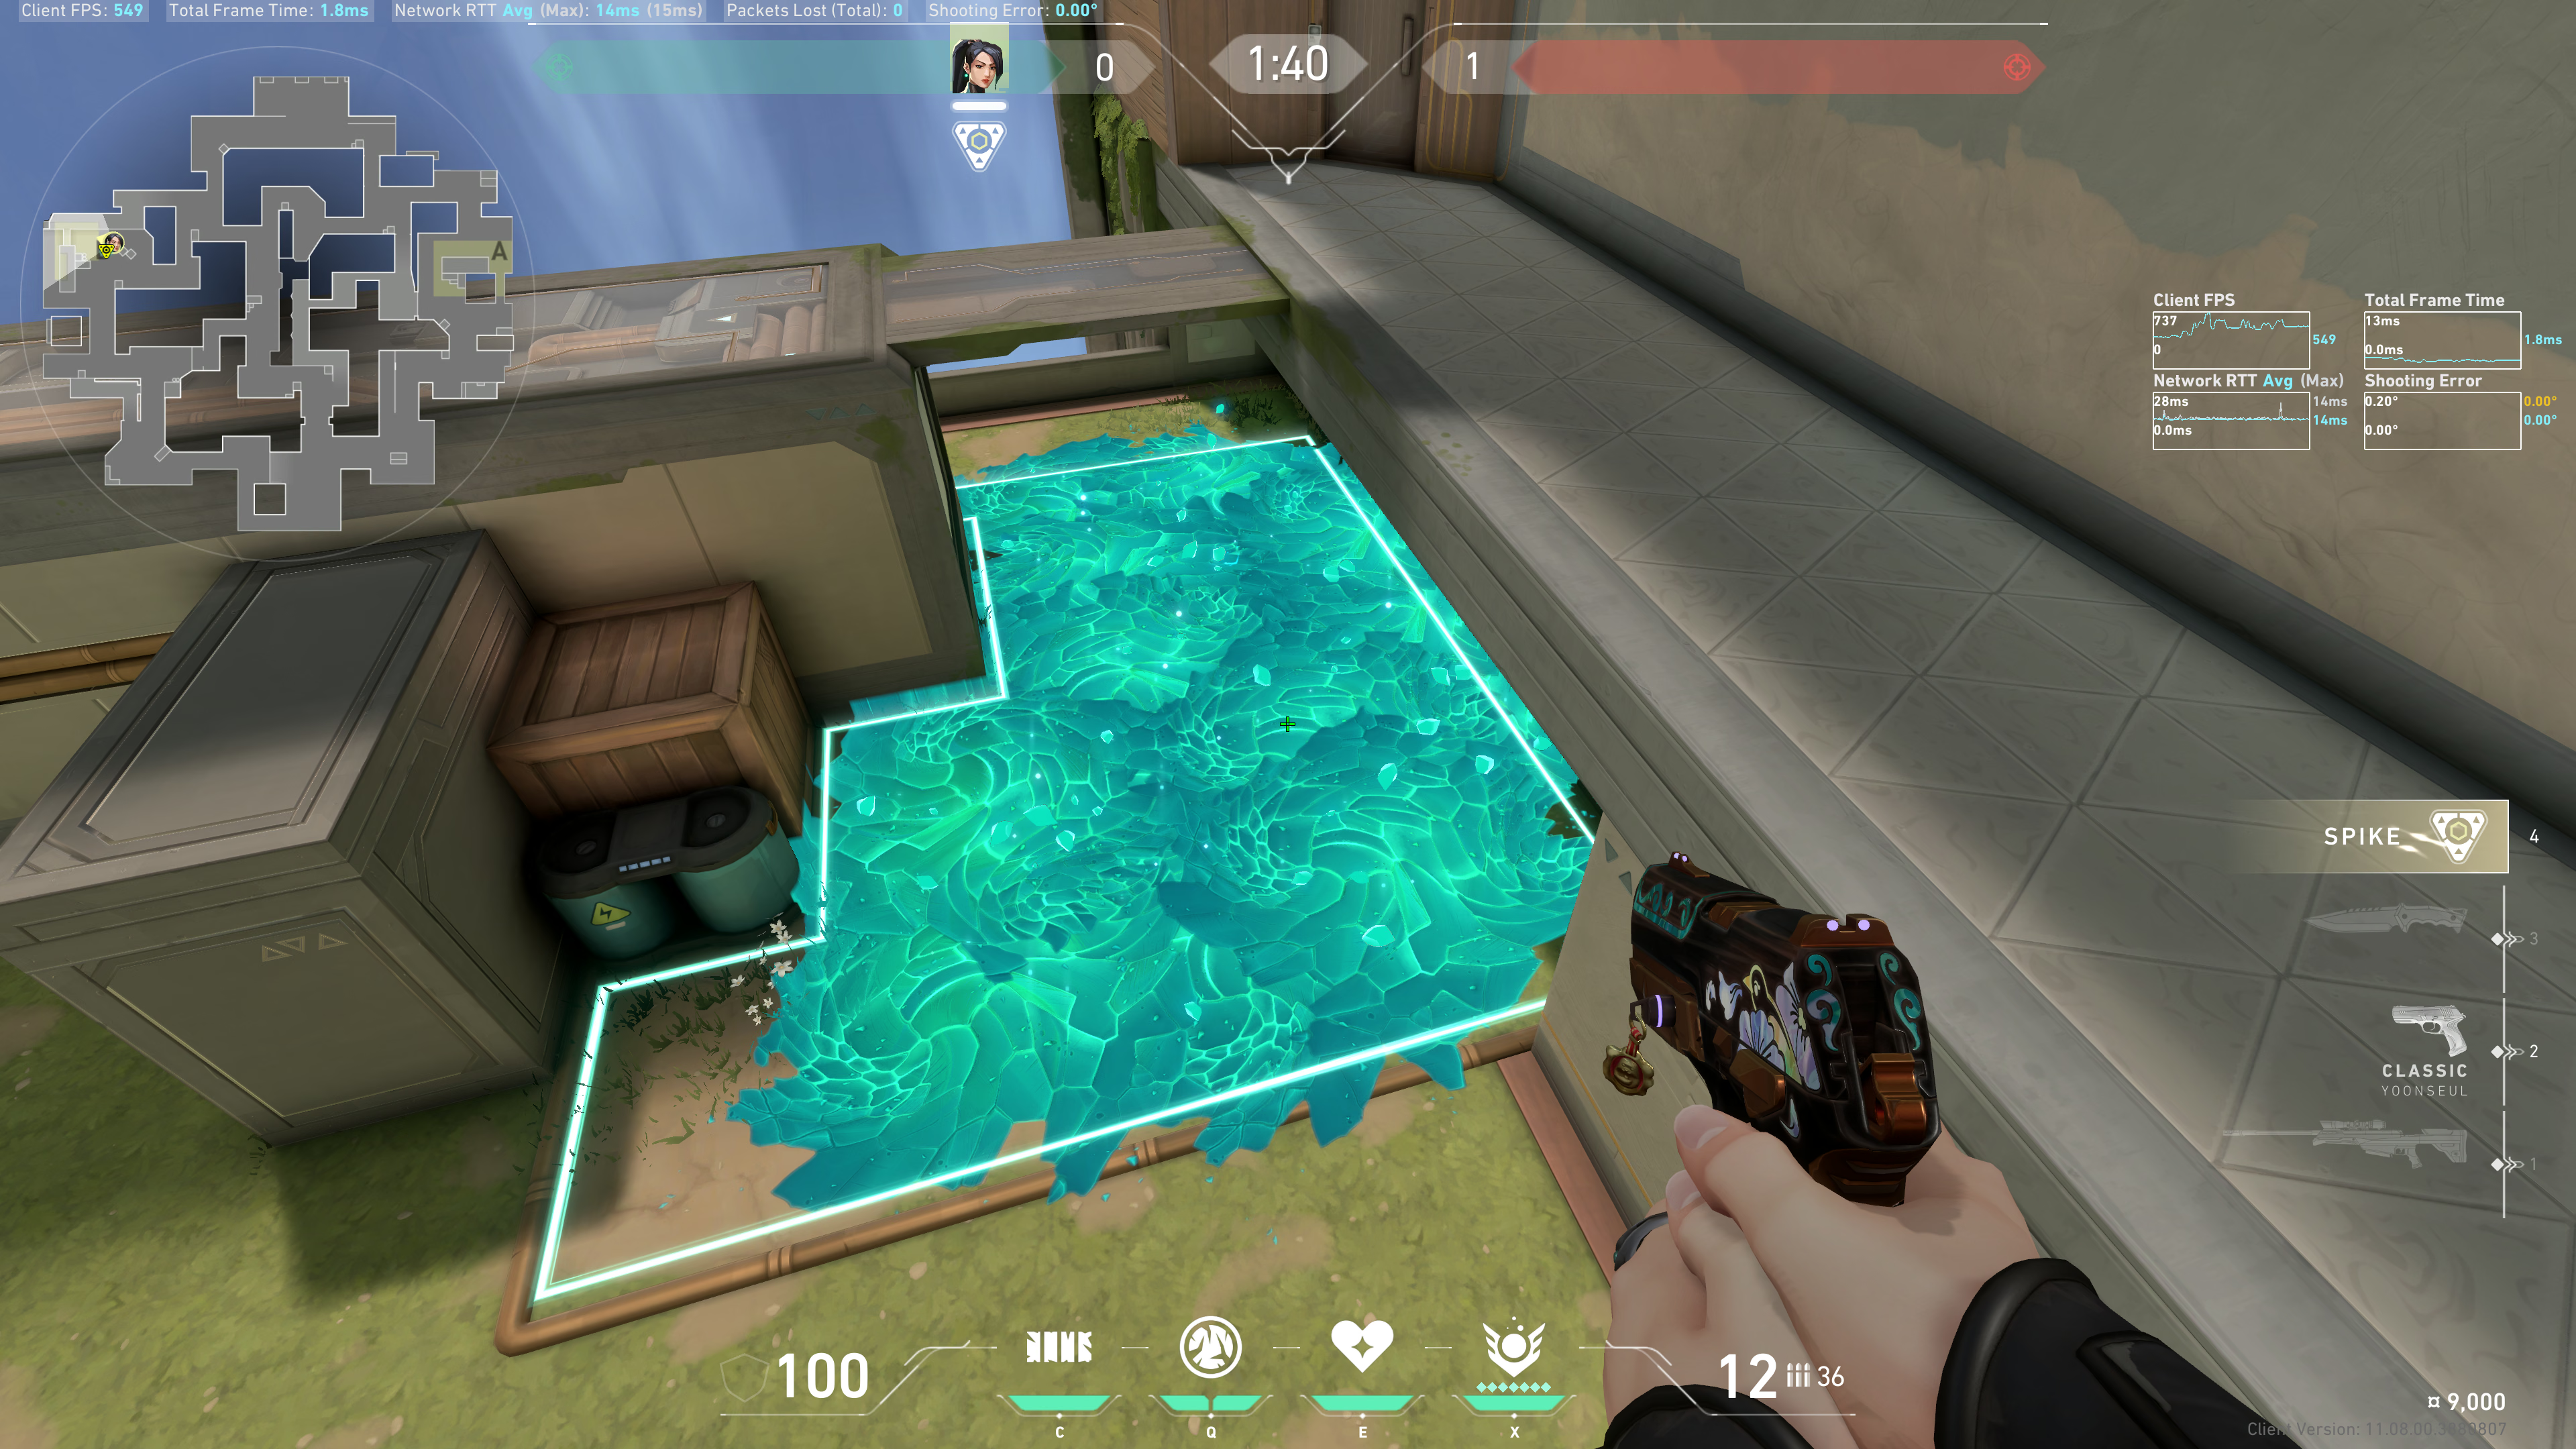
CT Top of Boxes
Note: this lineup is great to cover the top box and some grass surrounding the boxes. But the lineup is very finnicky, so I would not rely on it to cover grass outside of the box. For that use case, use the other two lineups.
Notice this green leaf sticking out from the mushrooms:
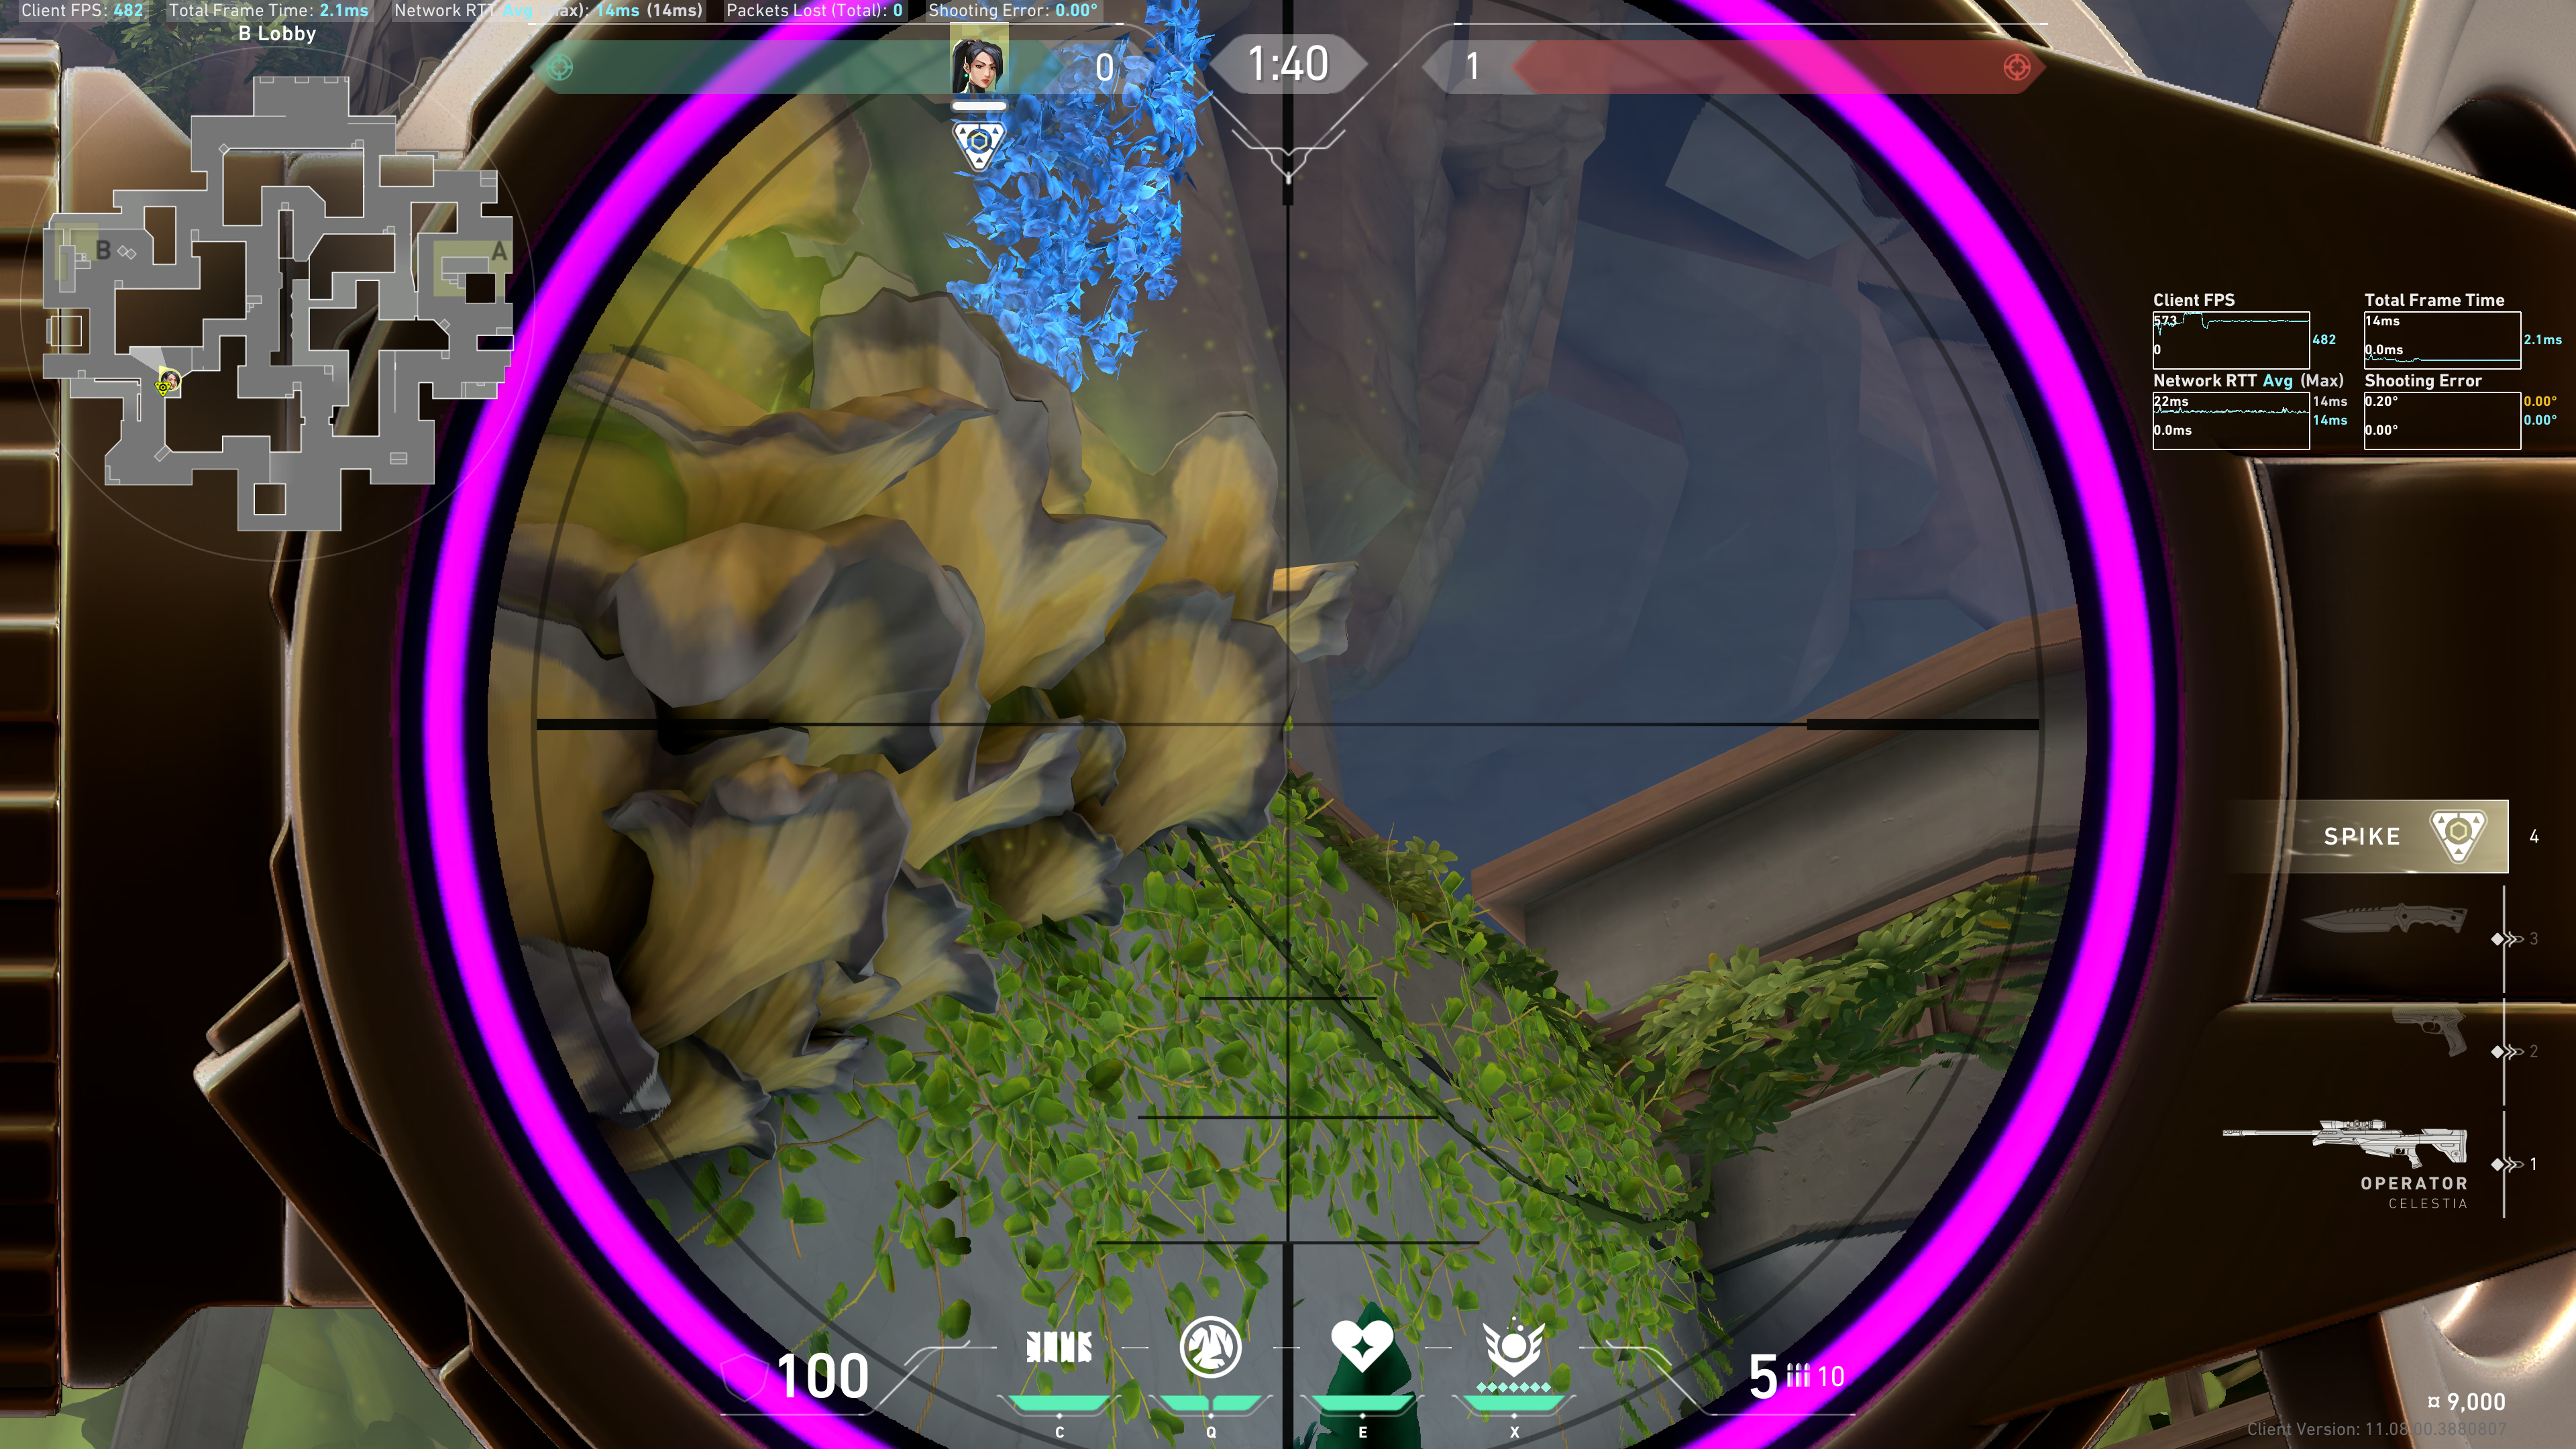
The bottom left HUD line to the left of the Wall icon, line up the end of the right line with that green leaf:
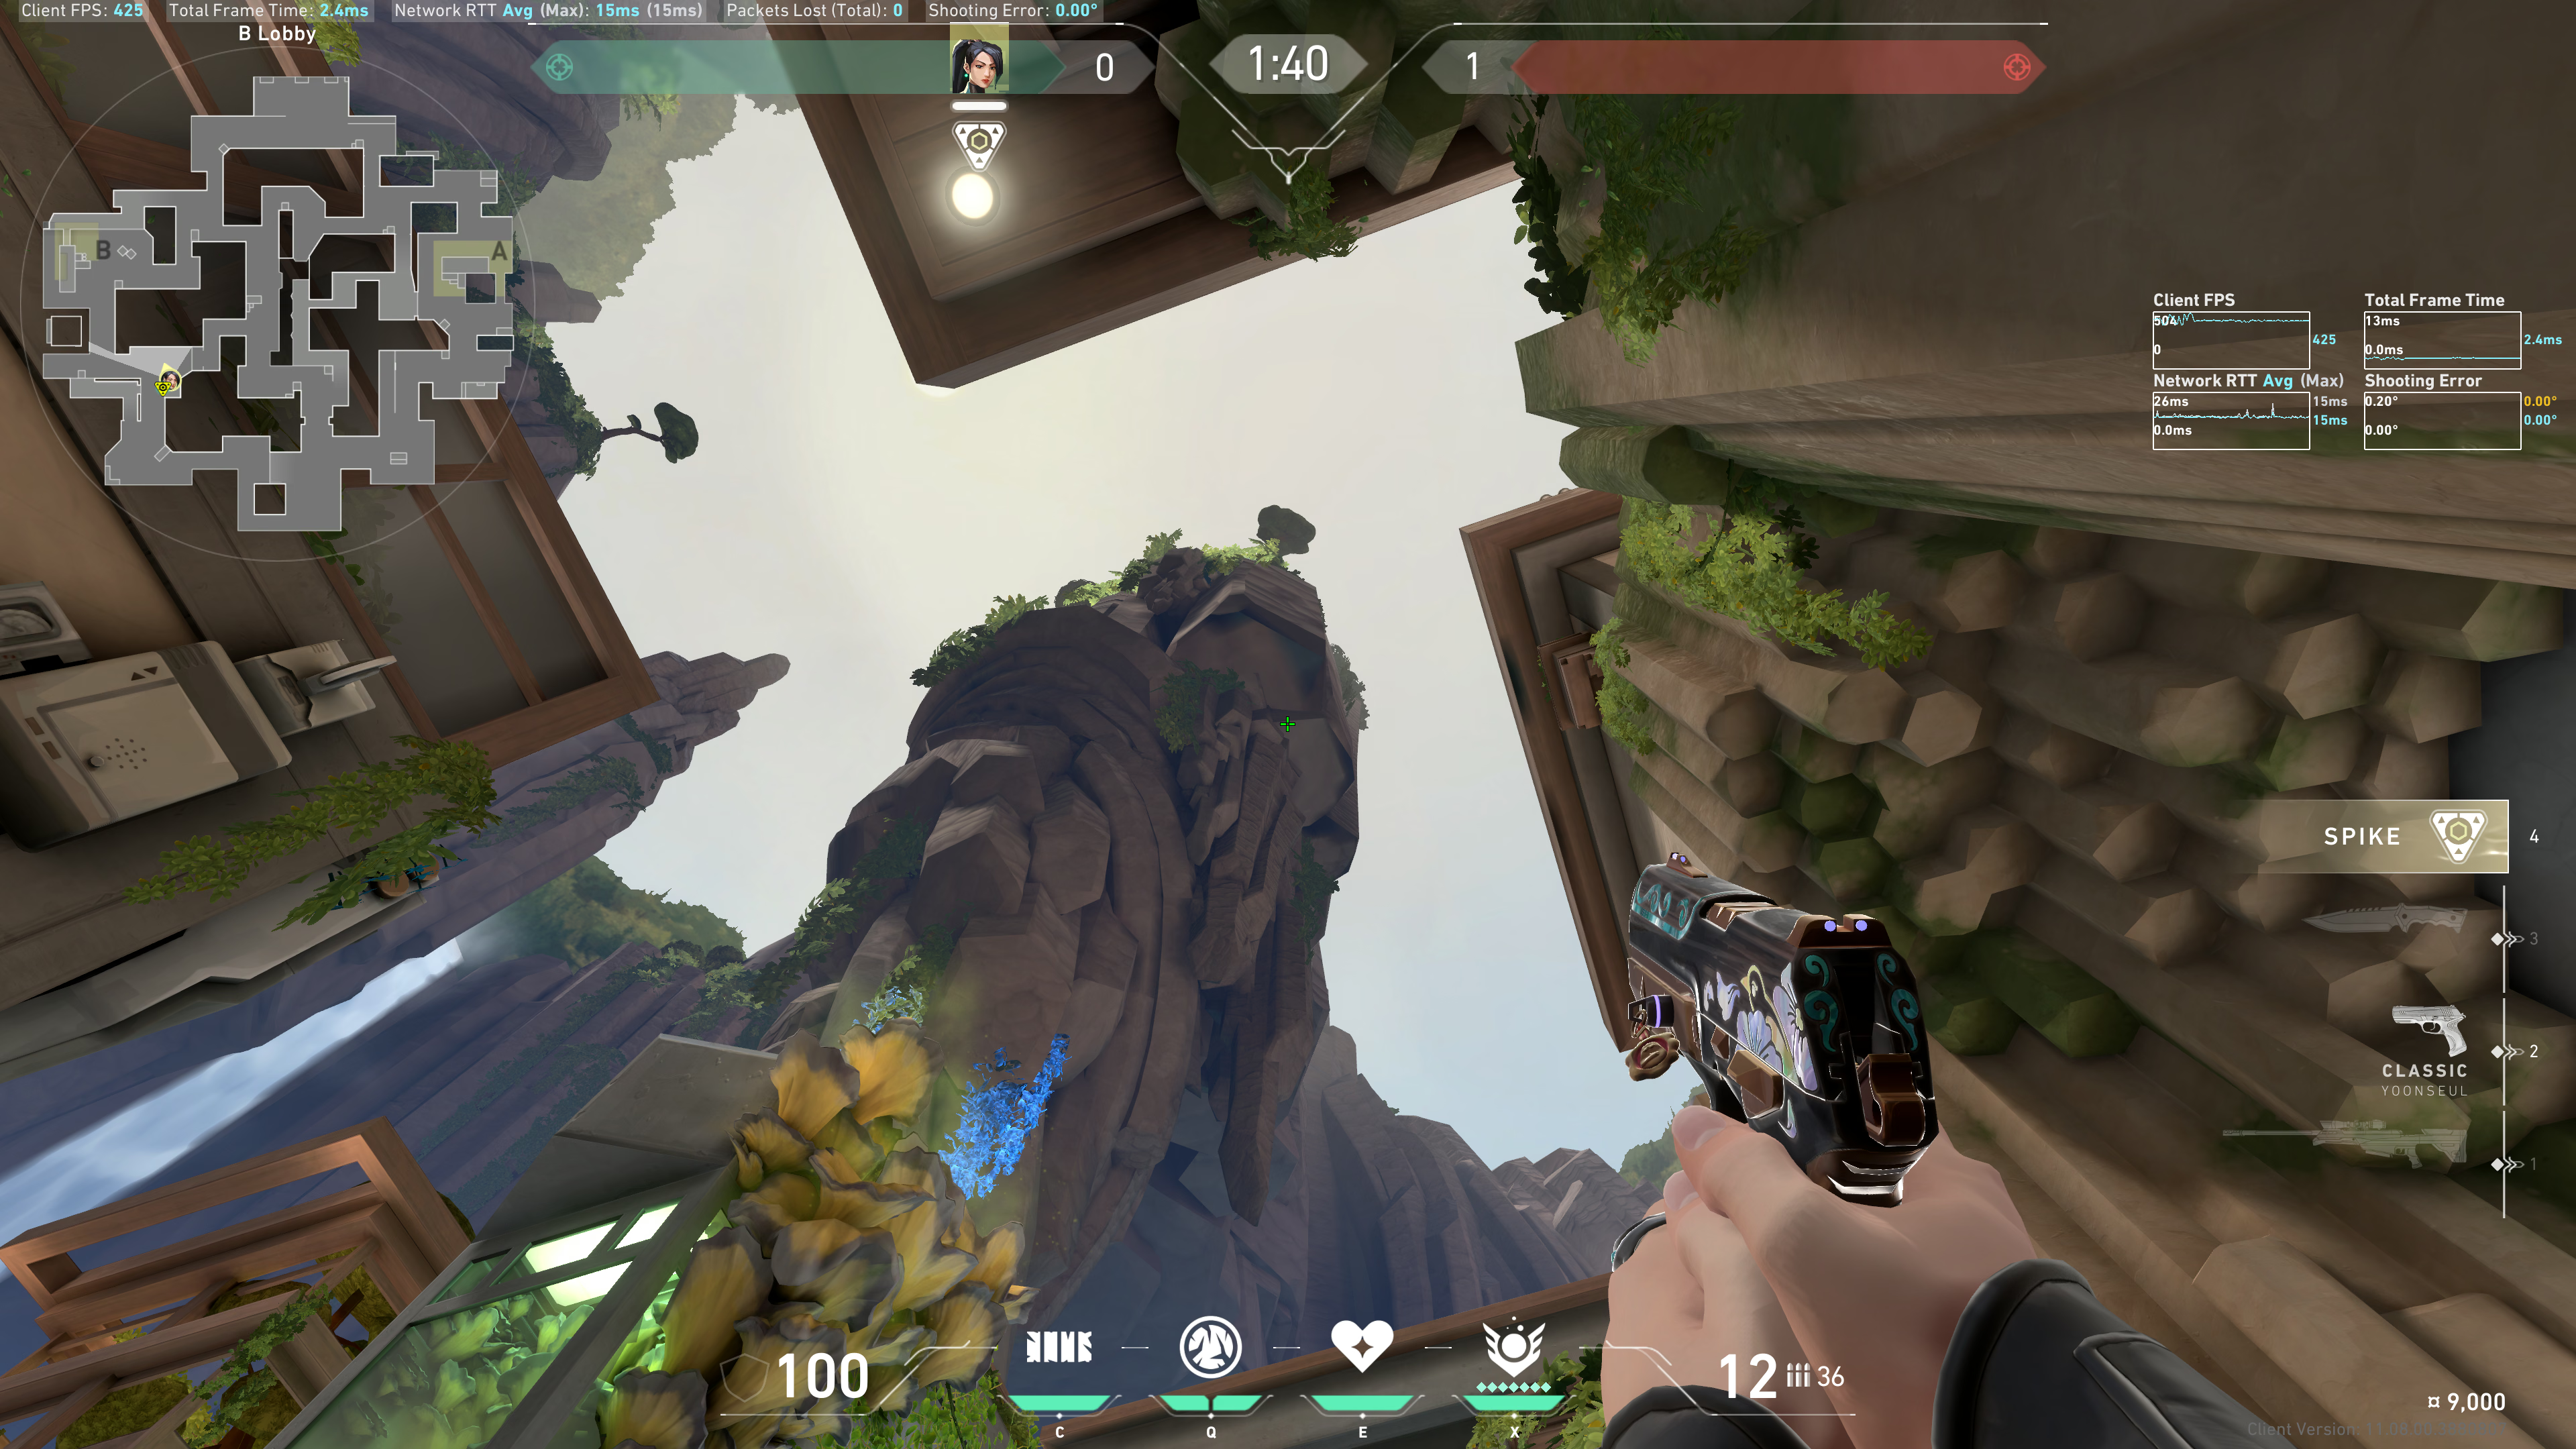
Example result:
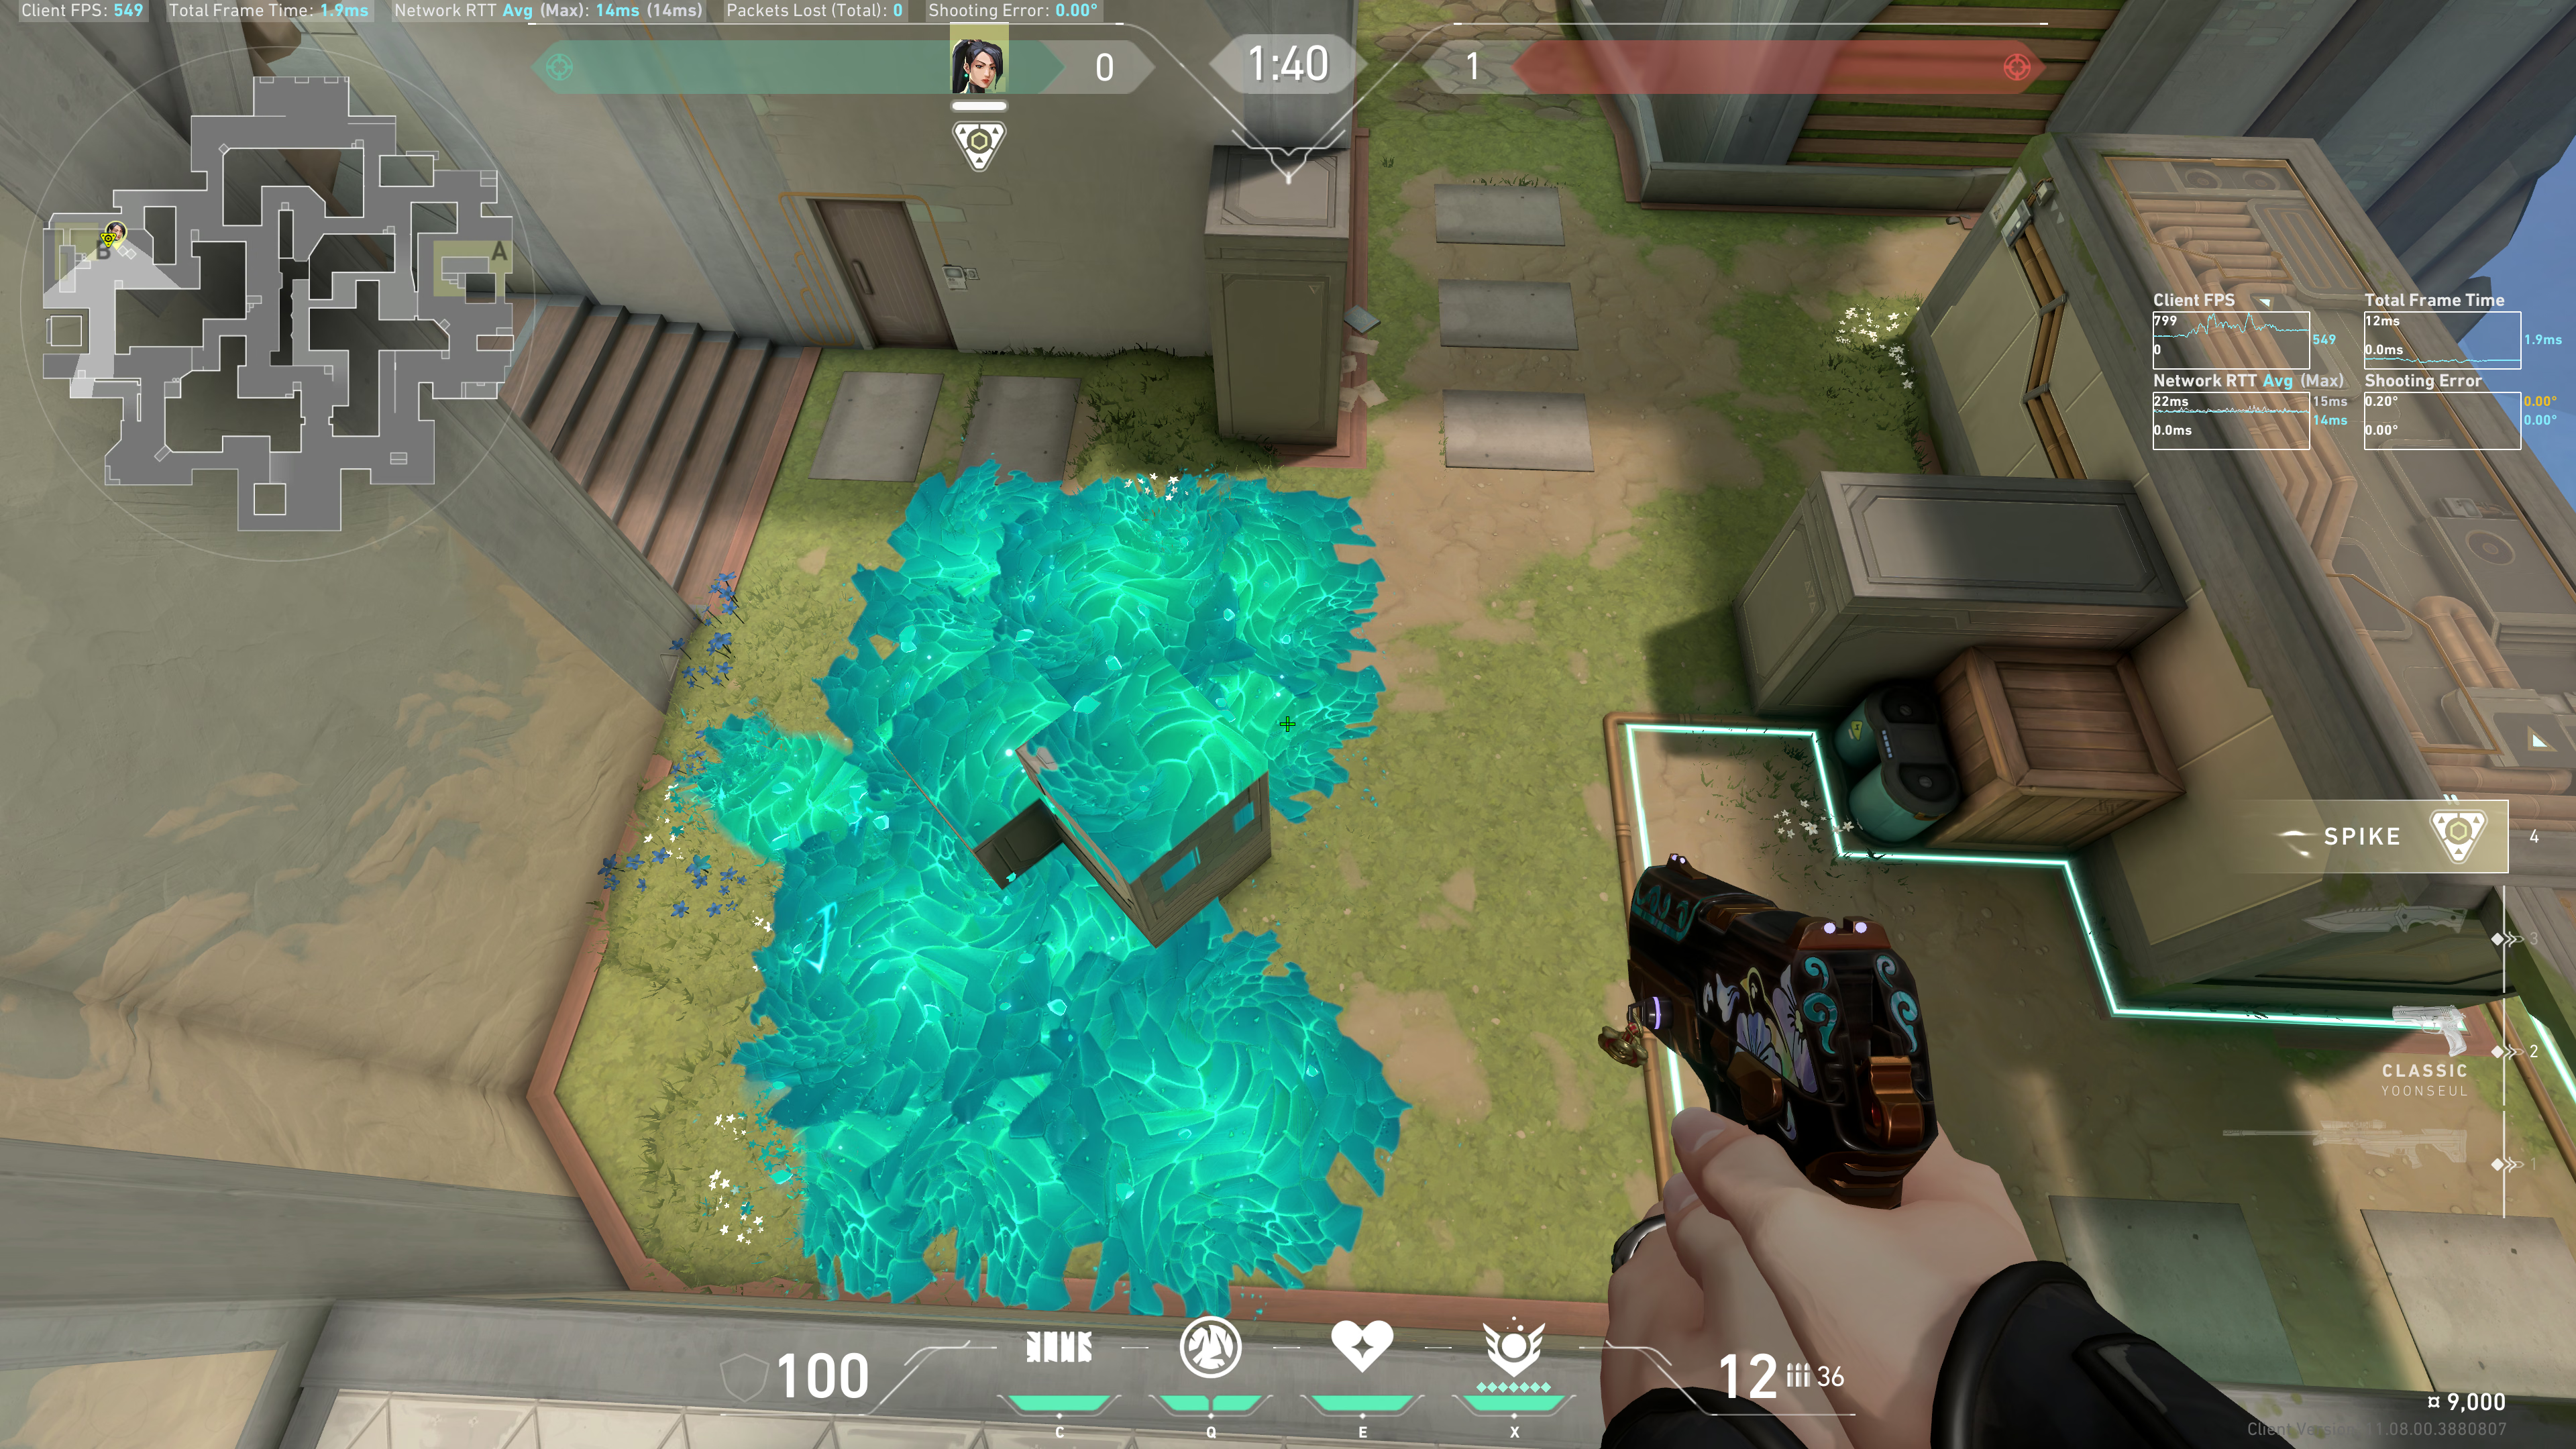
CT Behind Boxes
Notice this wood piece sticking out:
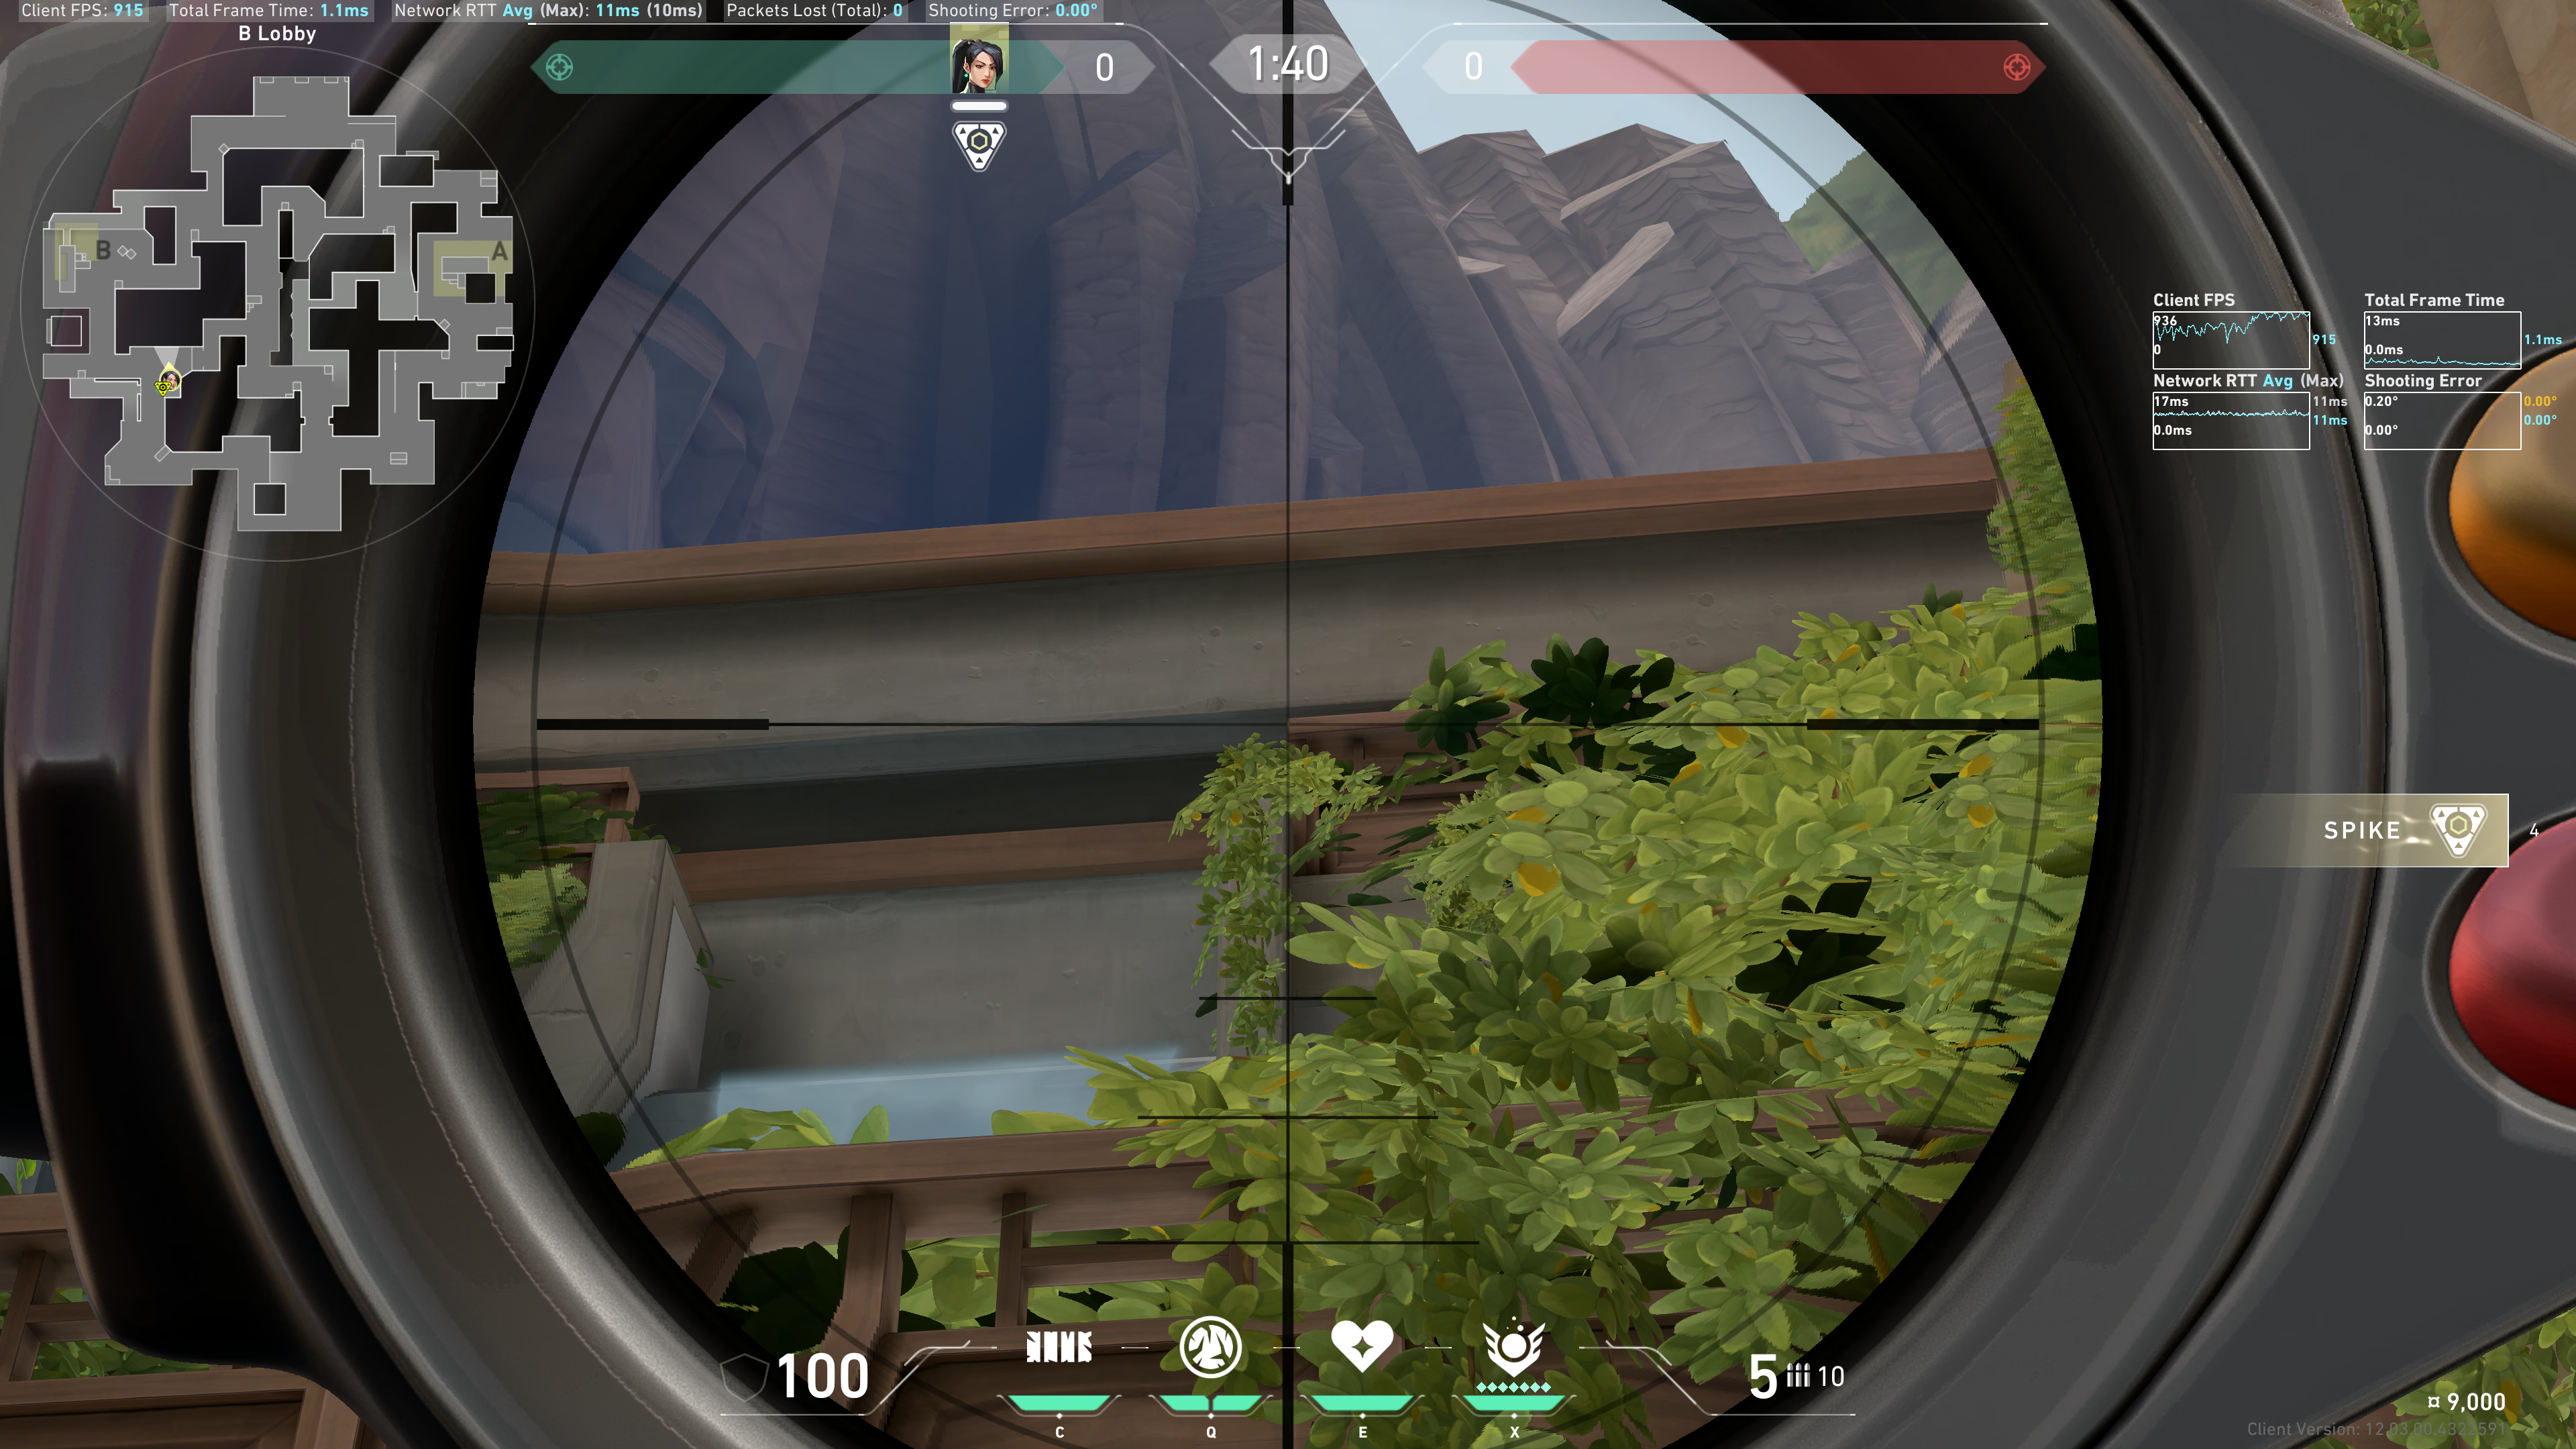
The Heart green trapezoid, lineup the right side of it with that wood piece:
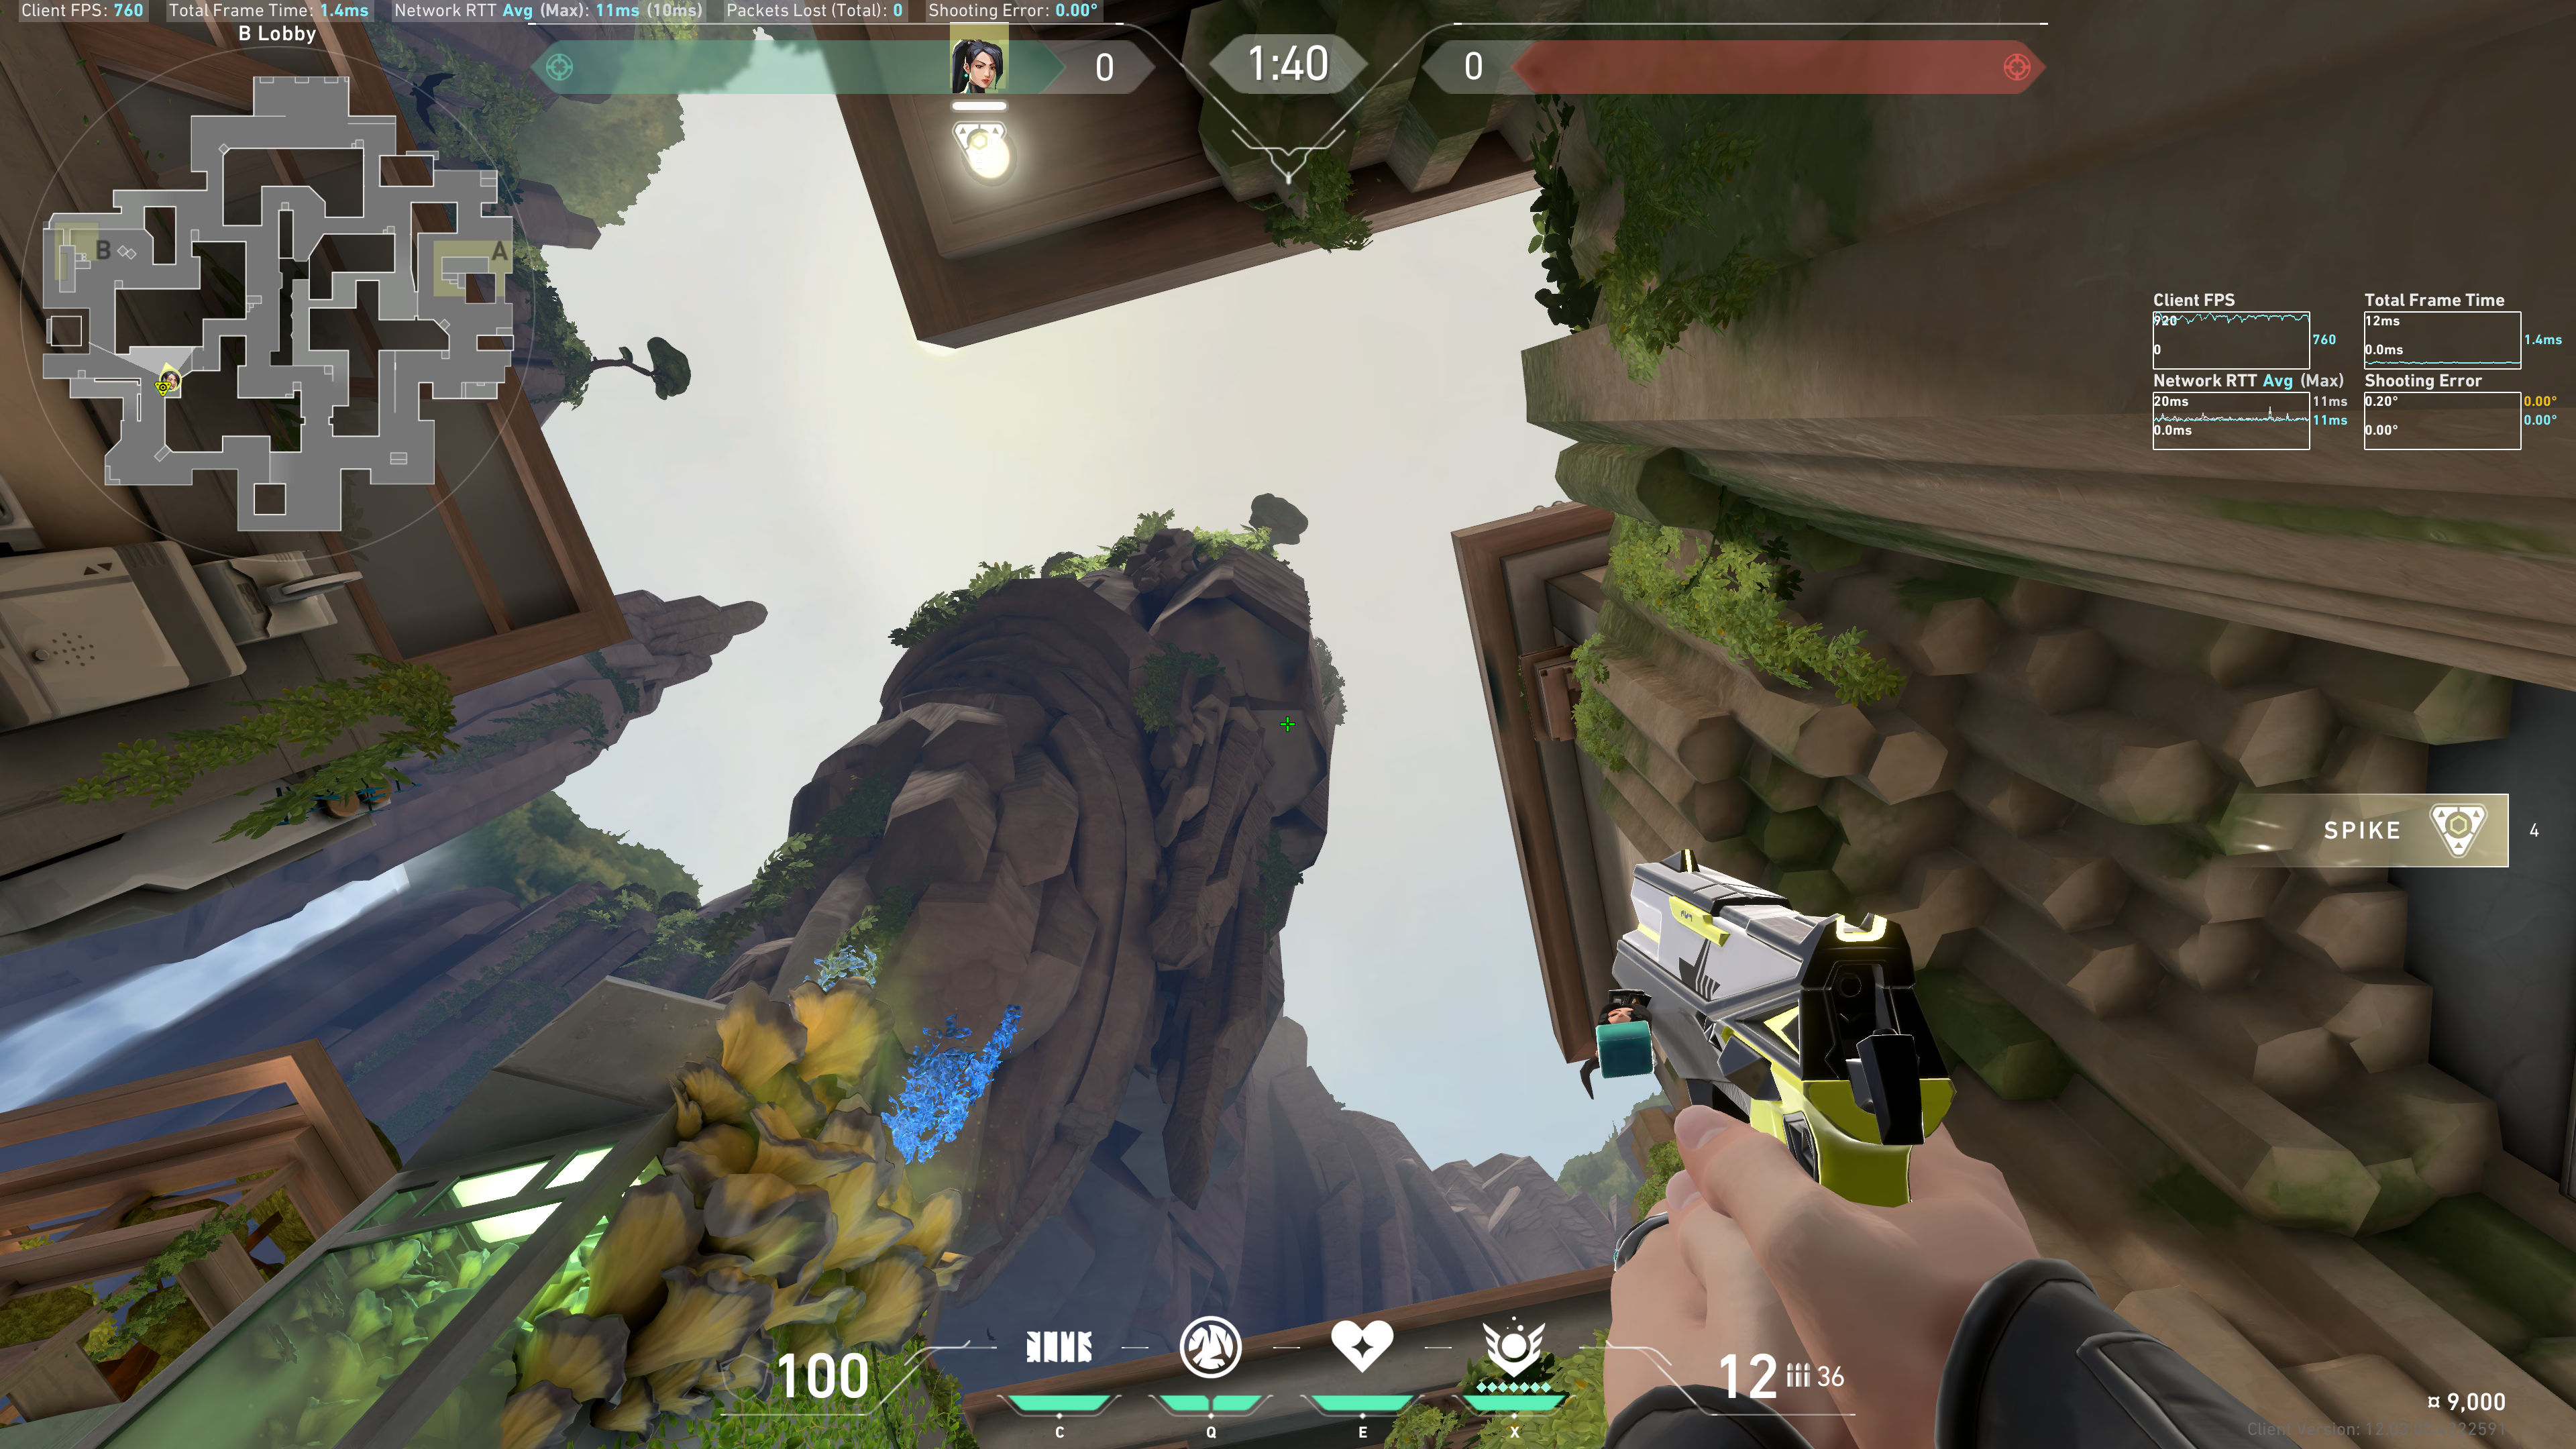
Result:
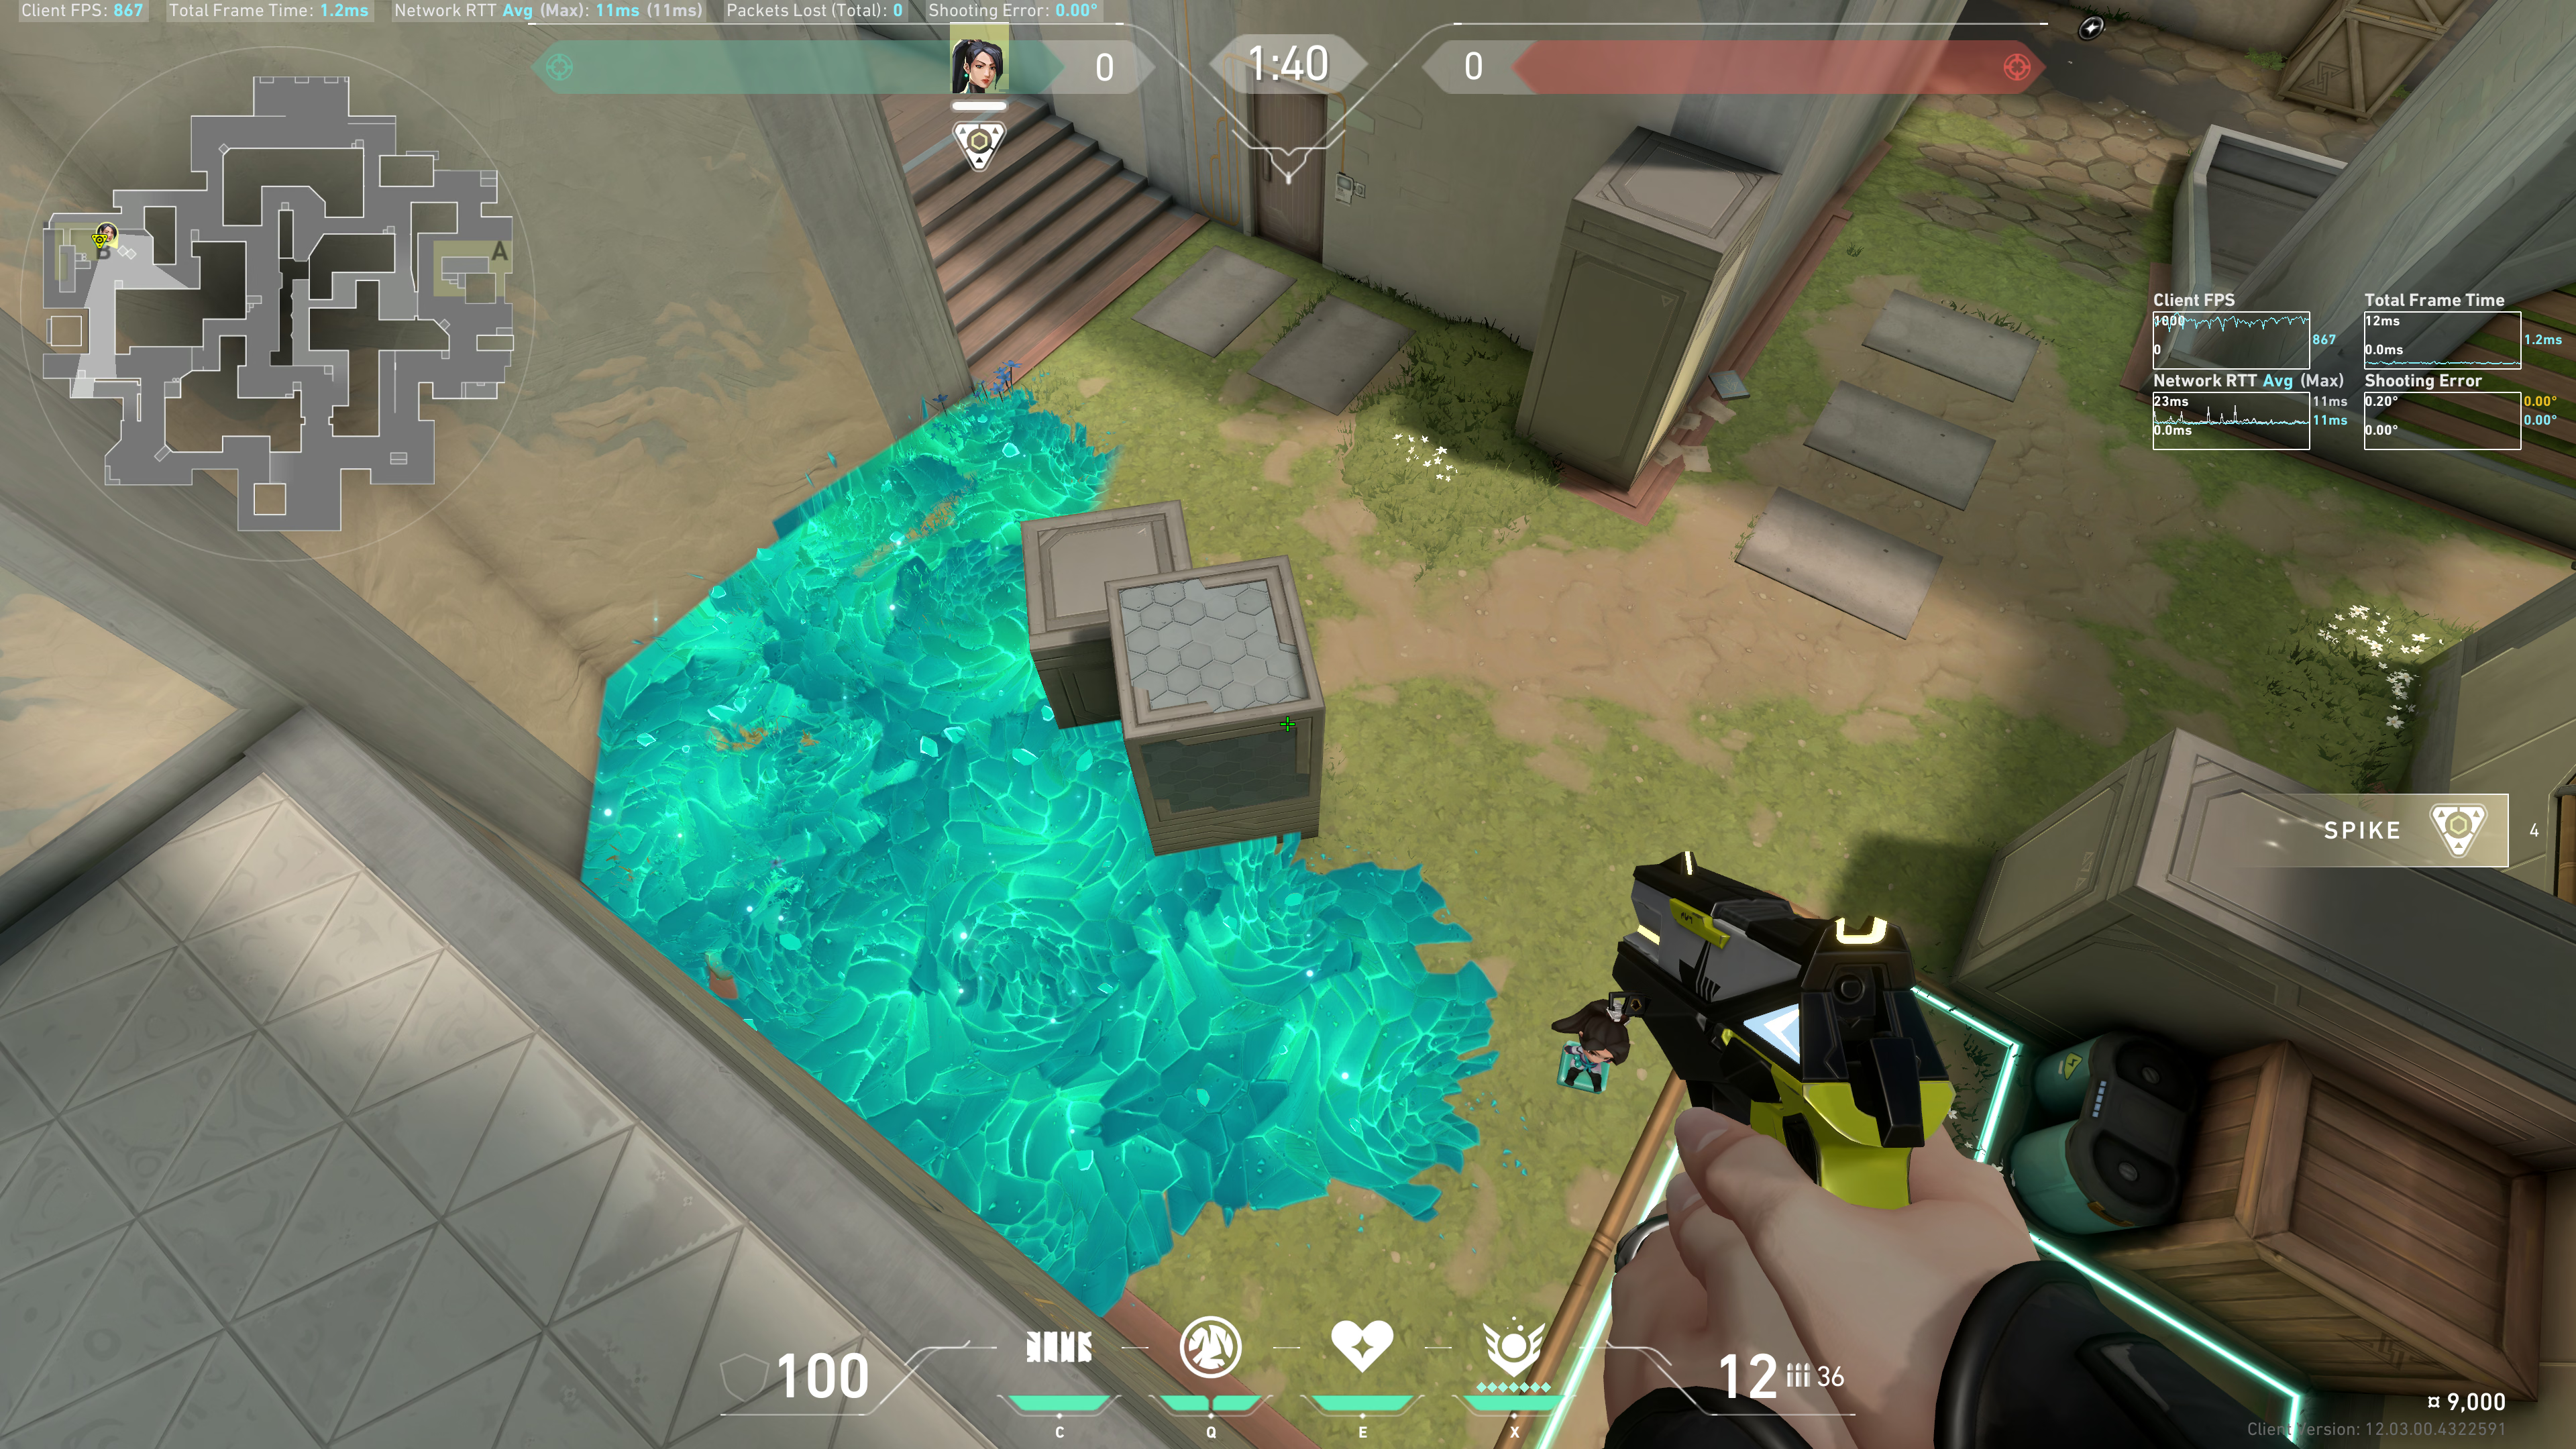
CT Front Boxes
Note this shade in the mountain:
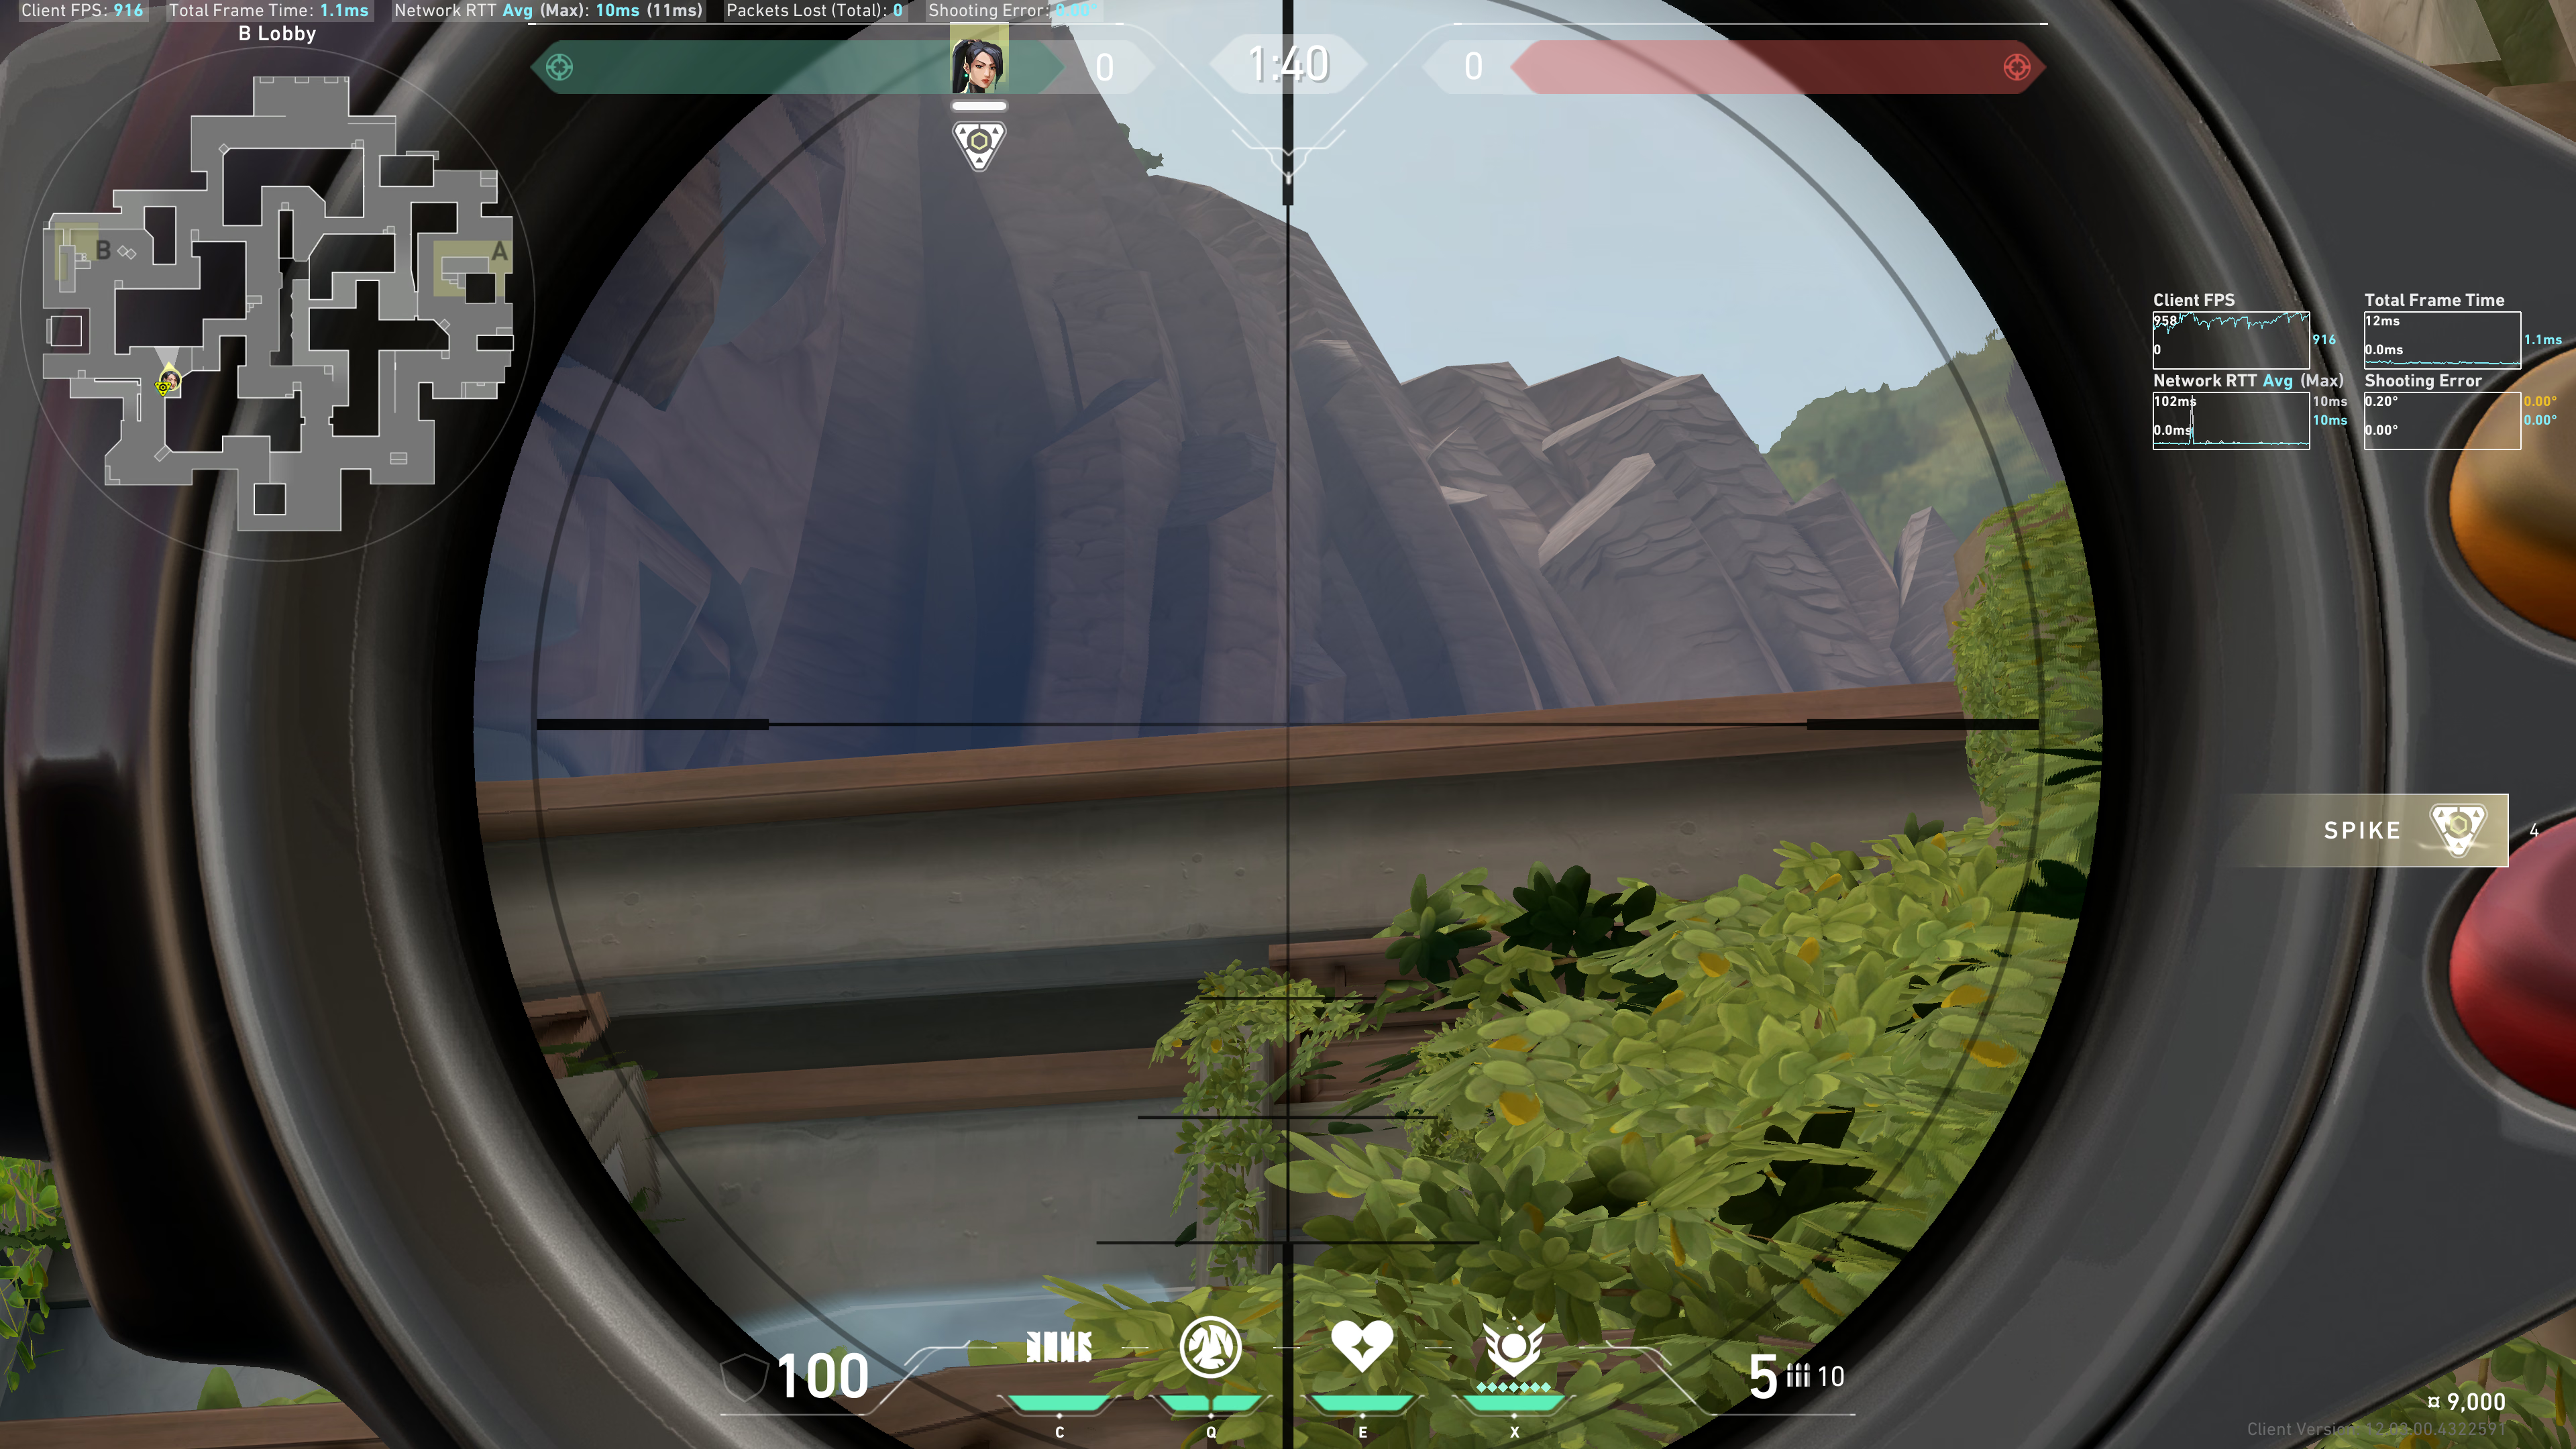
Move your crosshair upward until the right side of the Heart green trapezoid lines up with that shade:
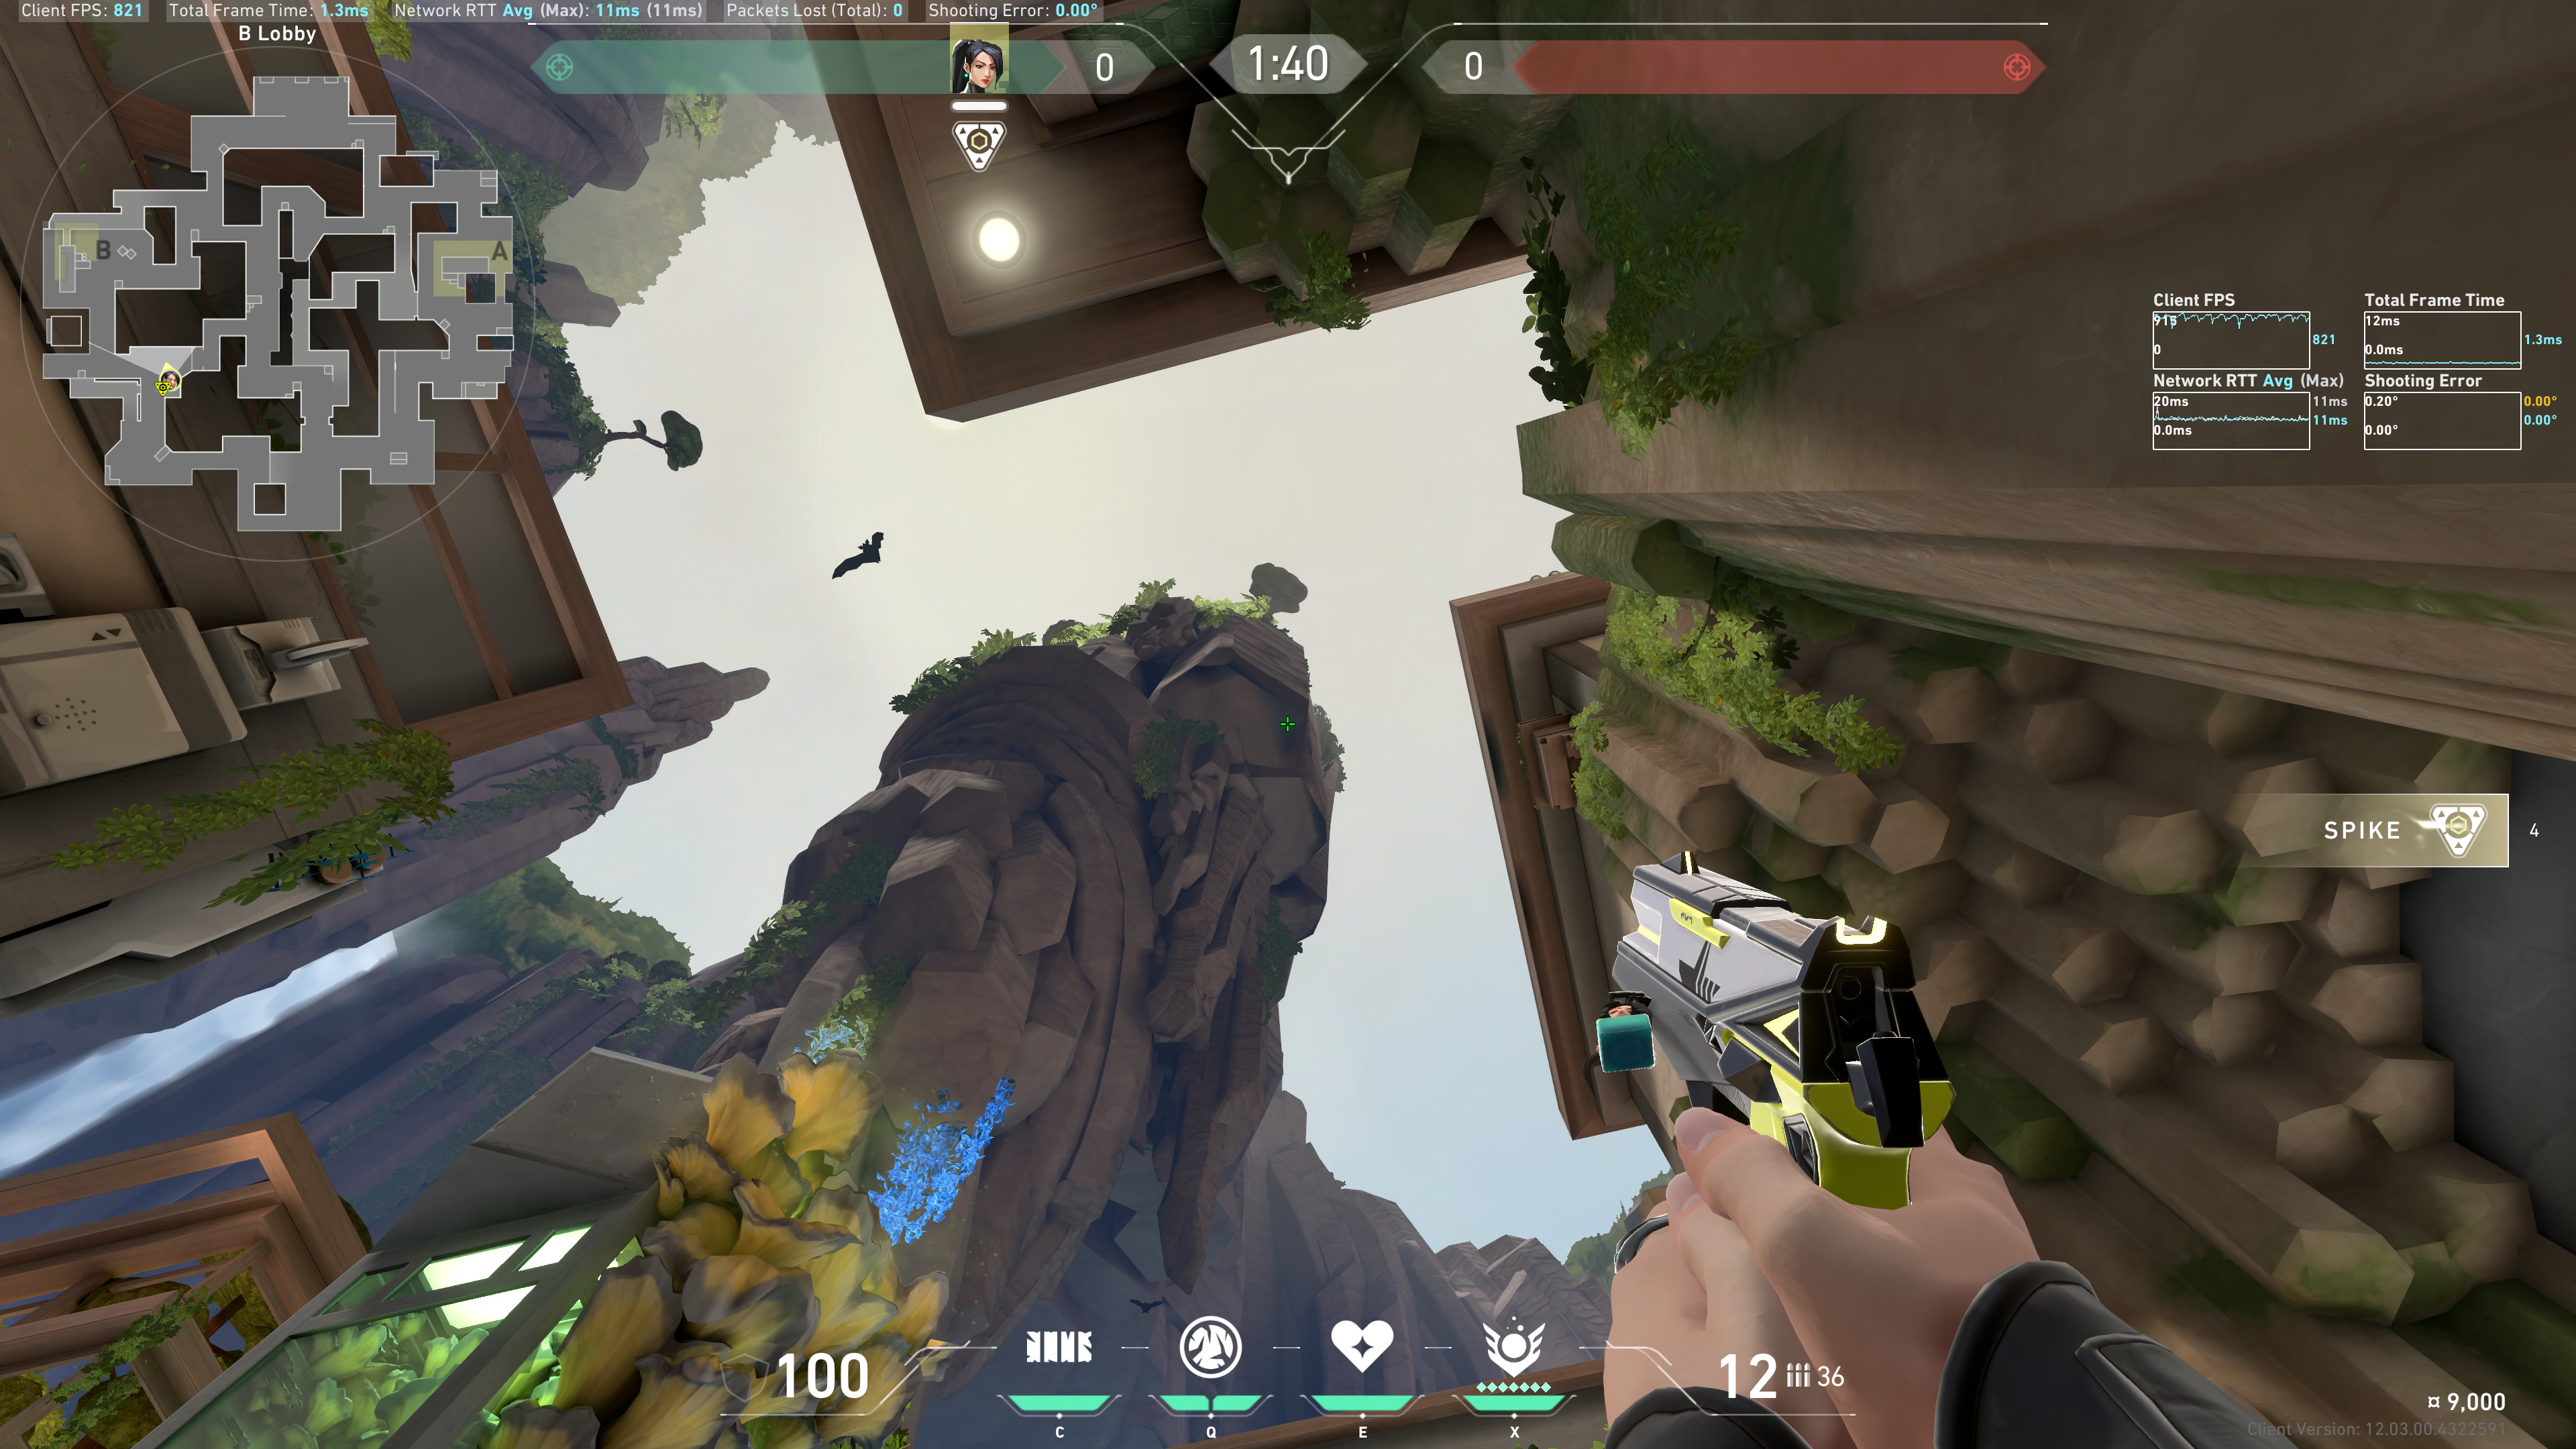
Result:
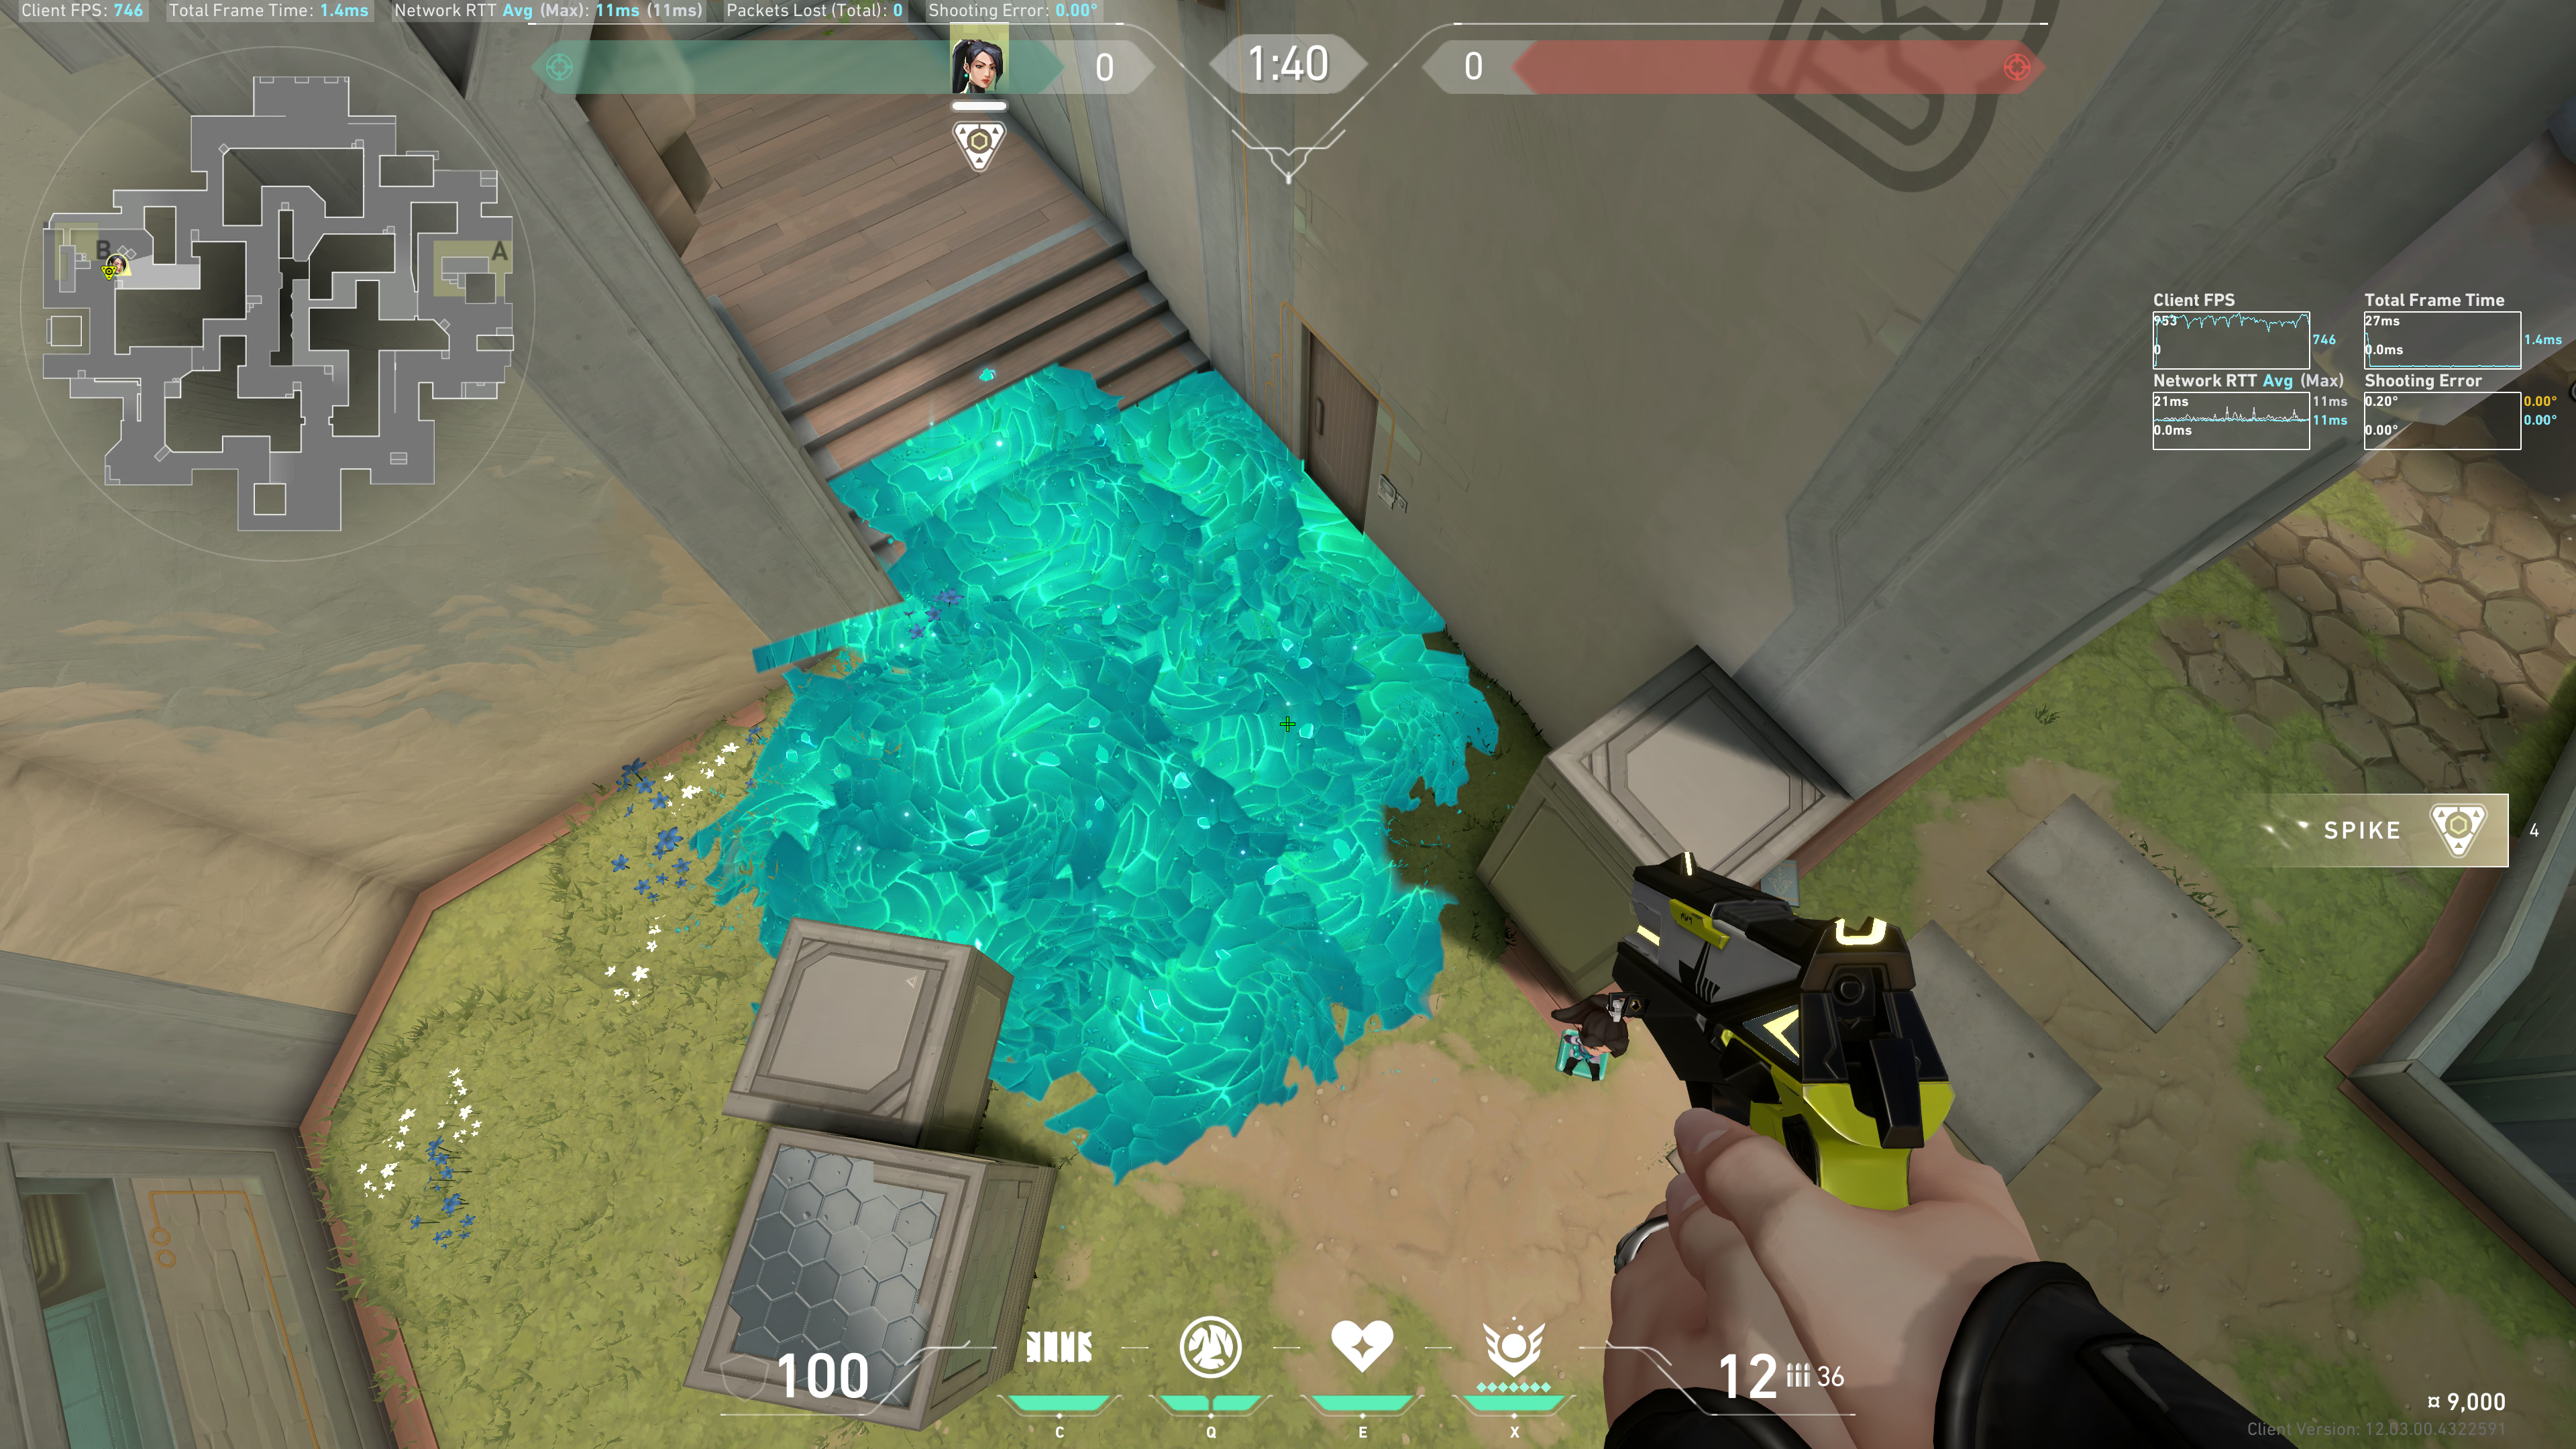
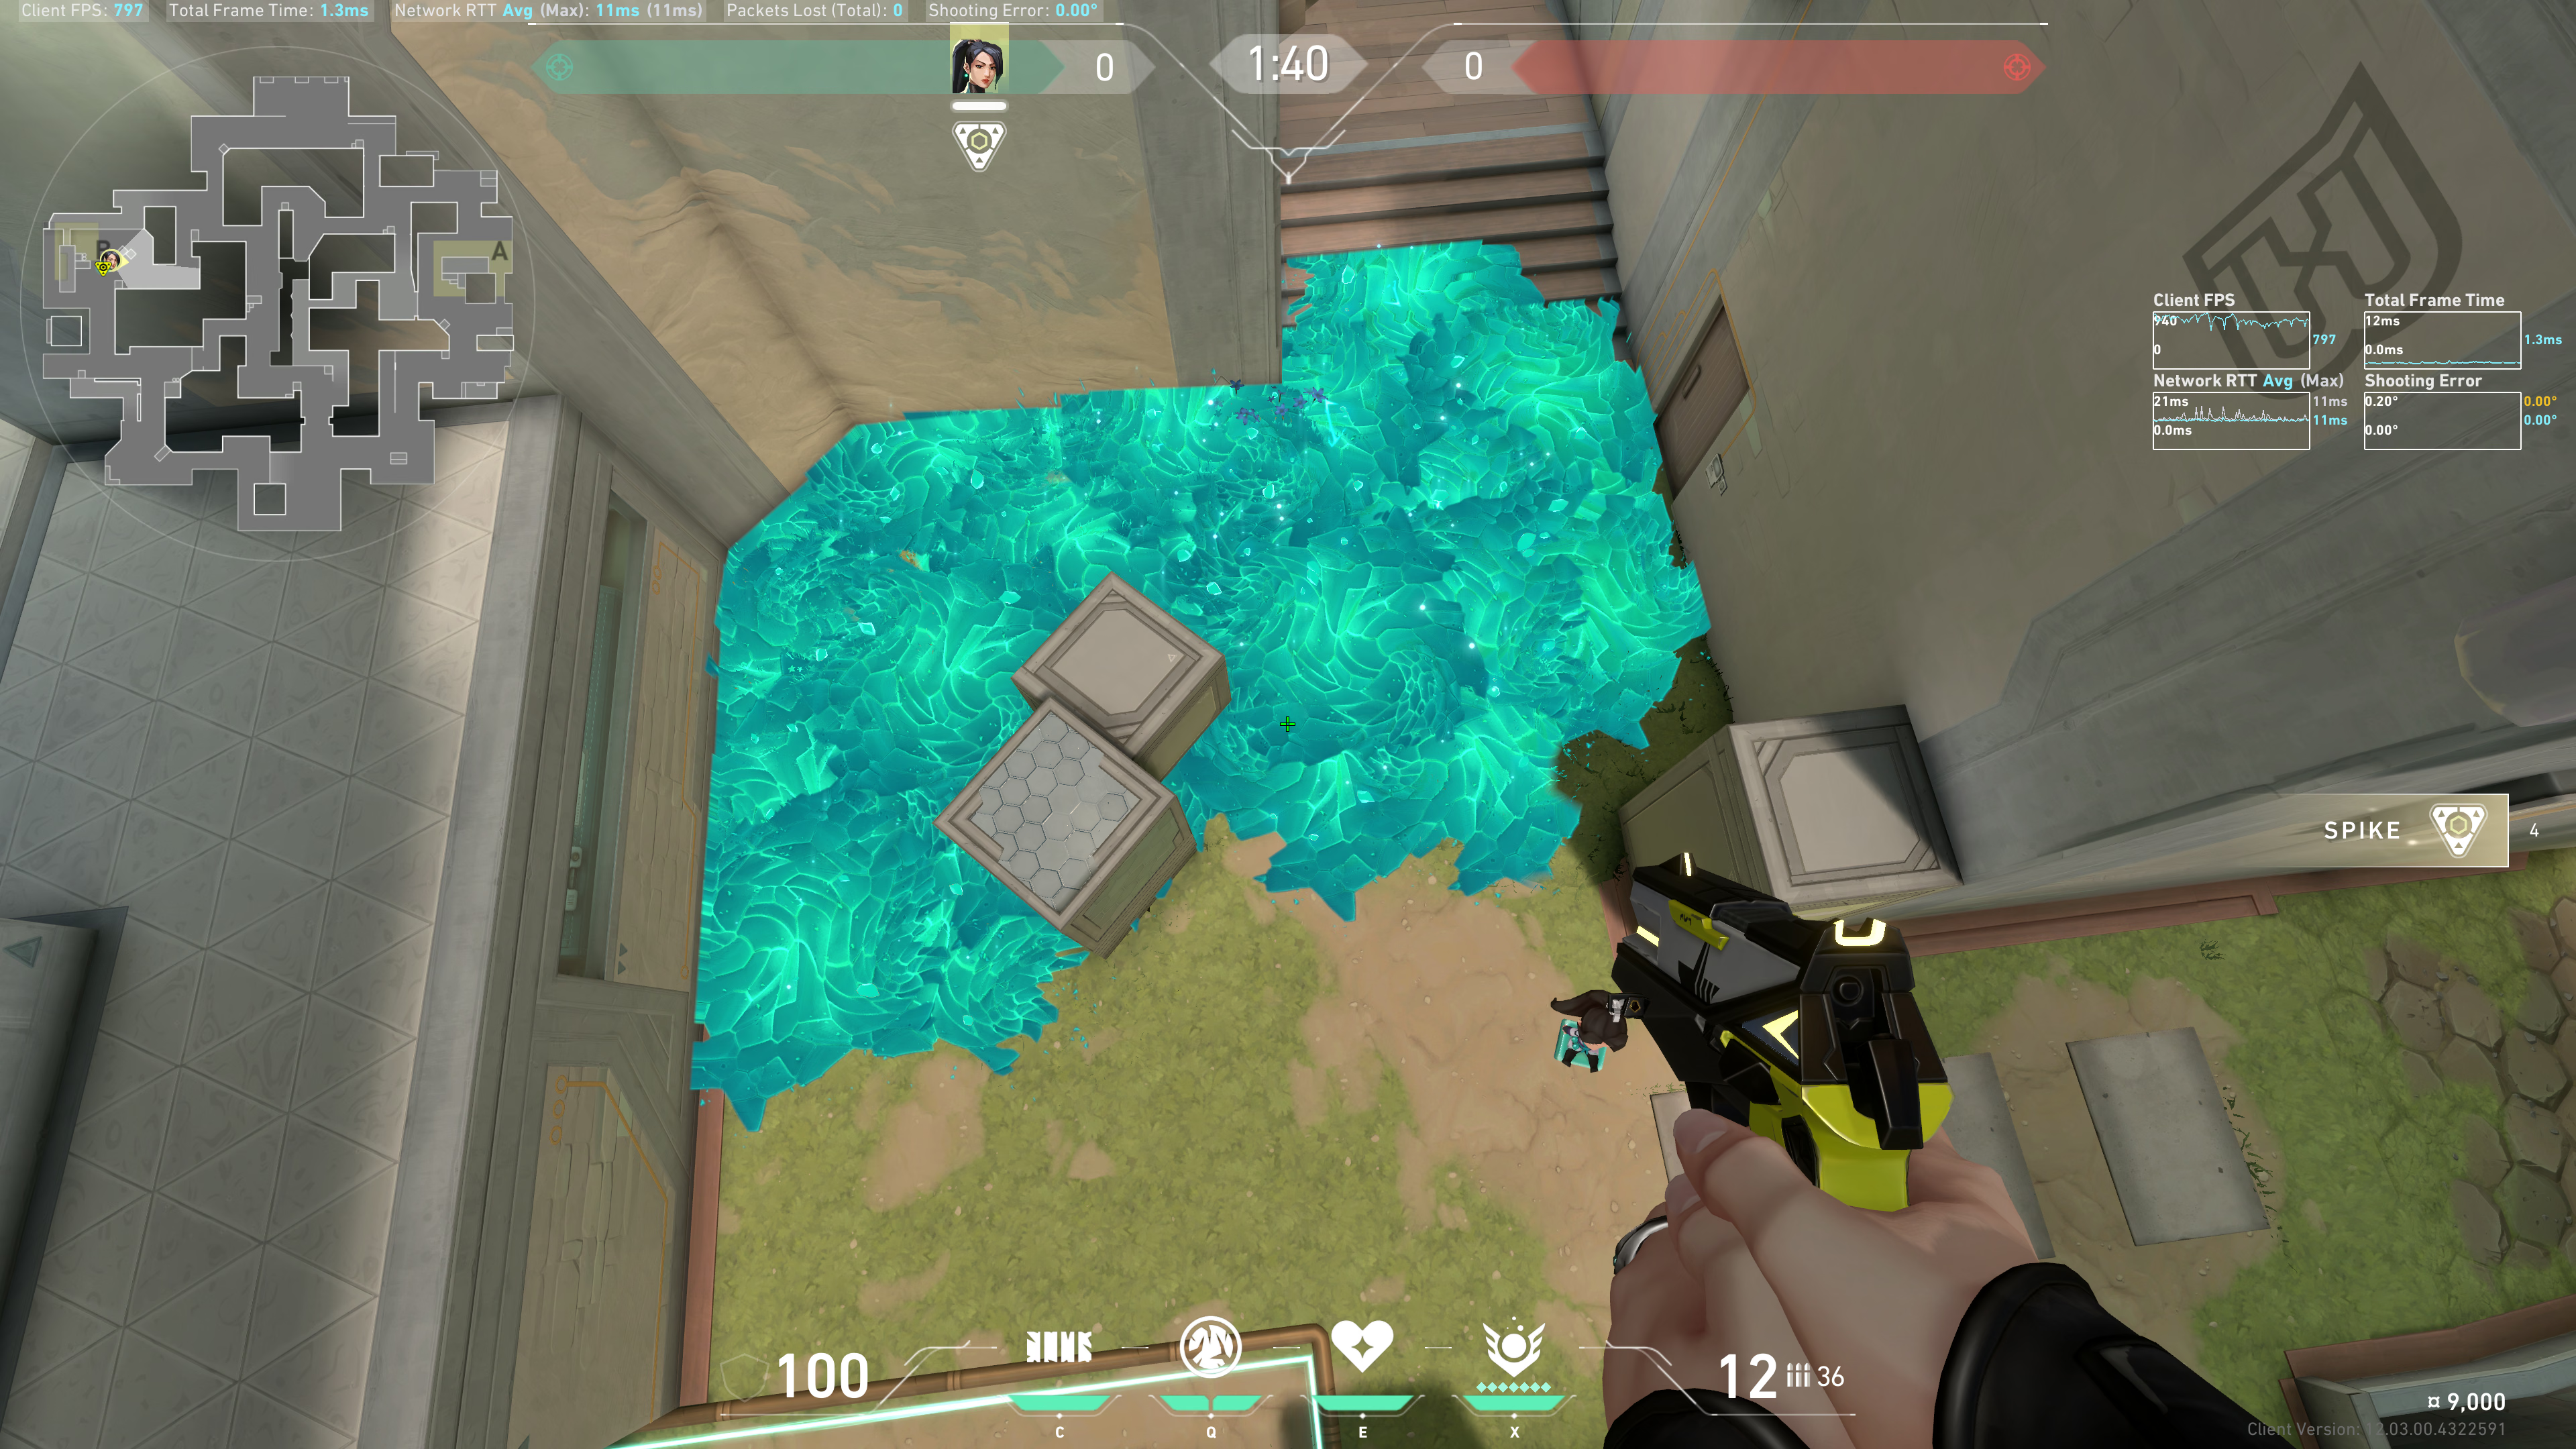
Combined results:
Heaven
Note the corner of this wood piece:
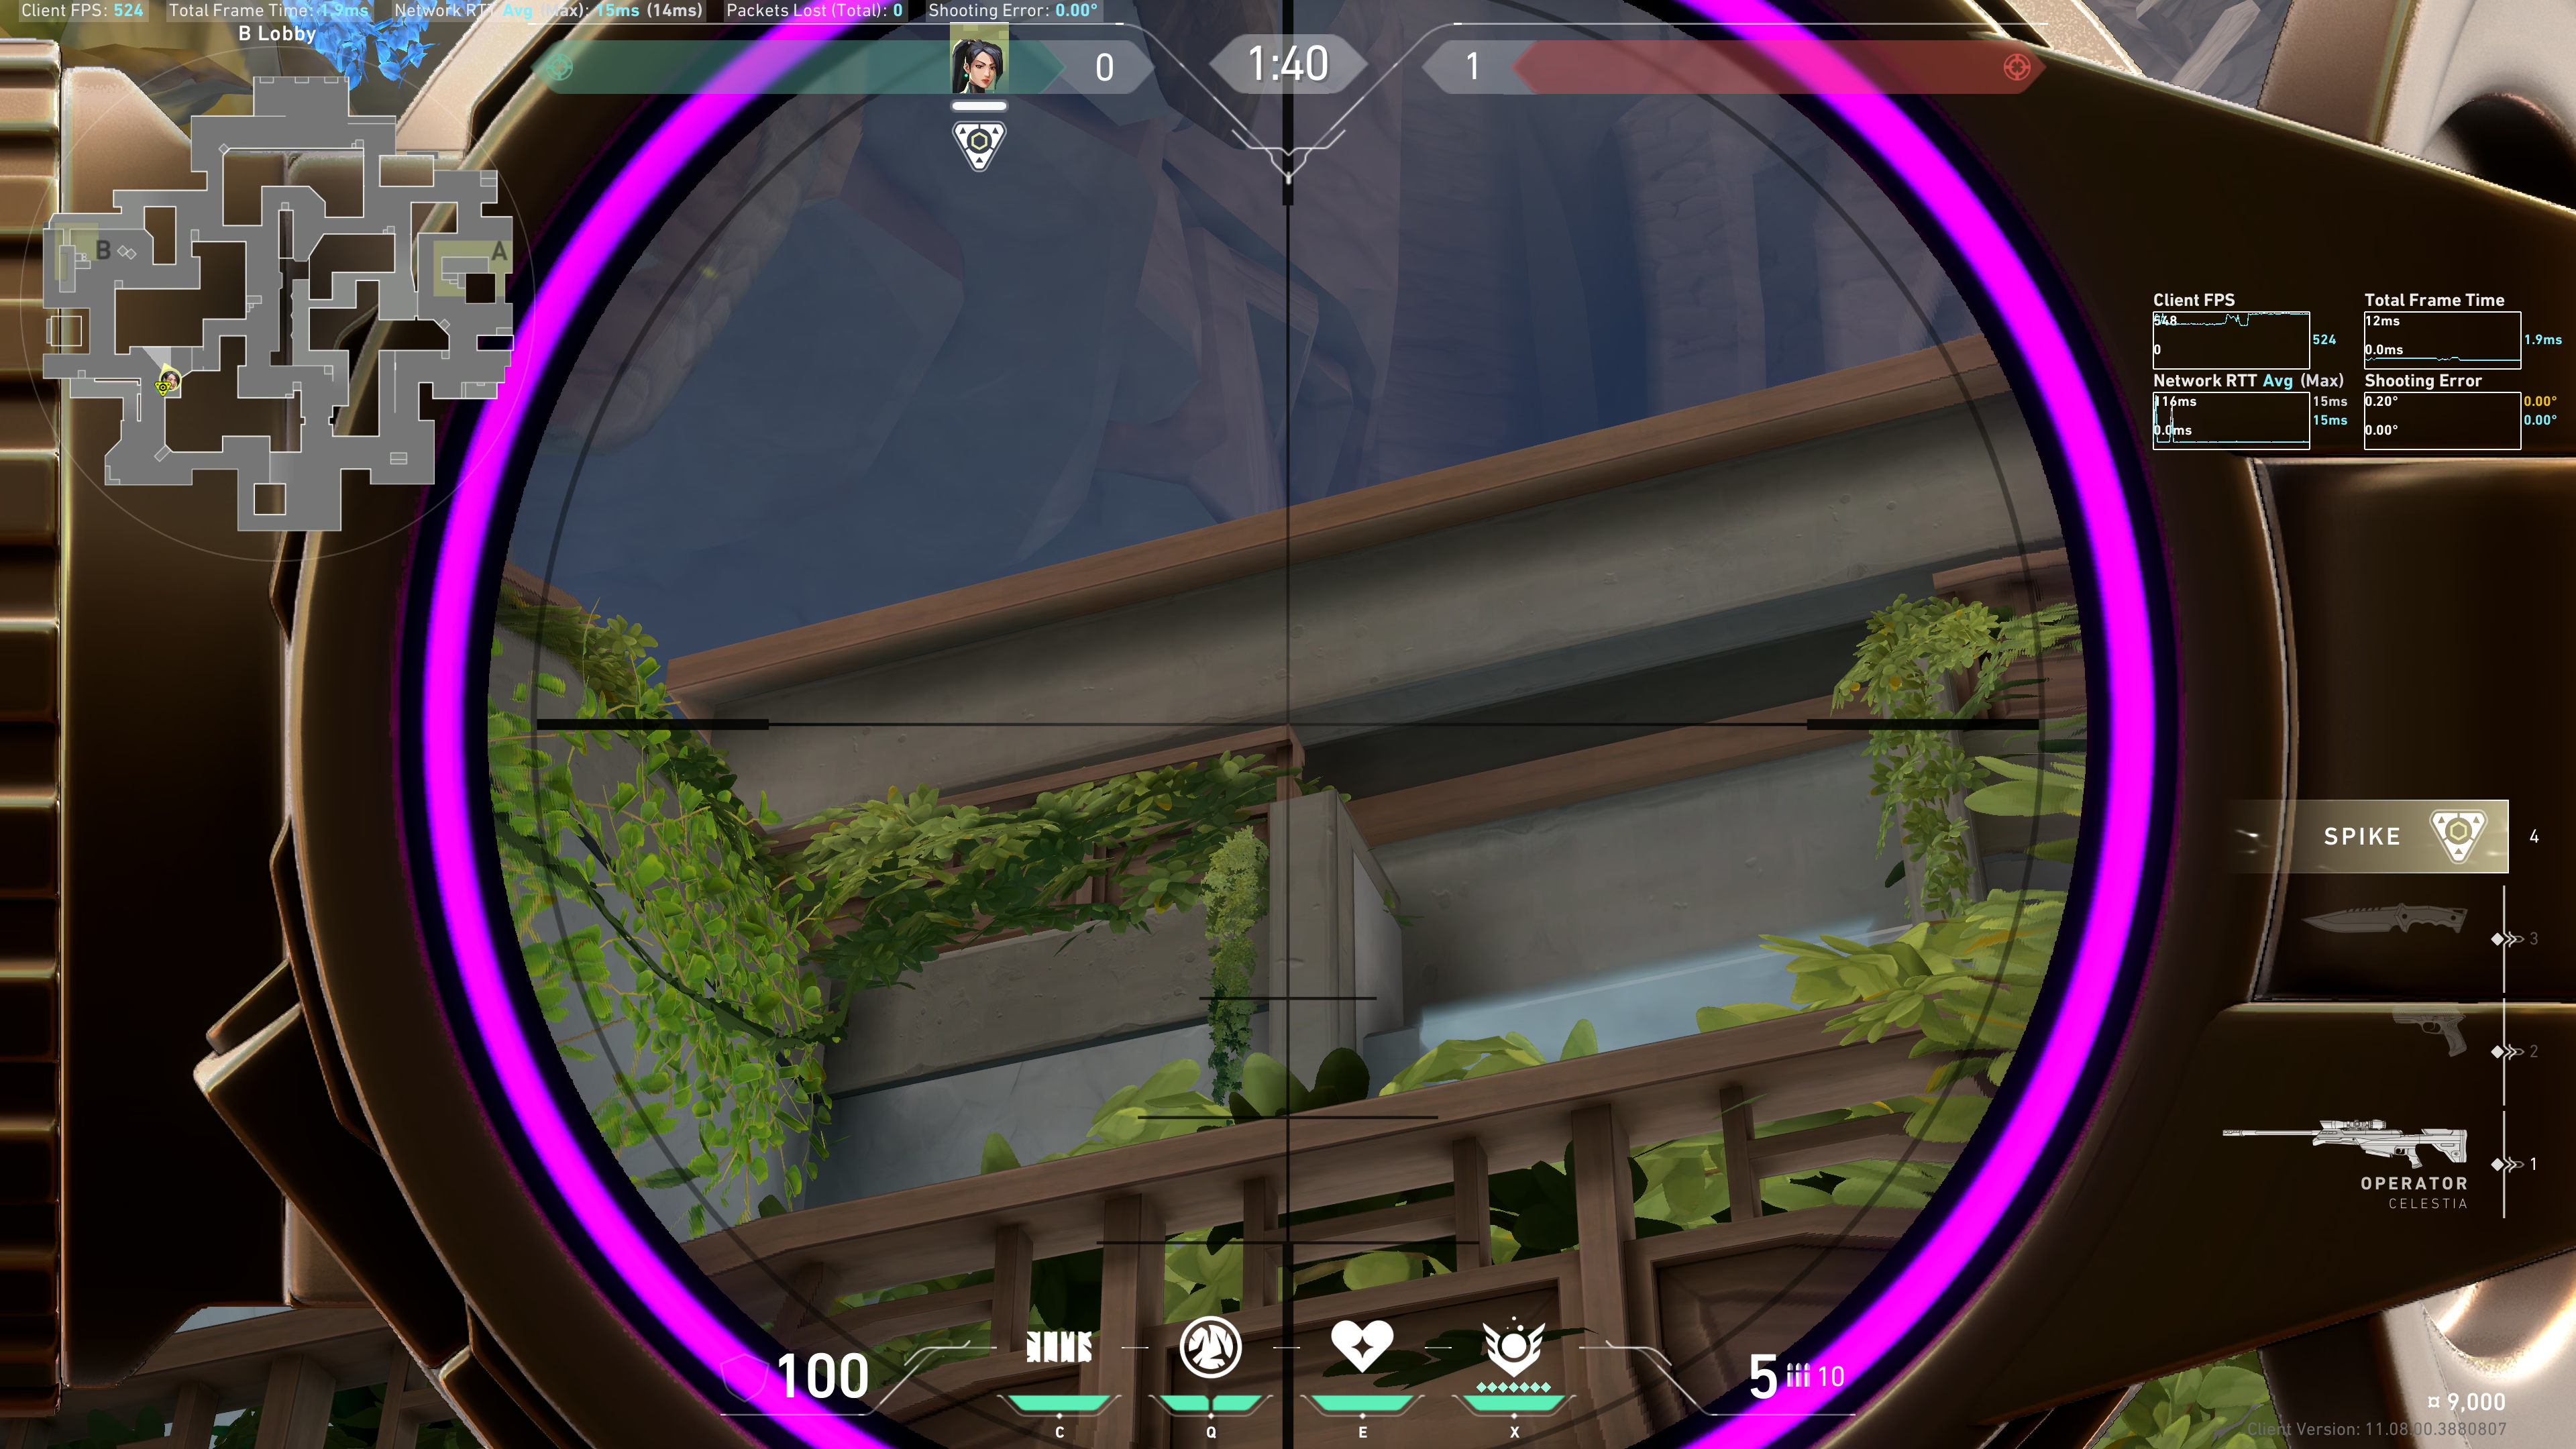
The separator bar between the Wall and Ice Orb symbols; line up the right side of that with that corner wood piece:
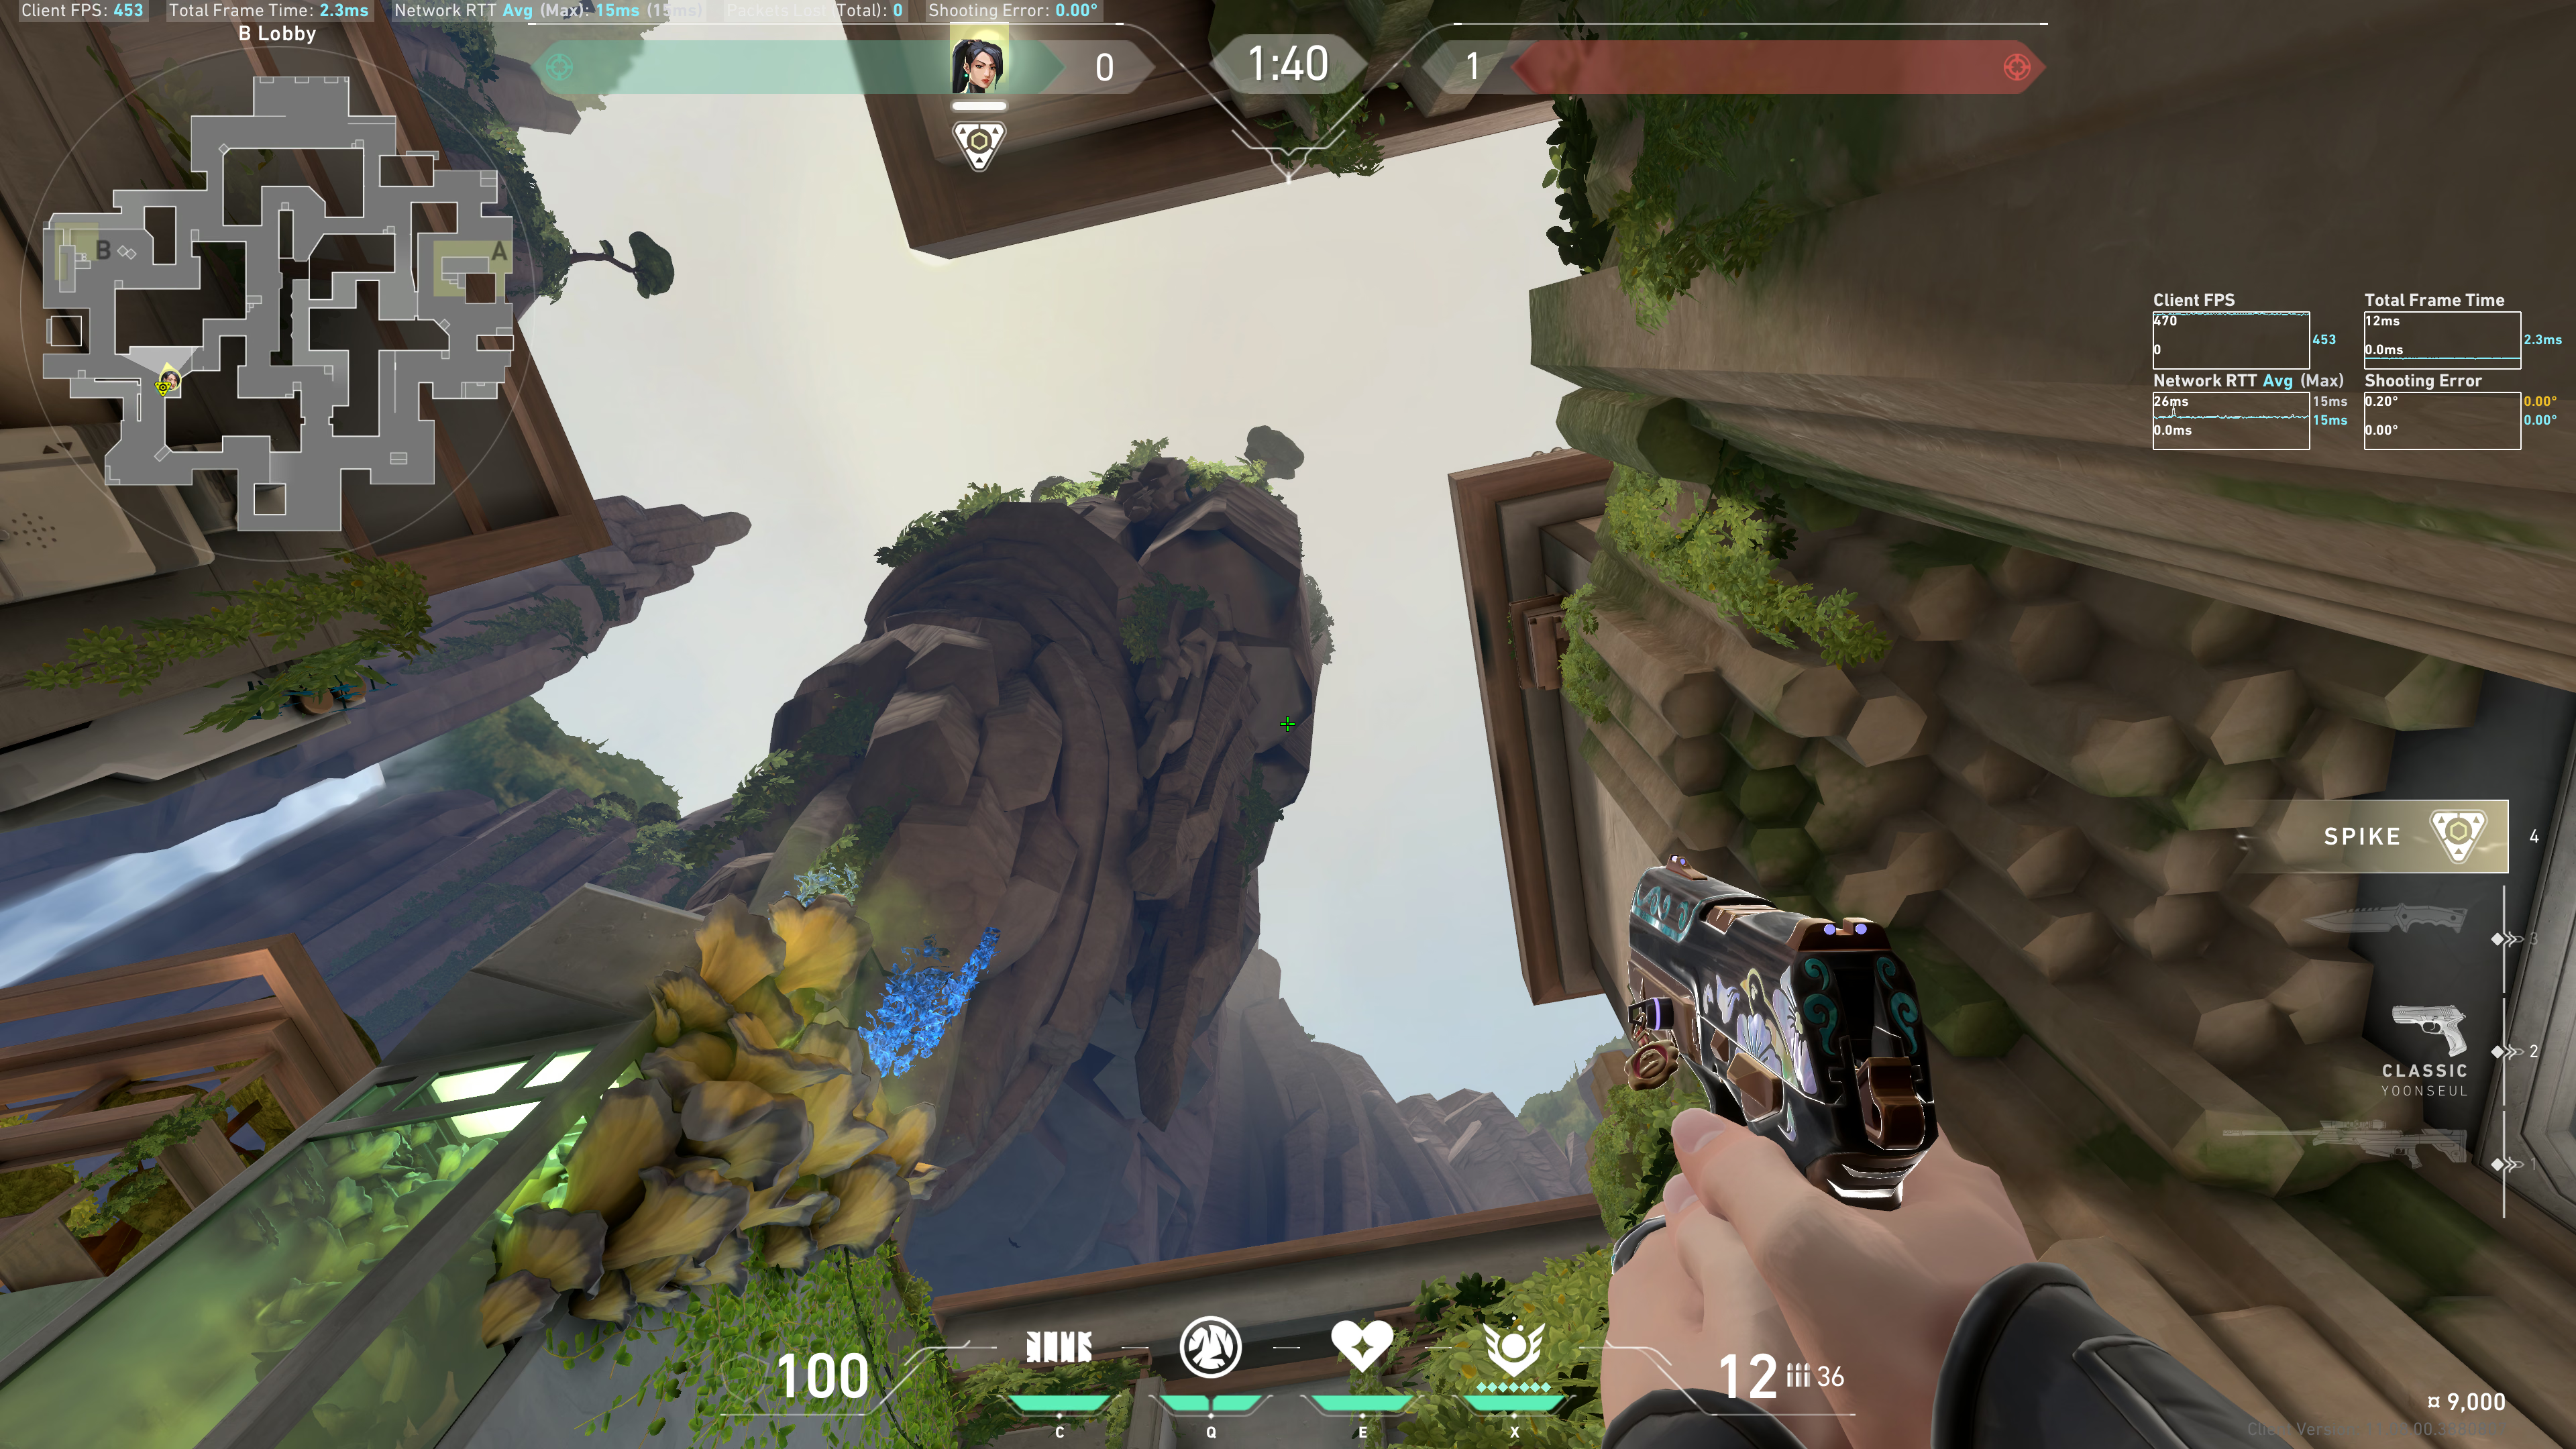
Result:
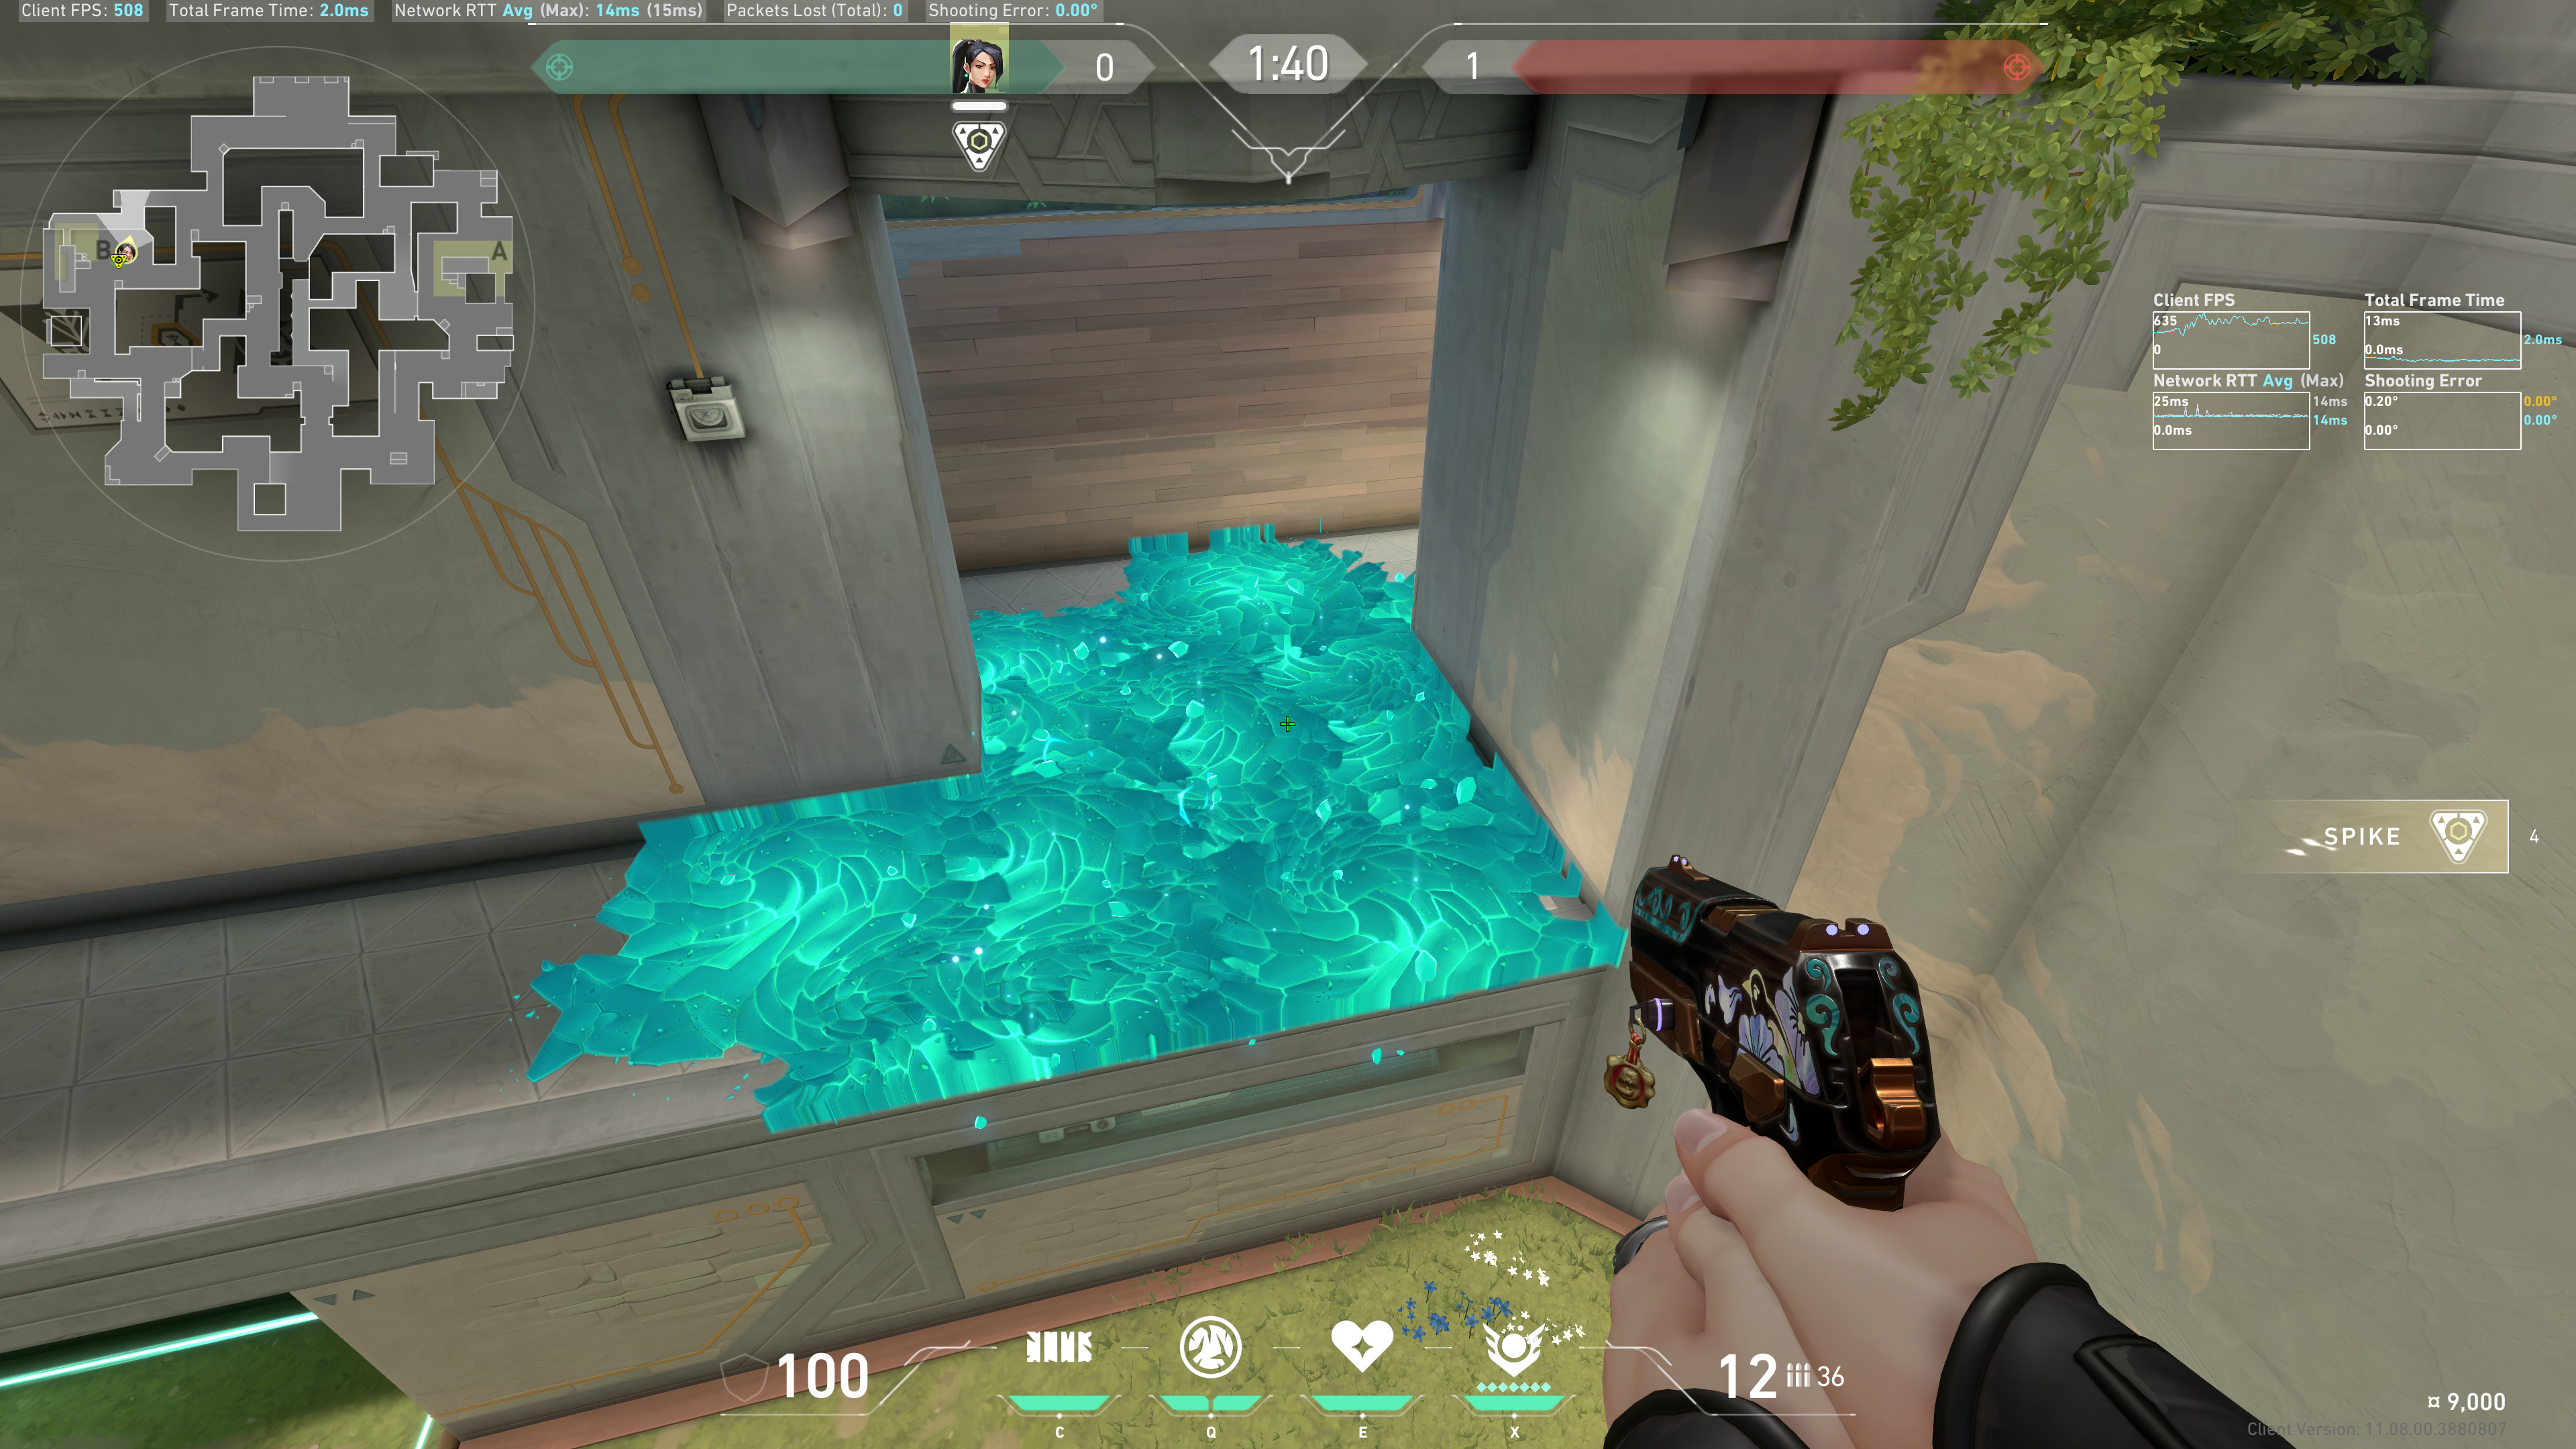
Position 2 (impromptu)
Tradeoffs: this position is faster but you are more exposed to site and potential defensive pushes. Use this position if your team executes faster, or you're not worried about initial gunfights between defenders at B Site and attackers at B Main/Window.
Back Site
Hug anywhere along this wall:
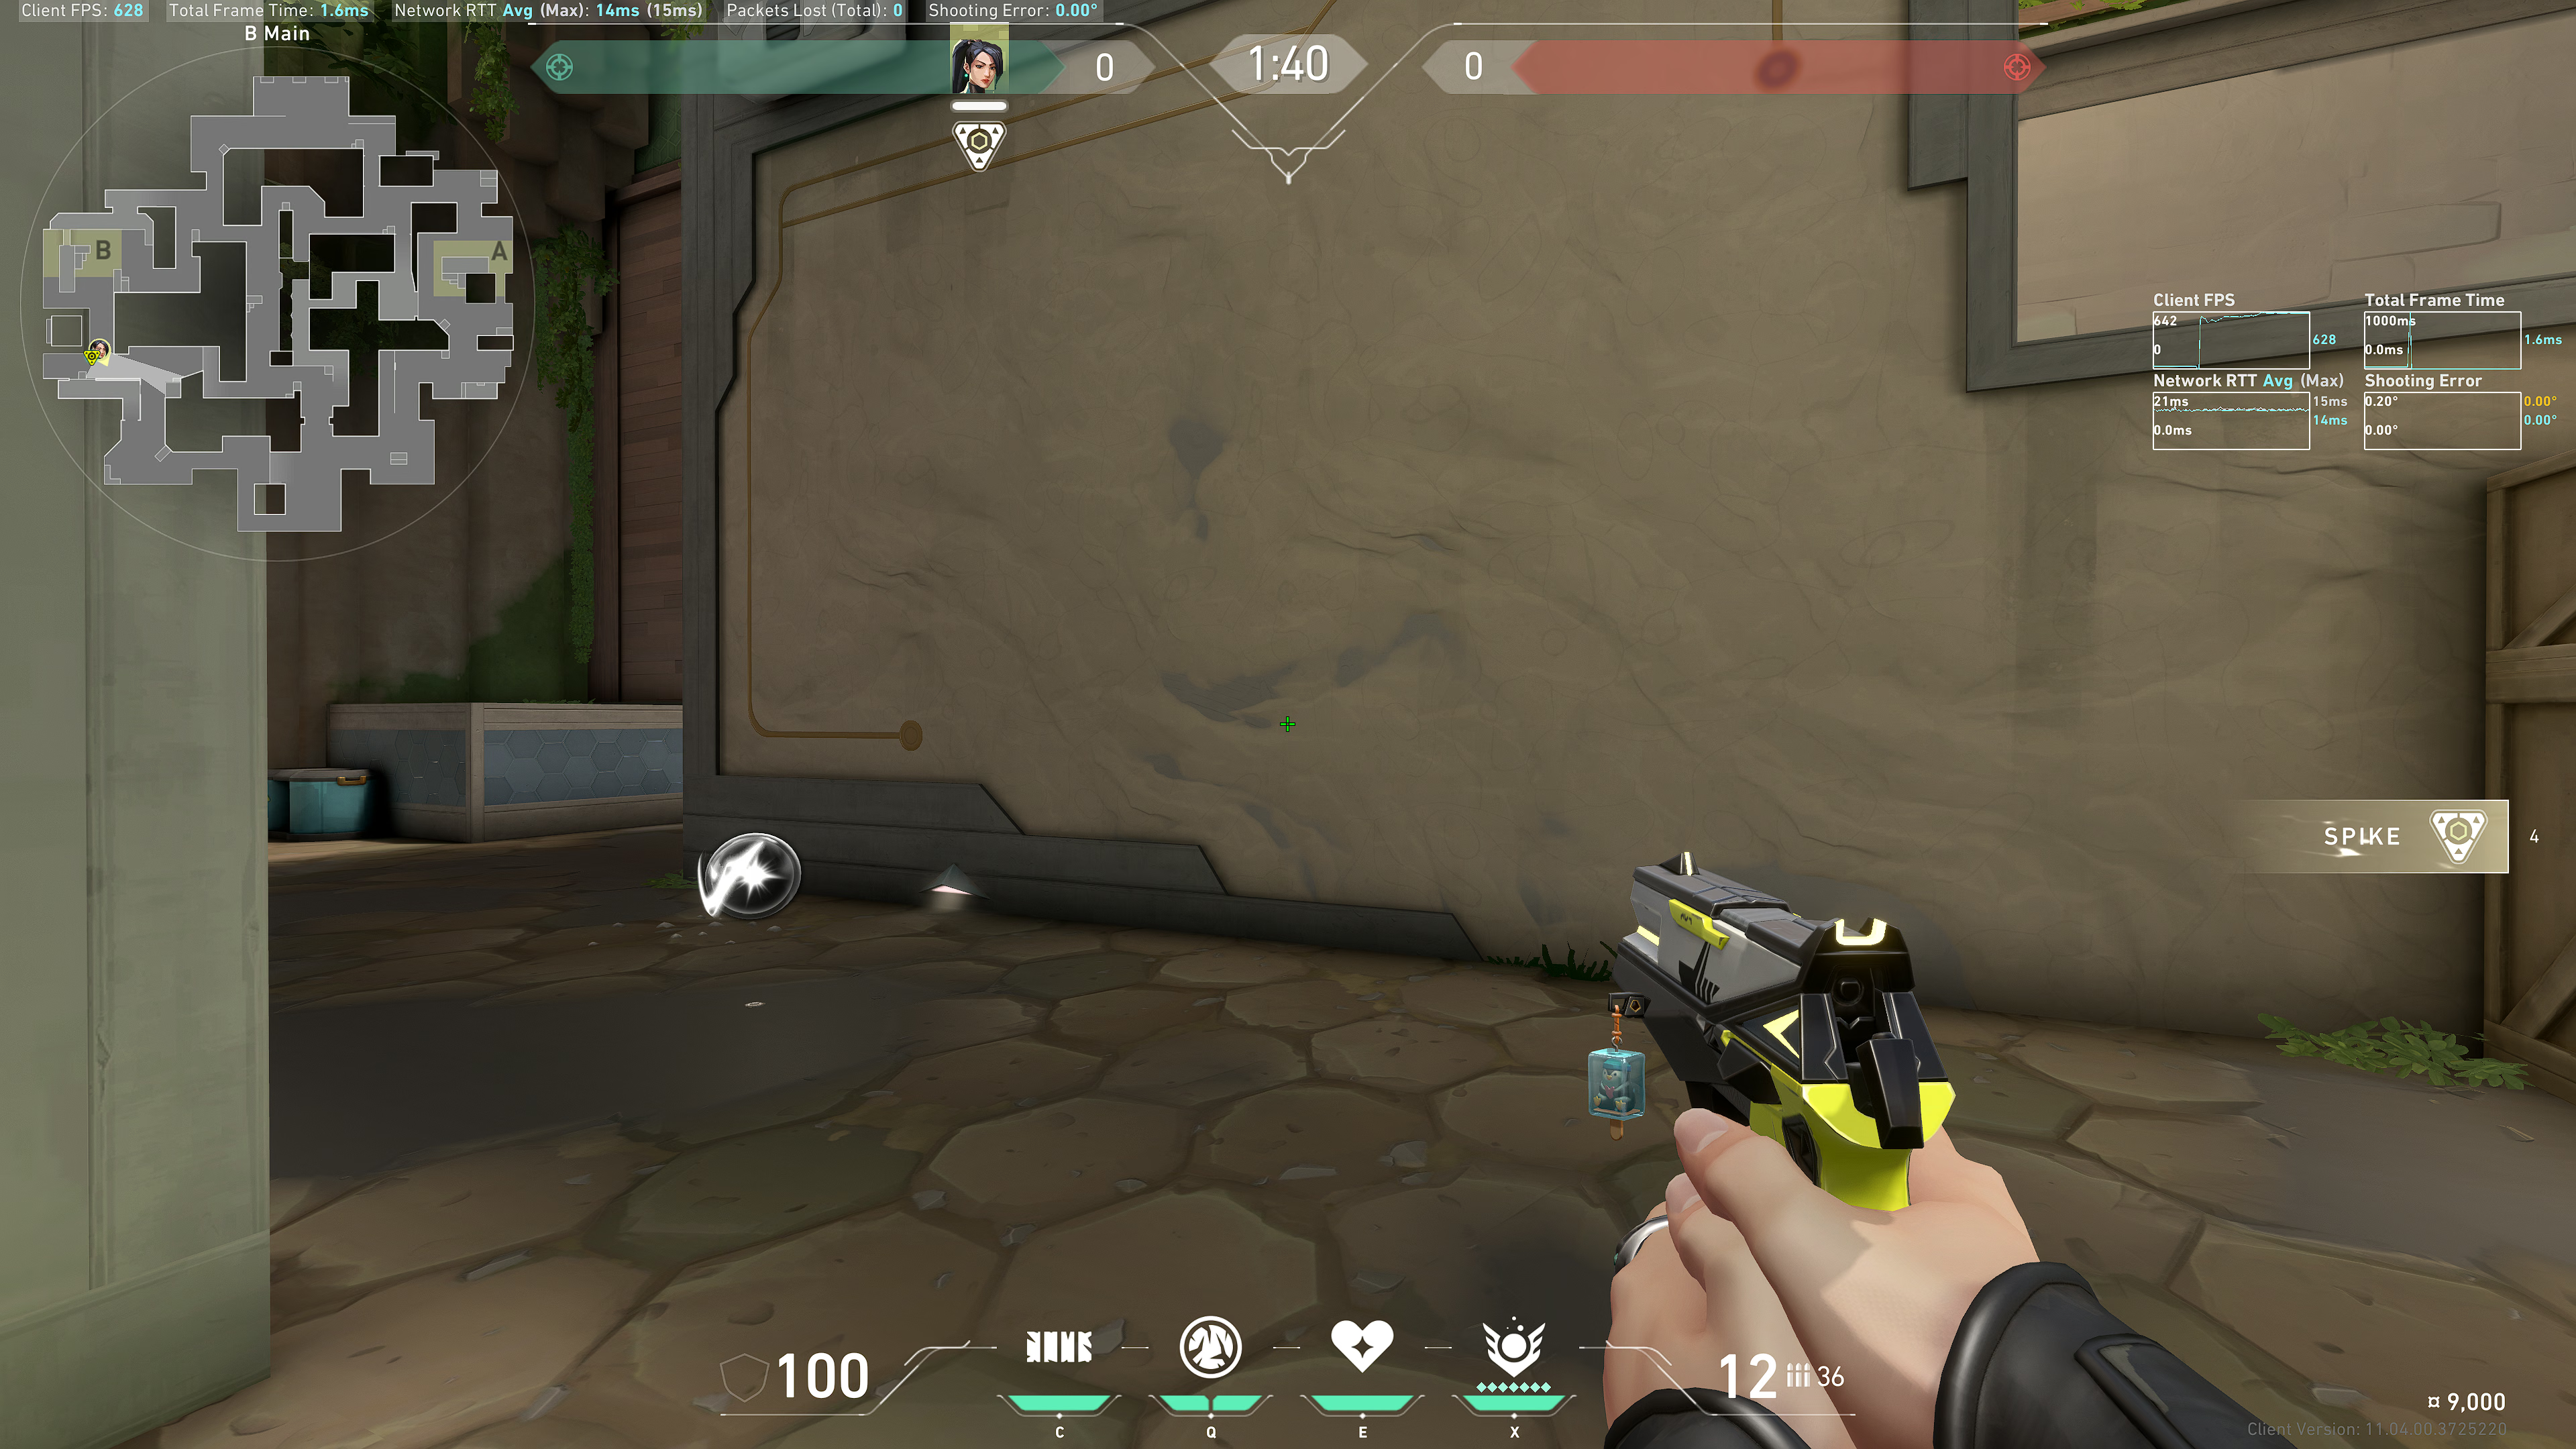
Aim at the left of this gold pattern:
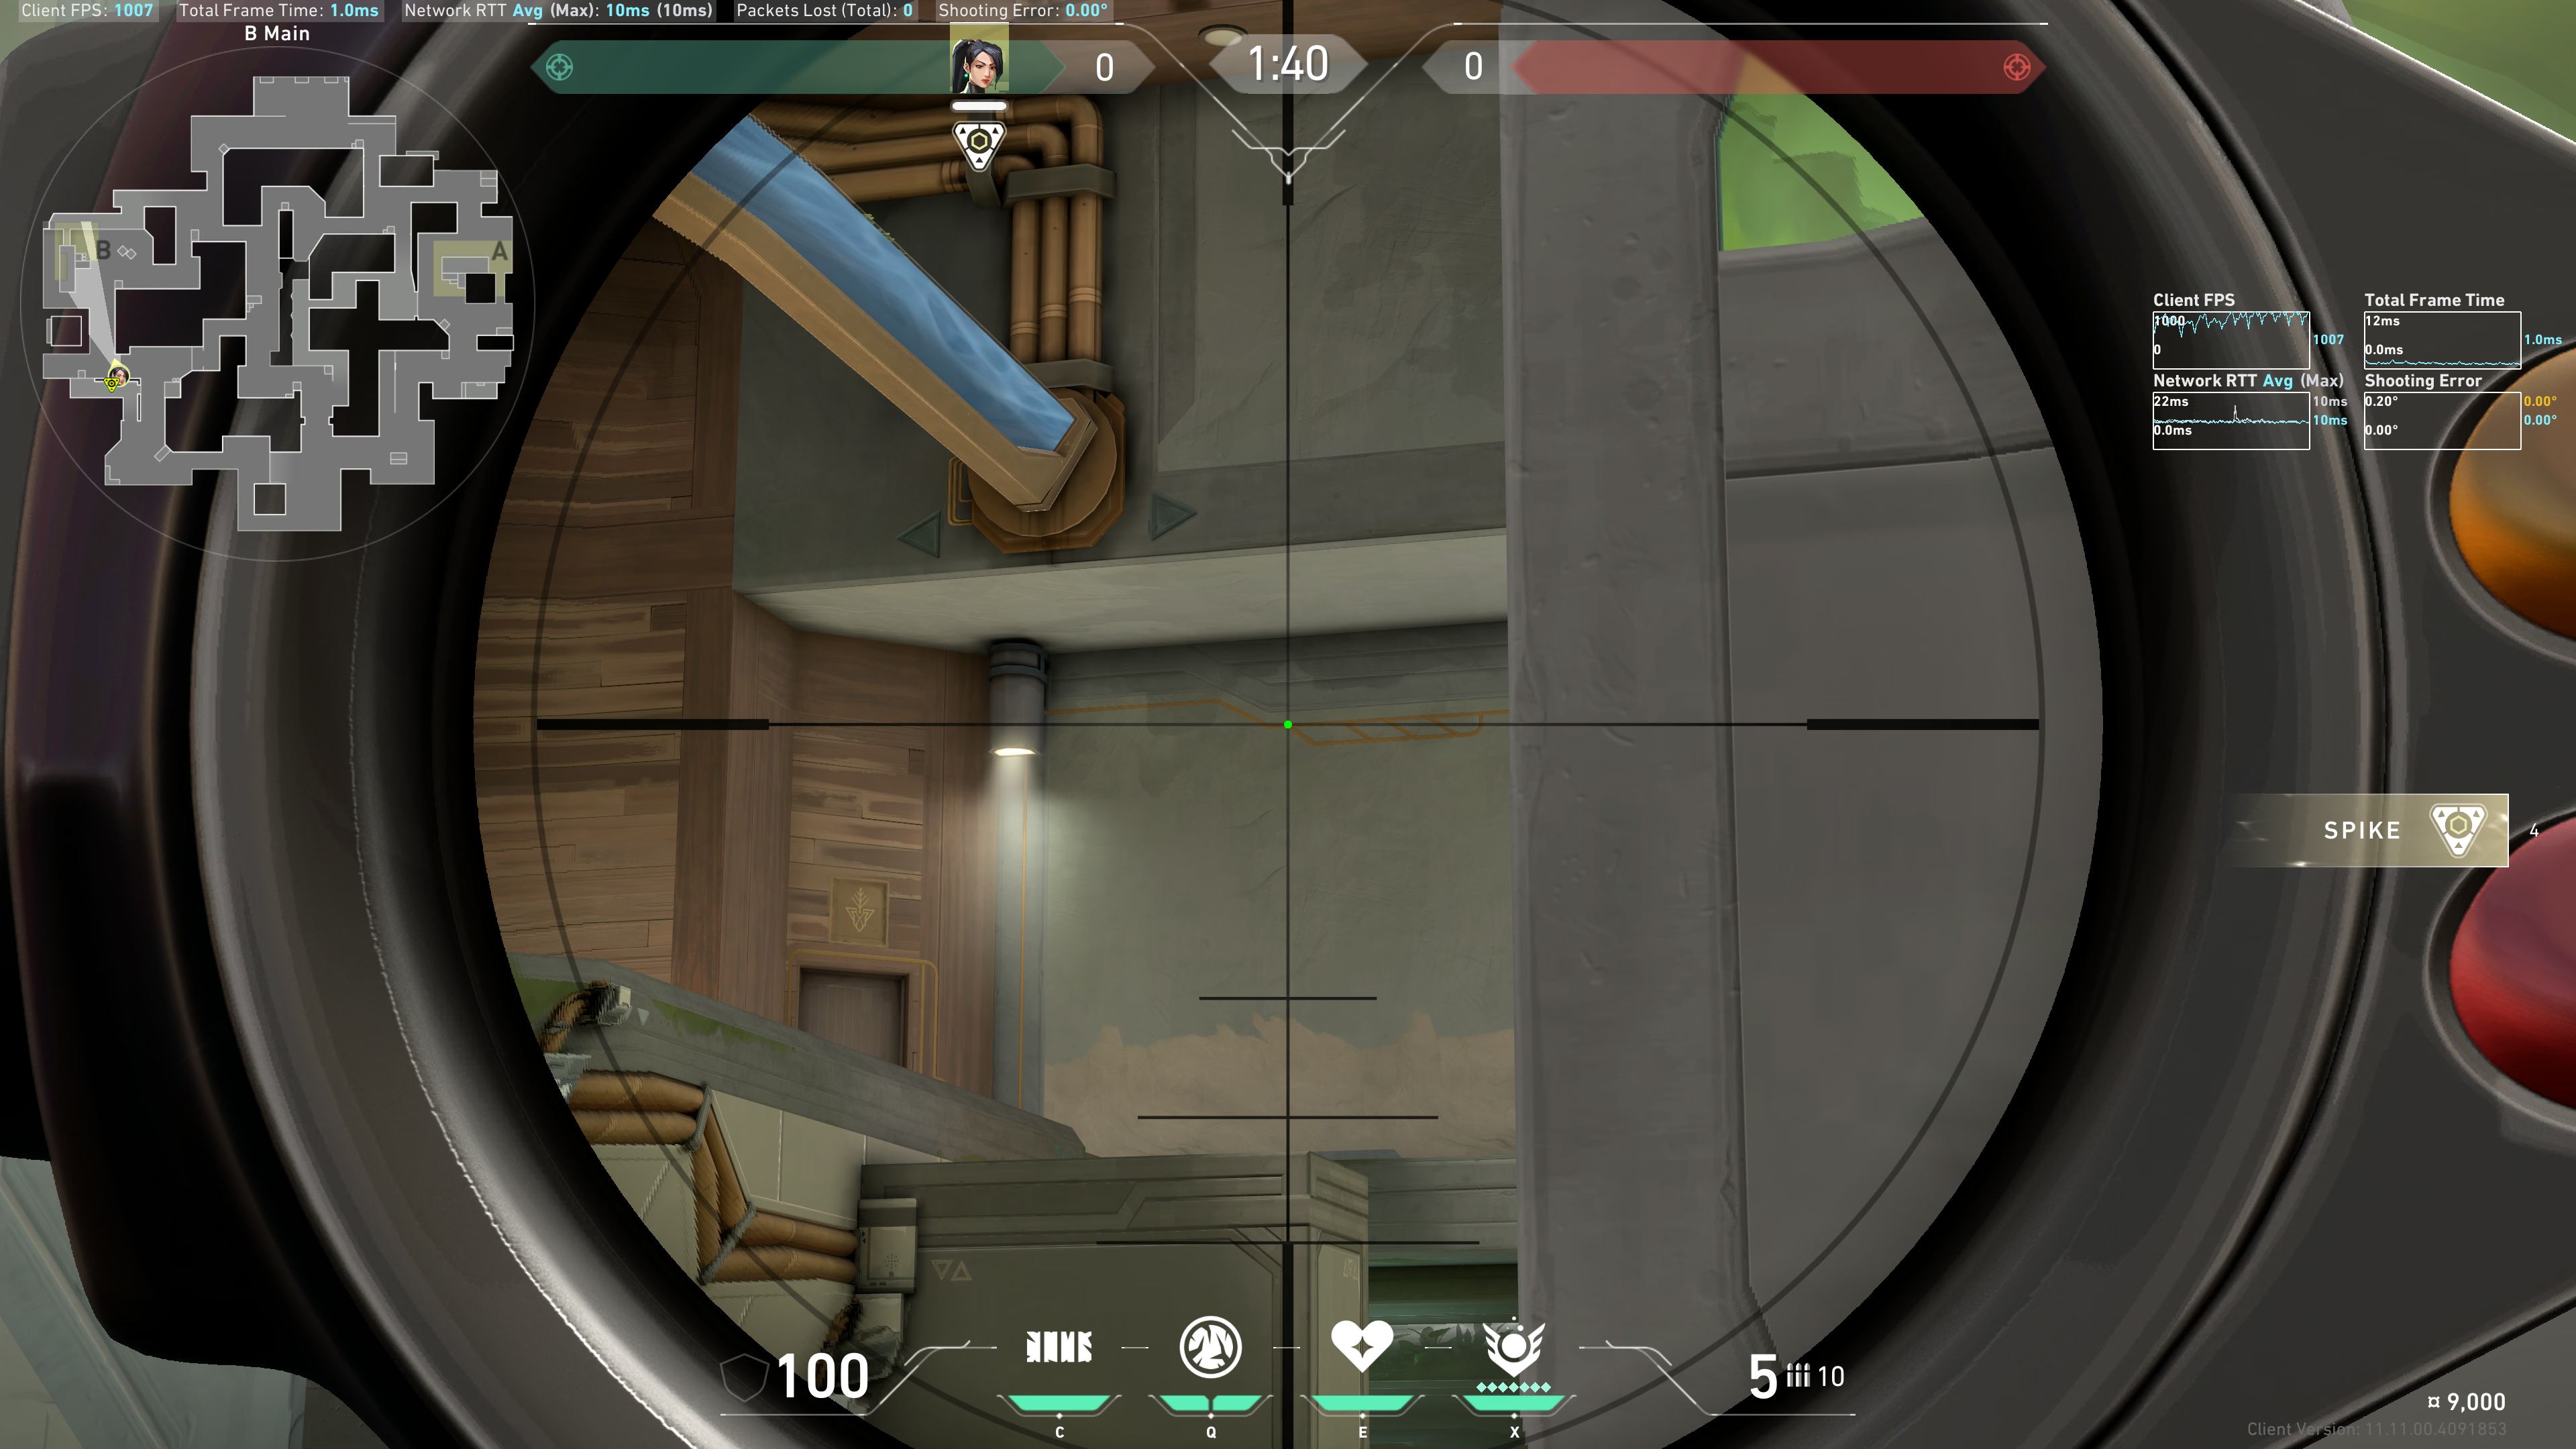
Example result:
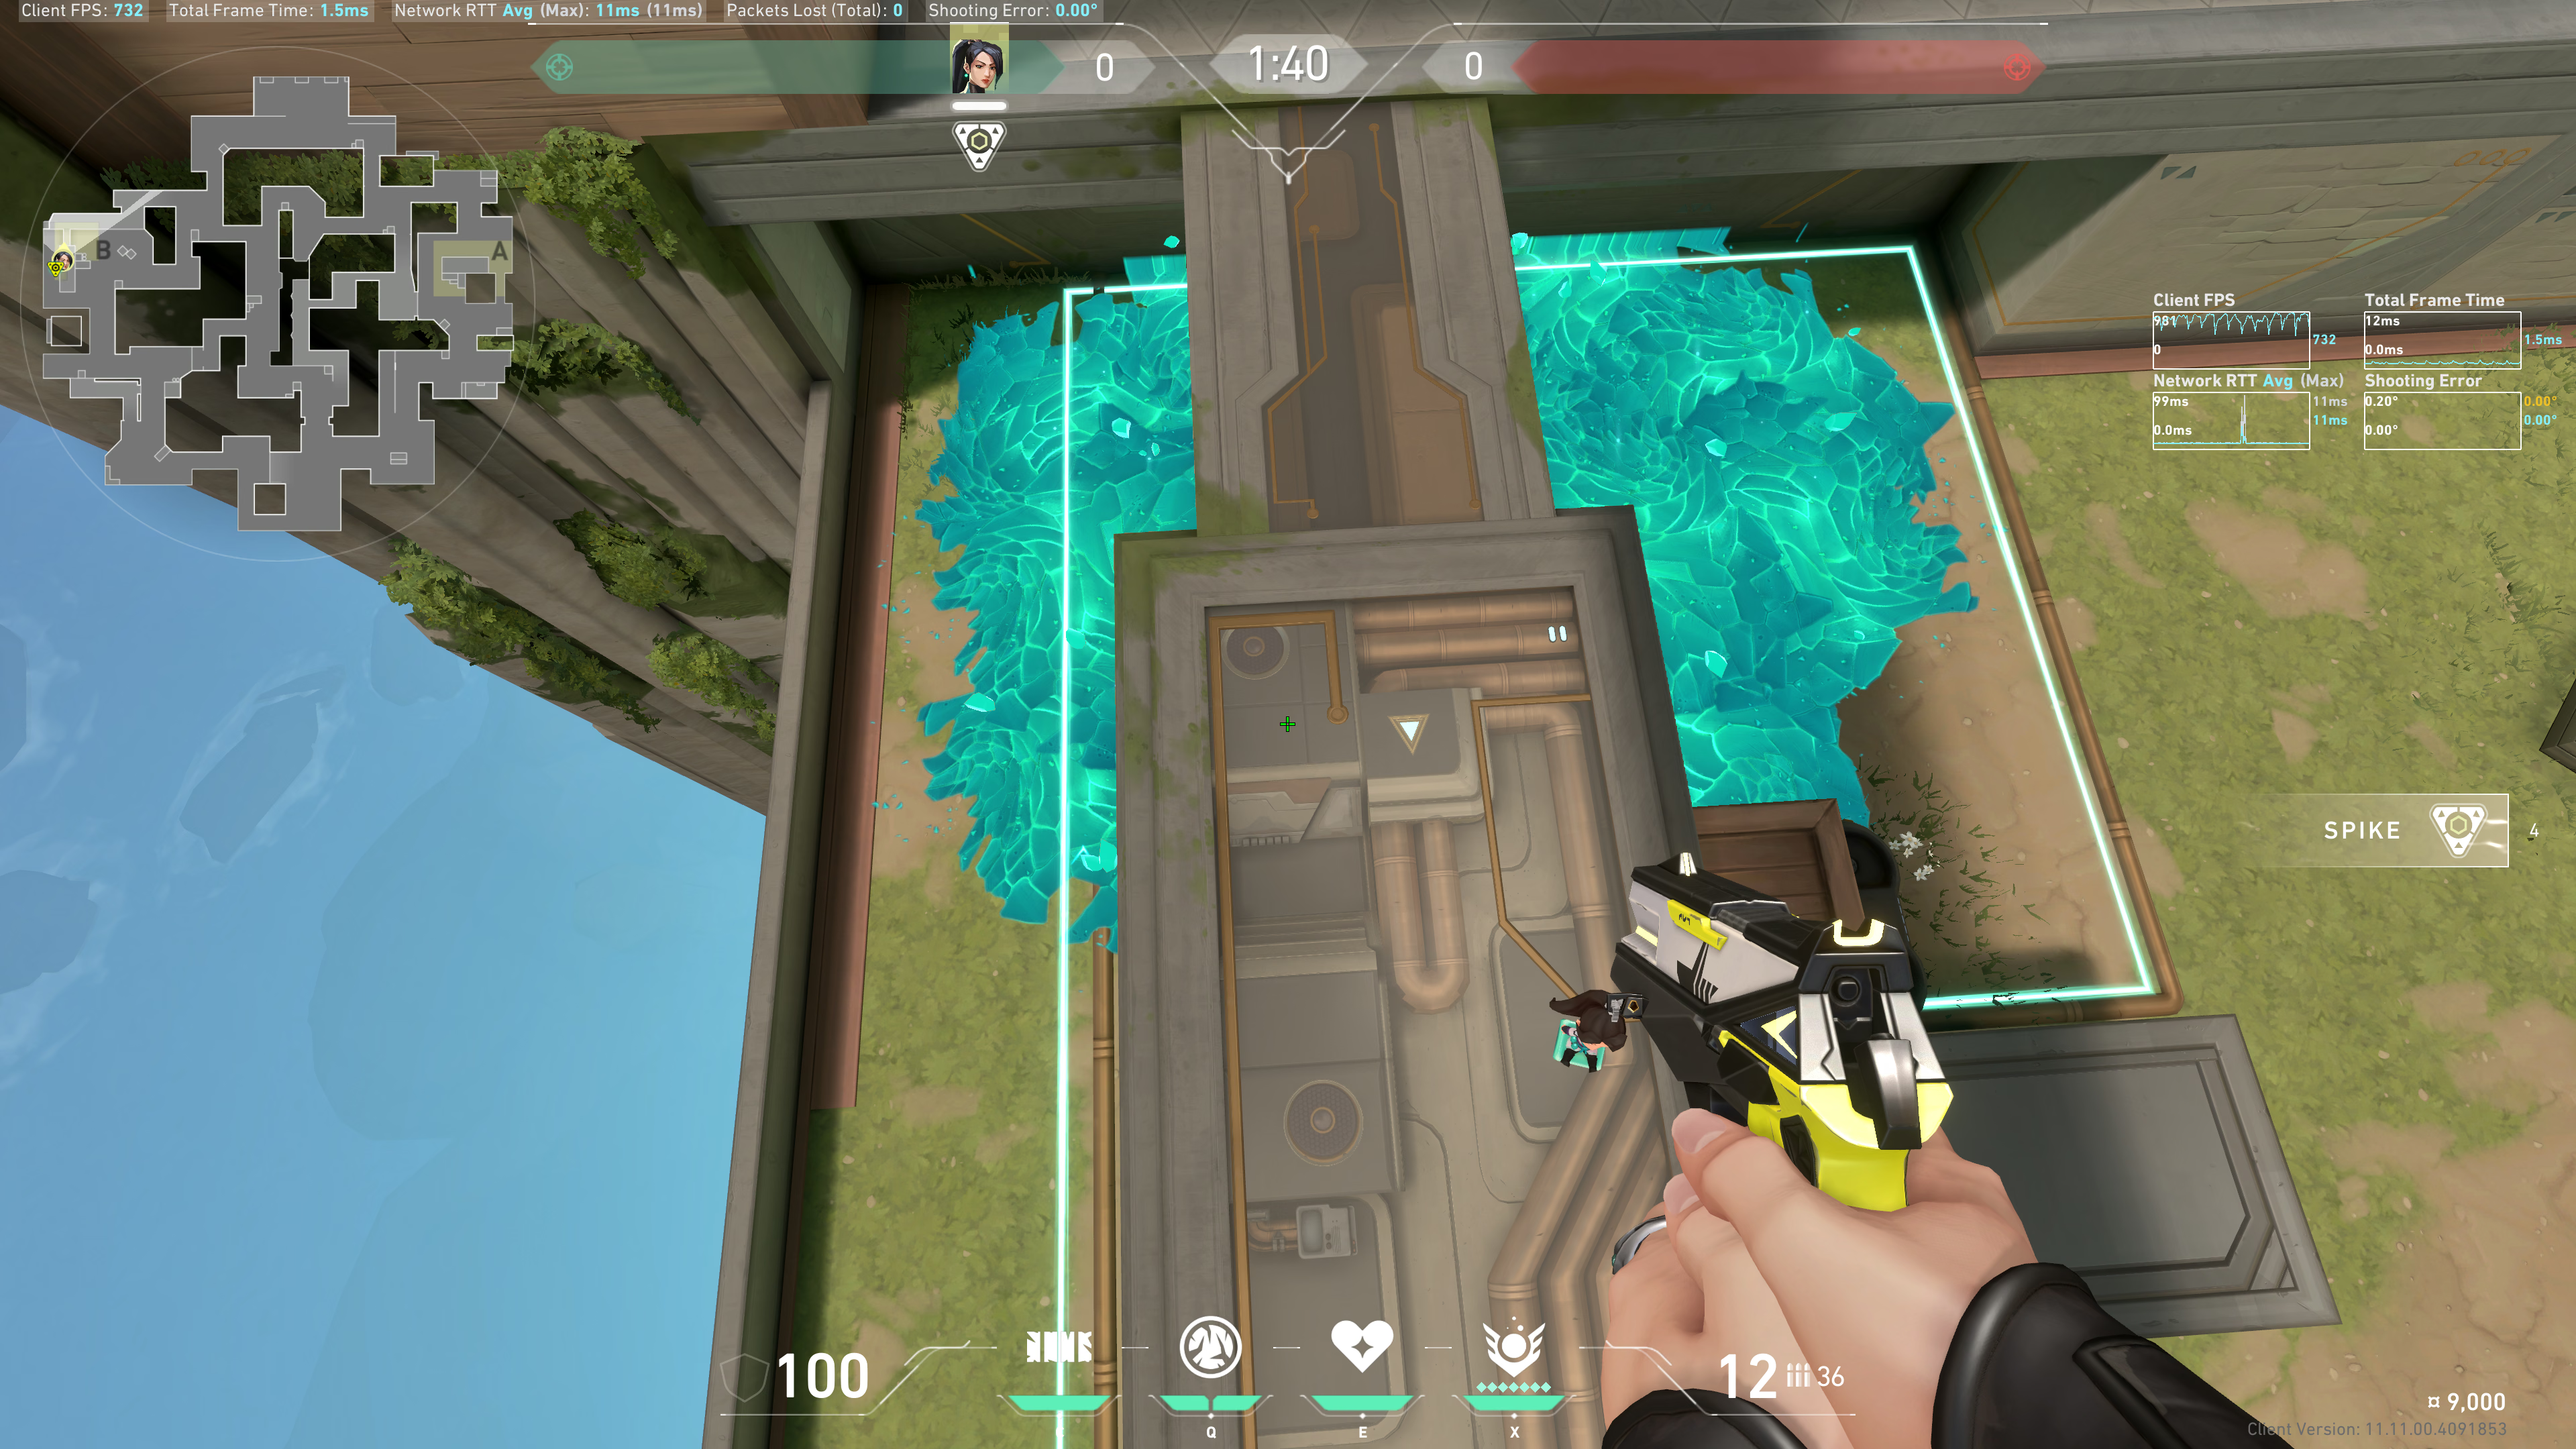
If you want to be slightly safer, then you can hide from the site angle, and only expose to top site.
Aim slightly above the light output of this lamp:
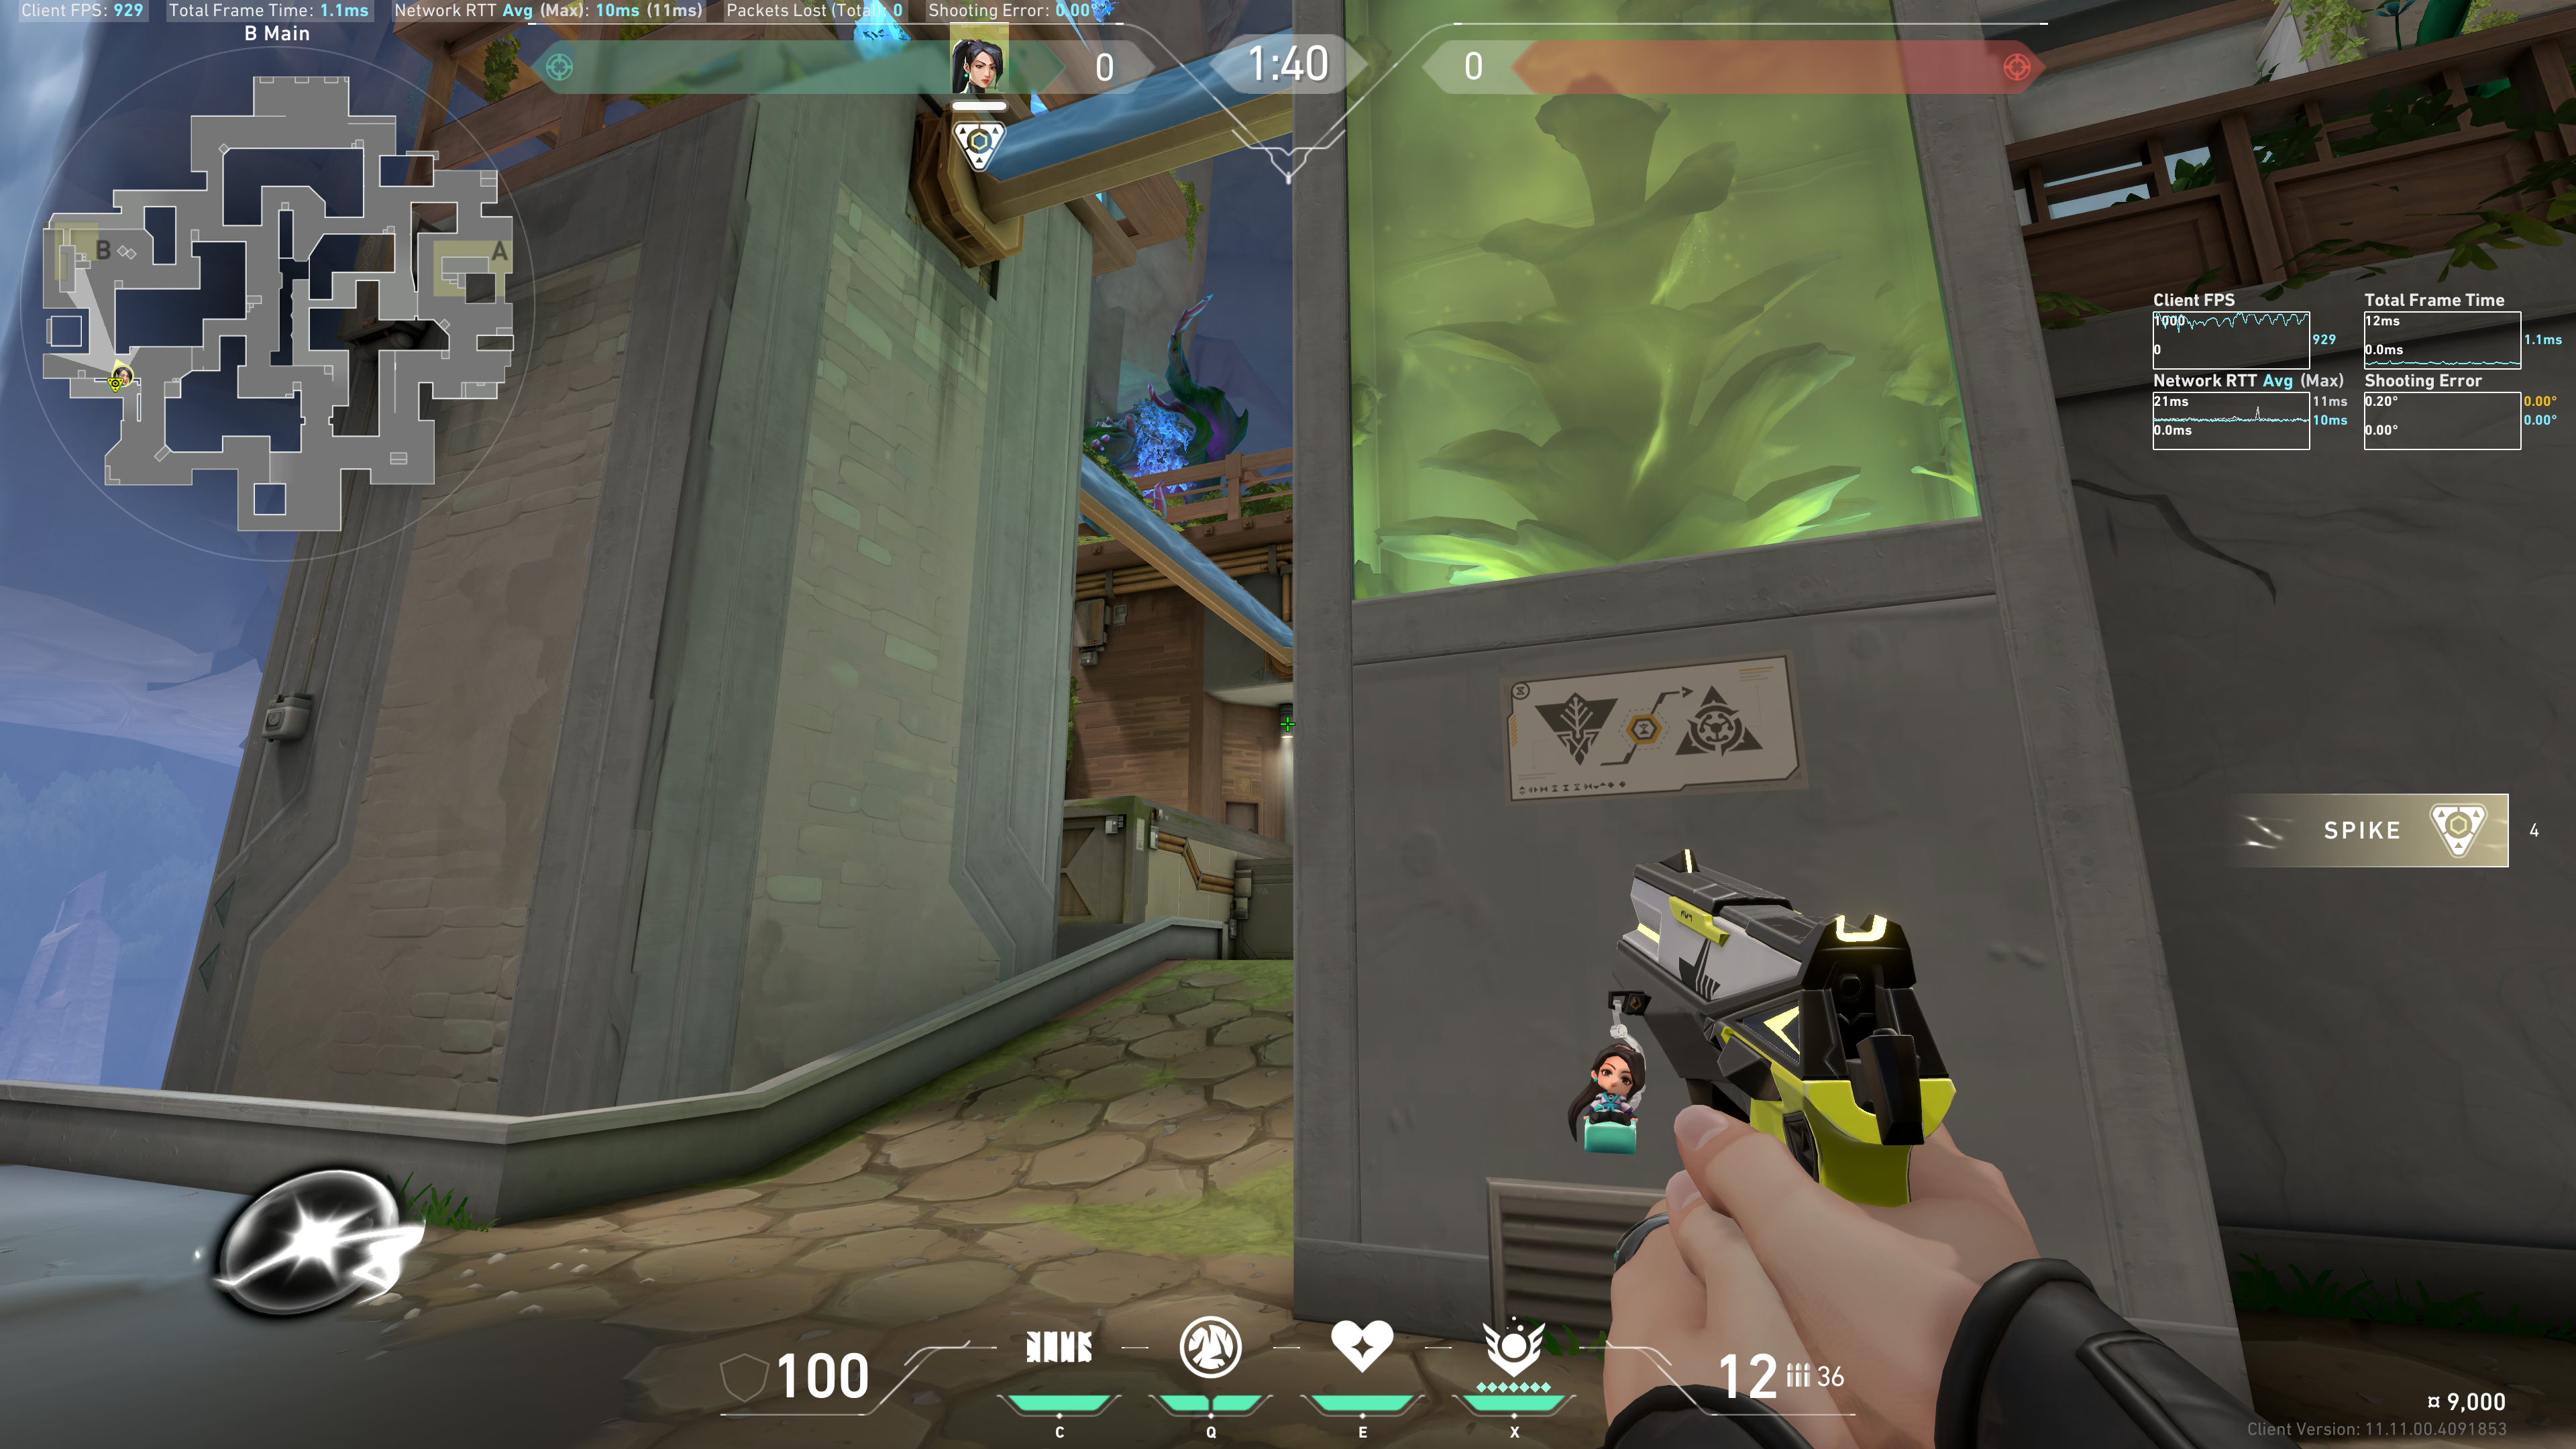
Example result:
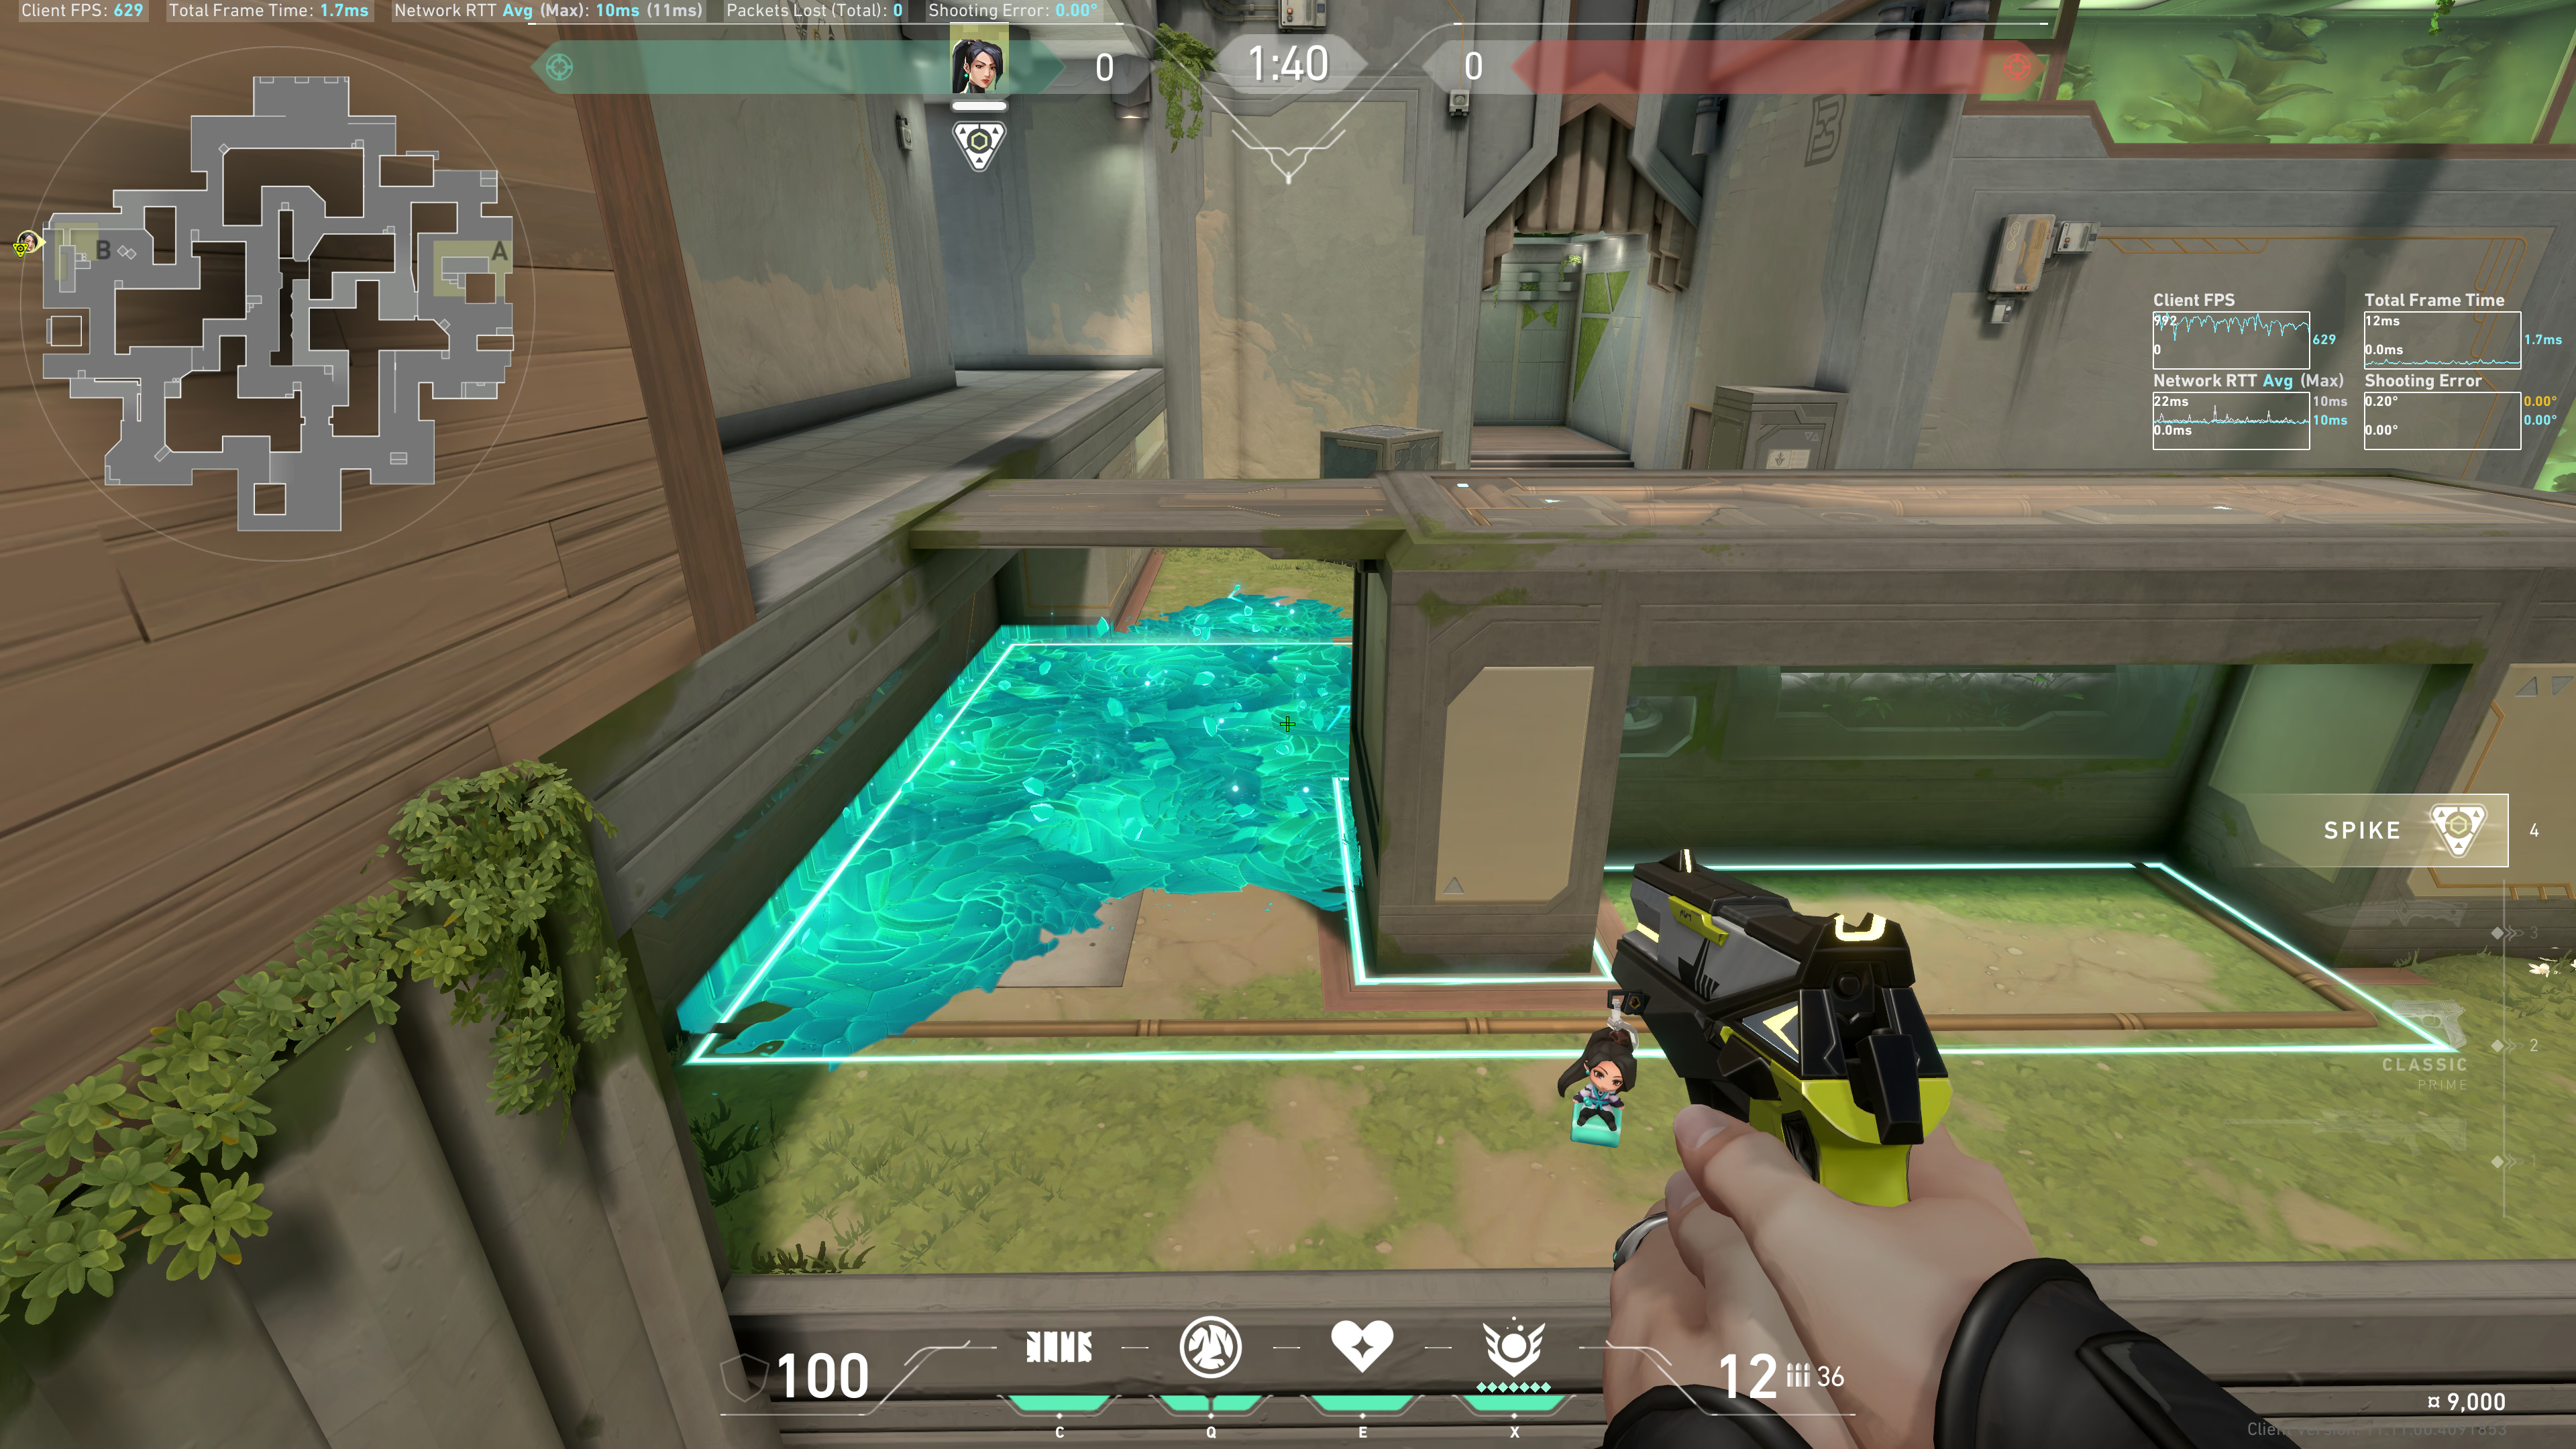
Note: depending on the height, the Slow Orb might bounce differently, but the result is similar.
Position 3 (round start)
Note: use this if your team just runs it down.
Tuck between this wall and the barrier:
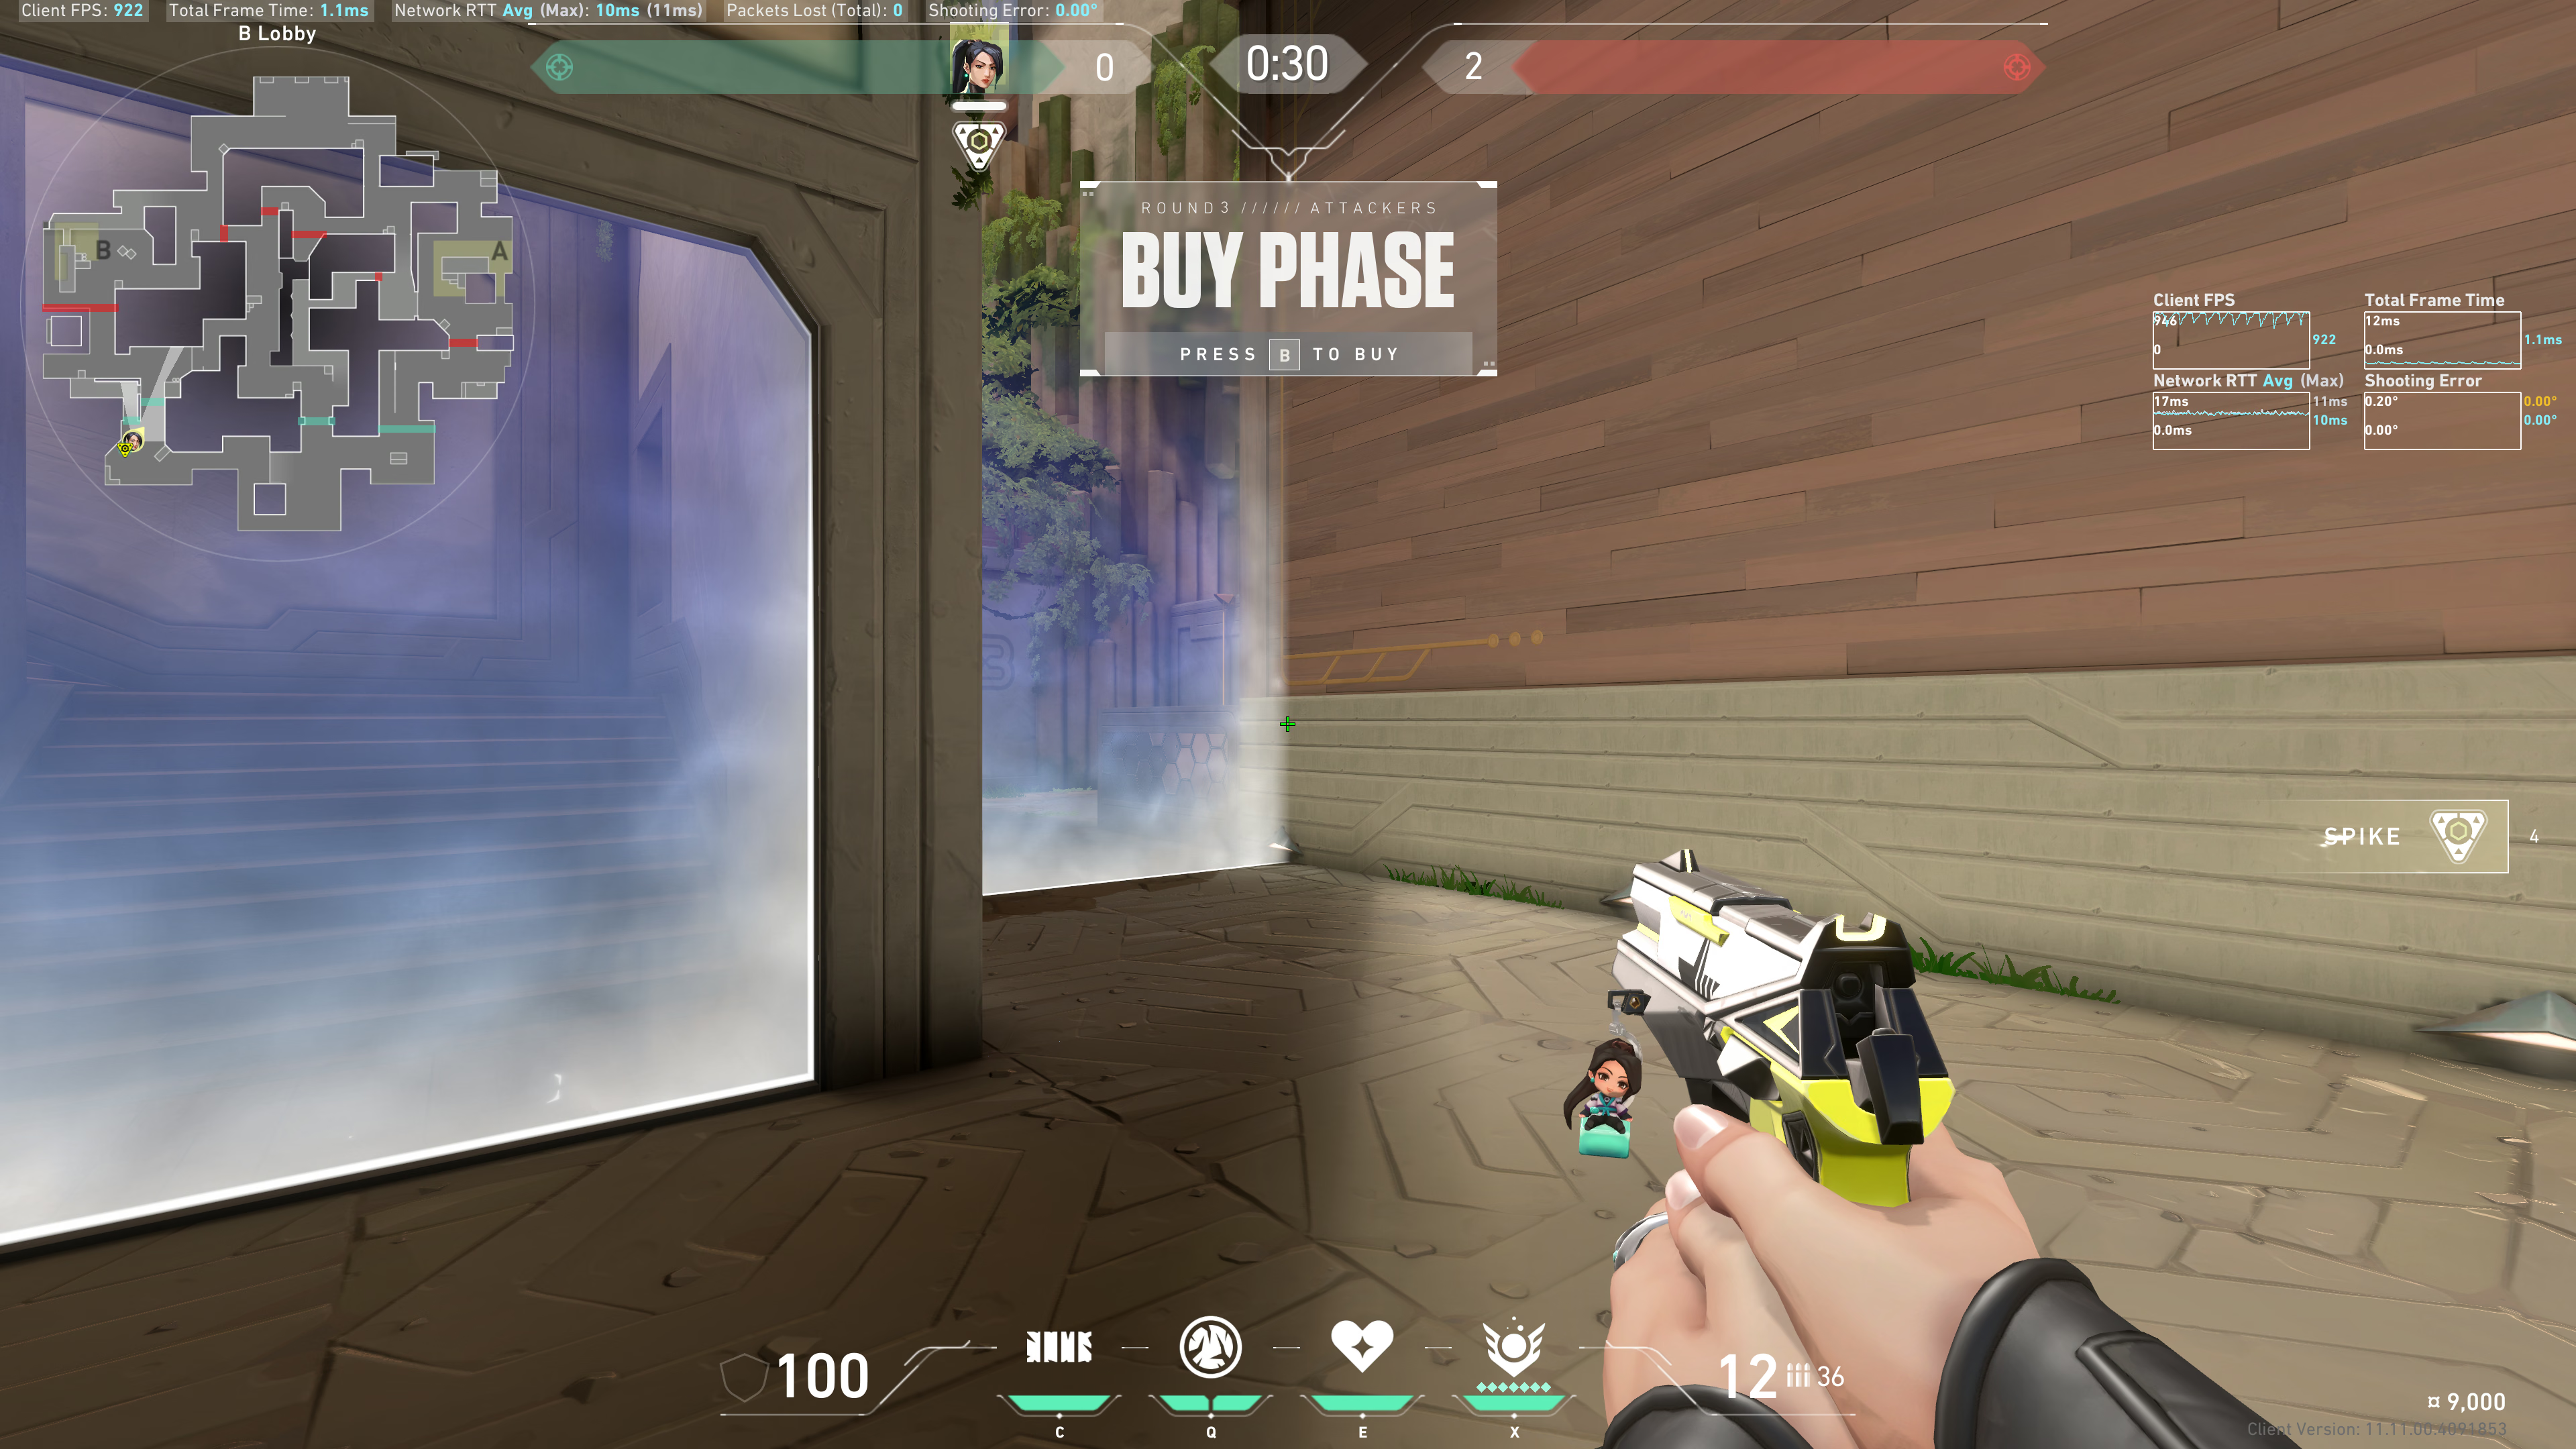
Back Site
Notice these two bright windows:
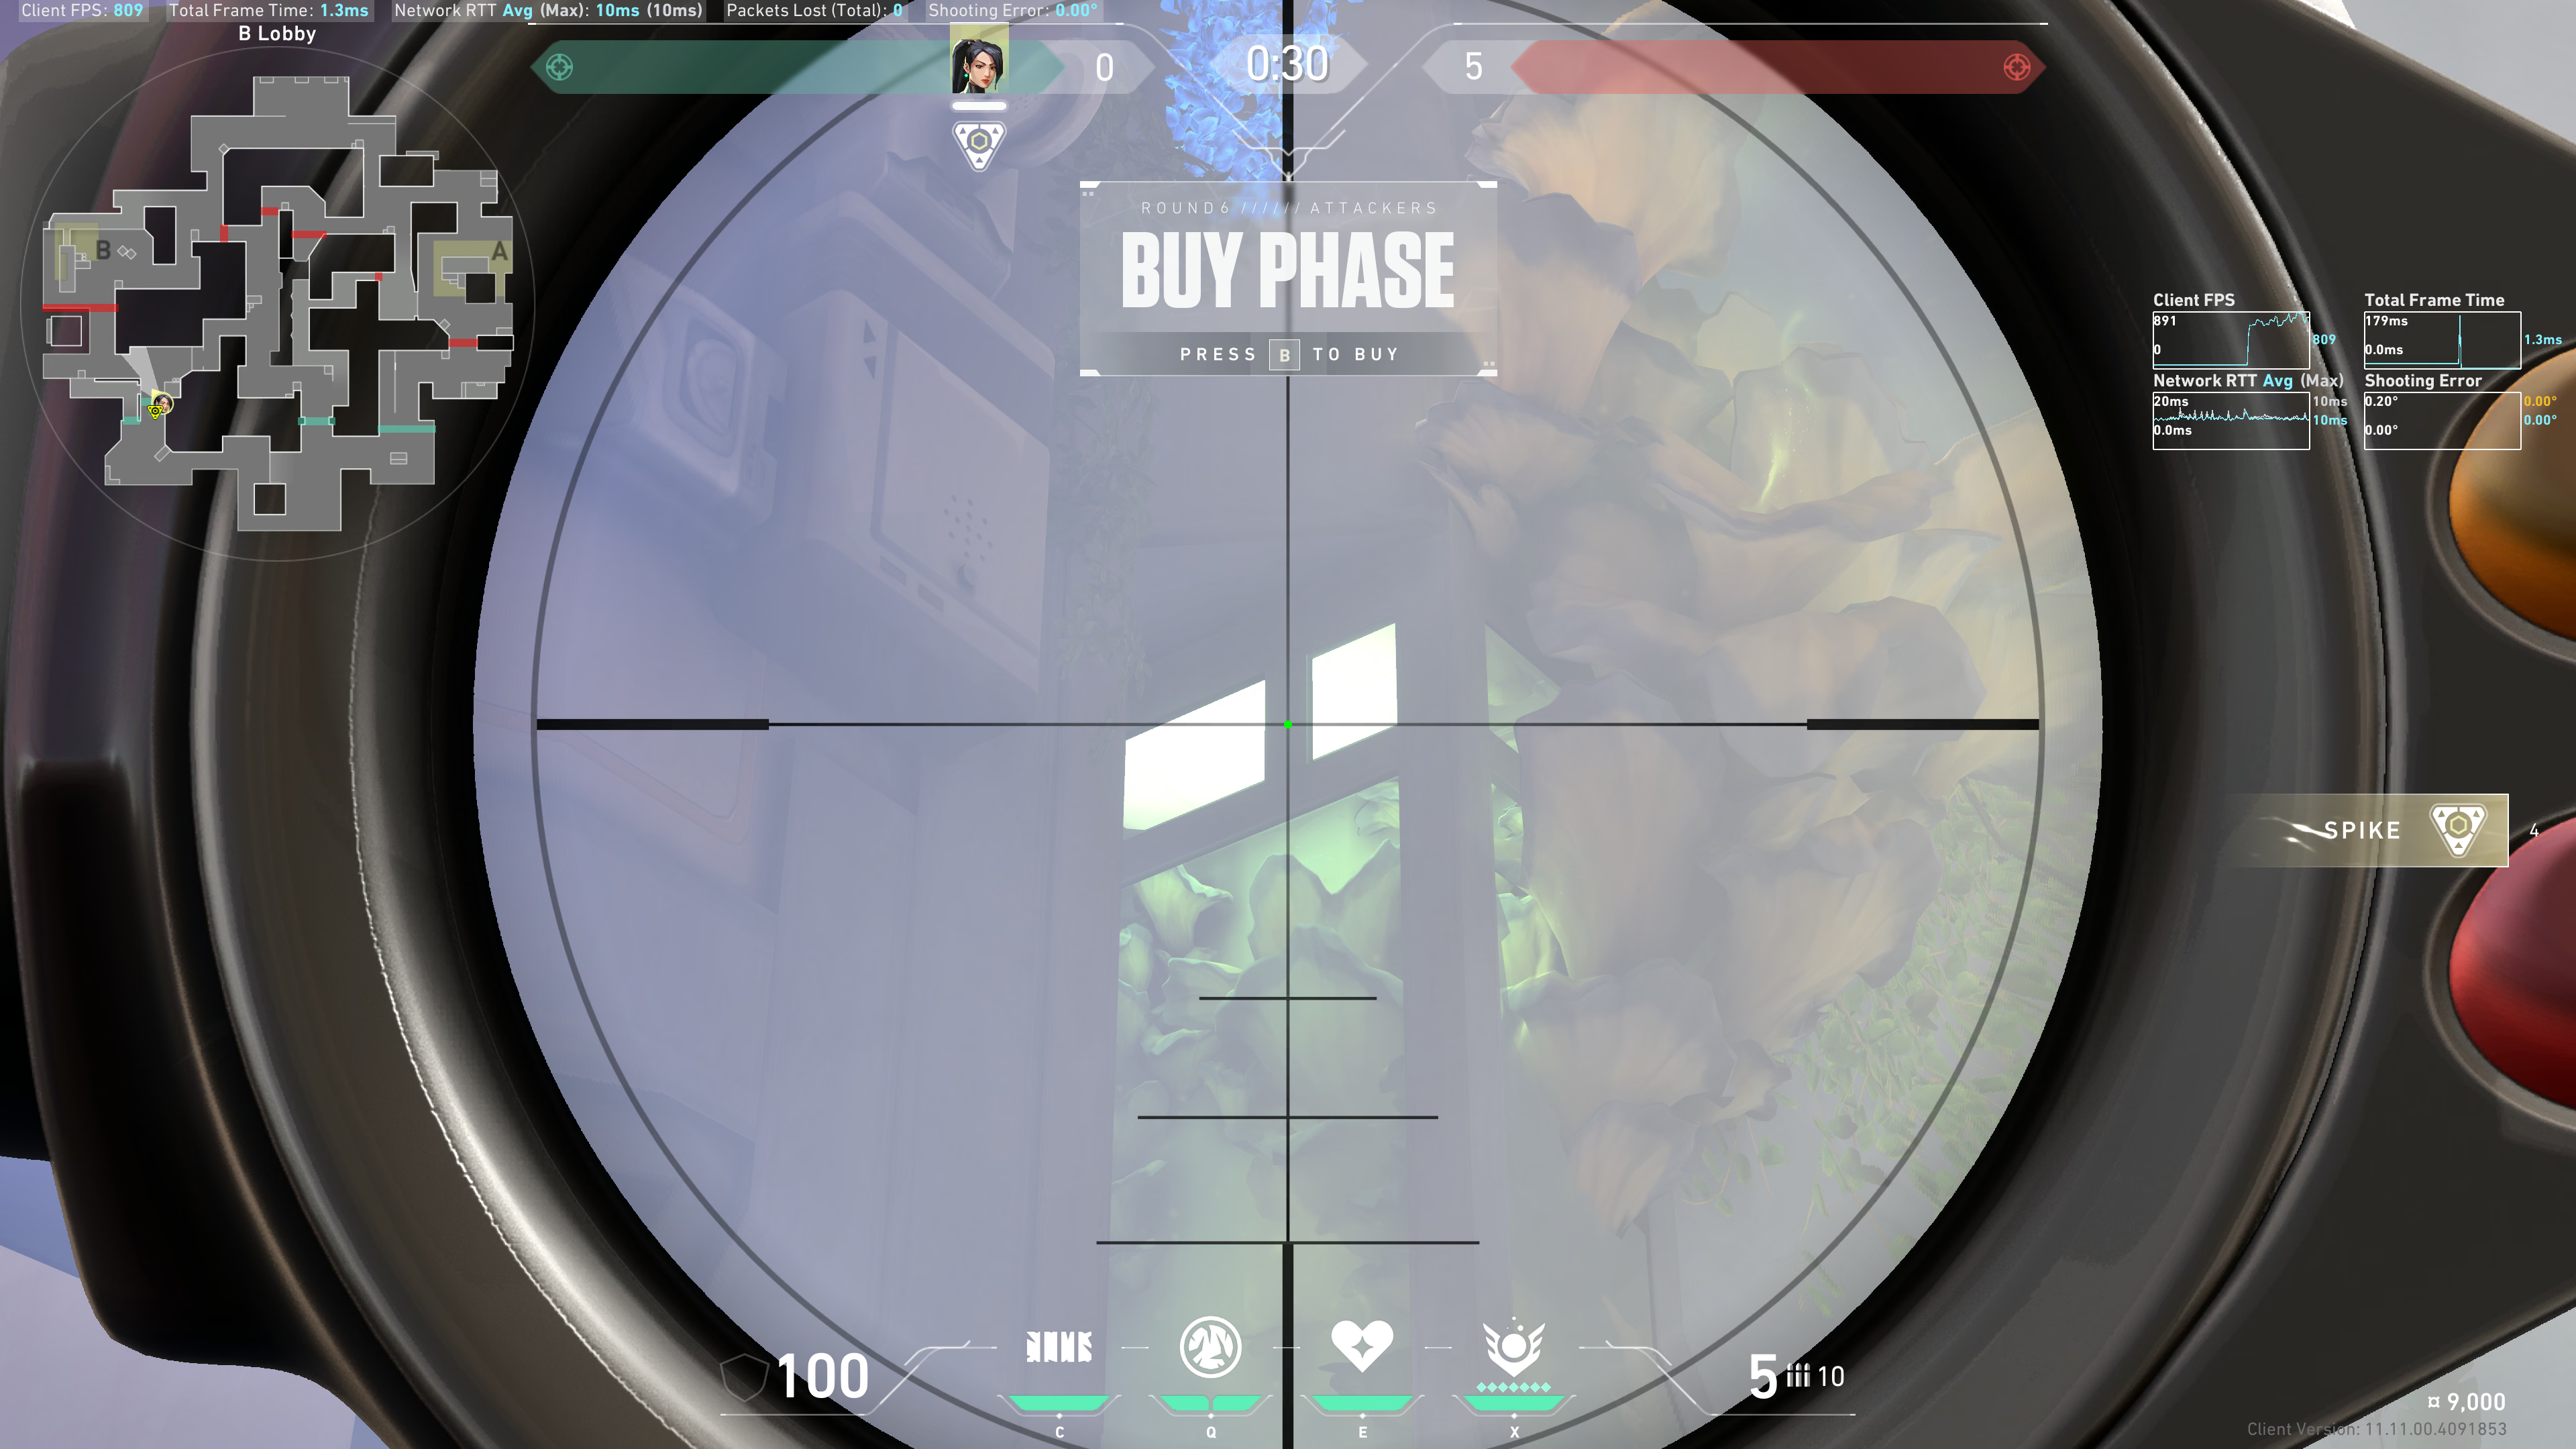
The wall green trapezoid, line up the right side of it with halfway into the left window:
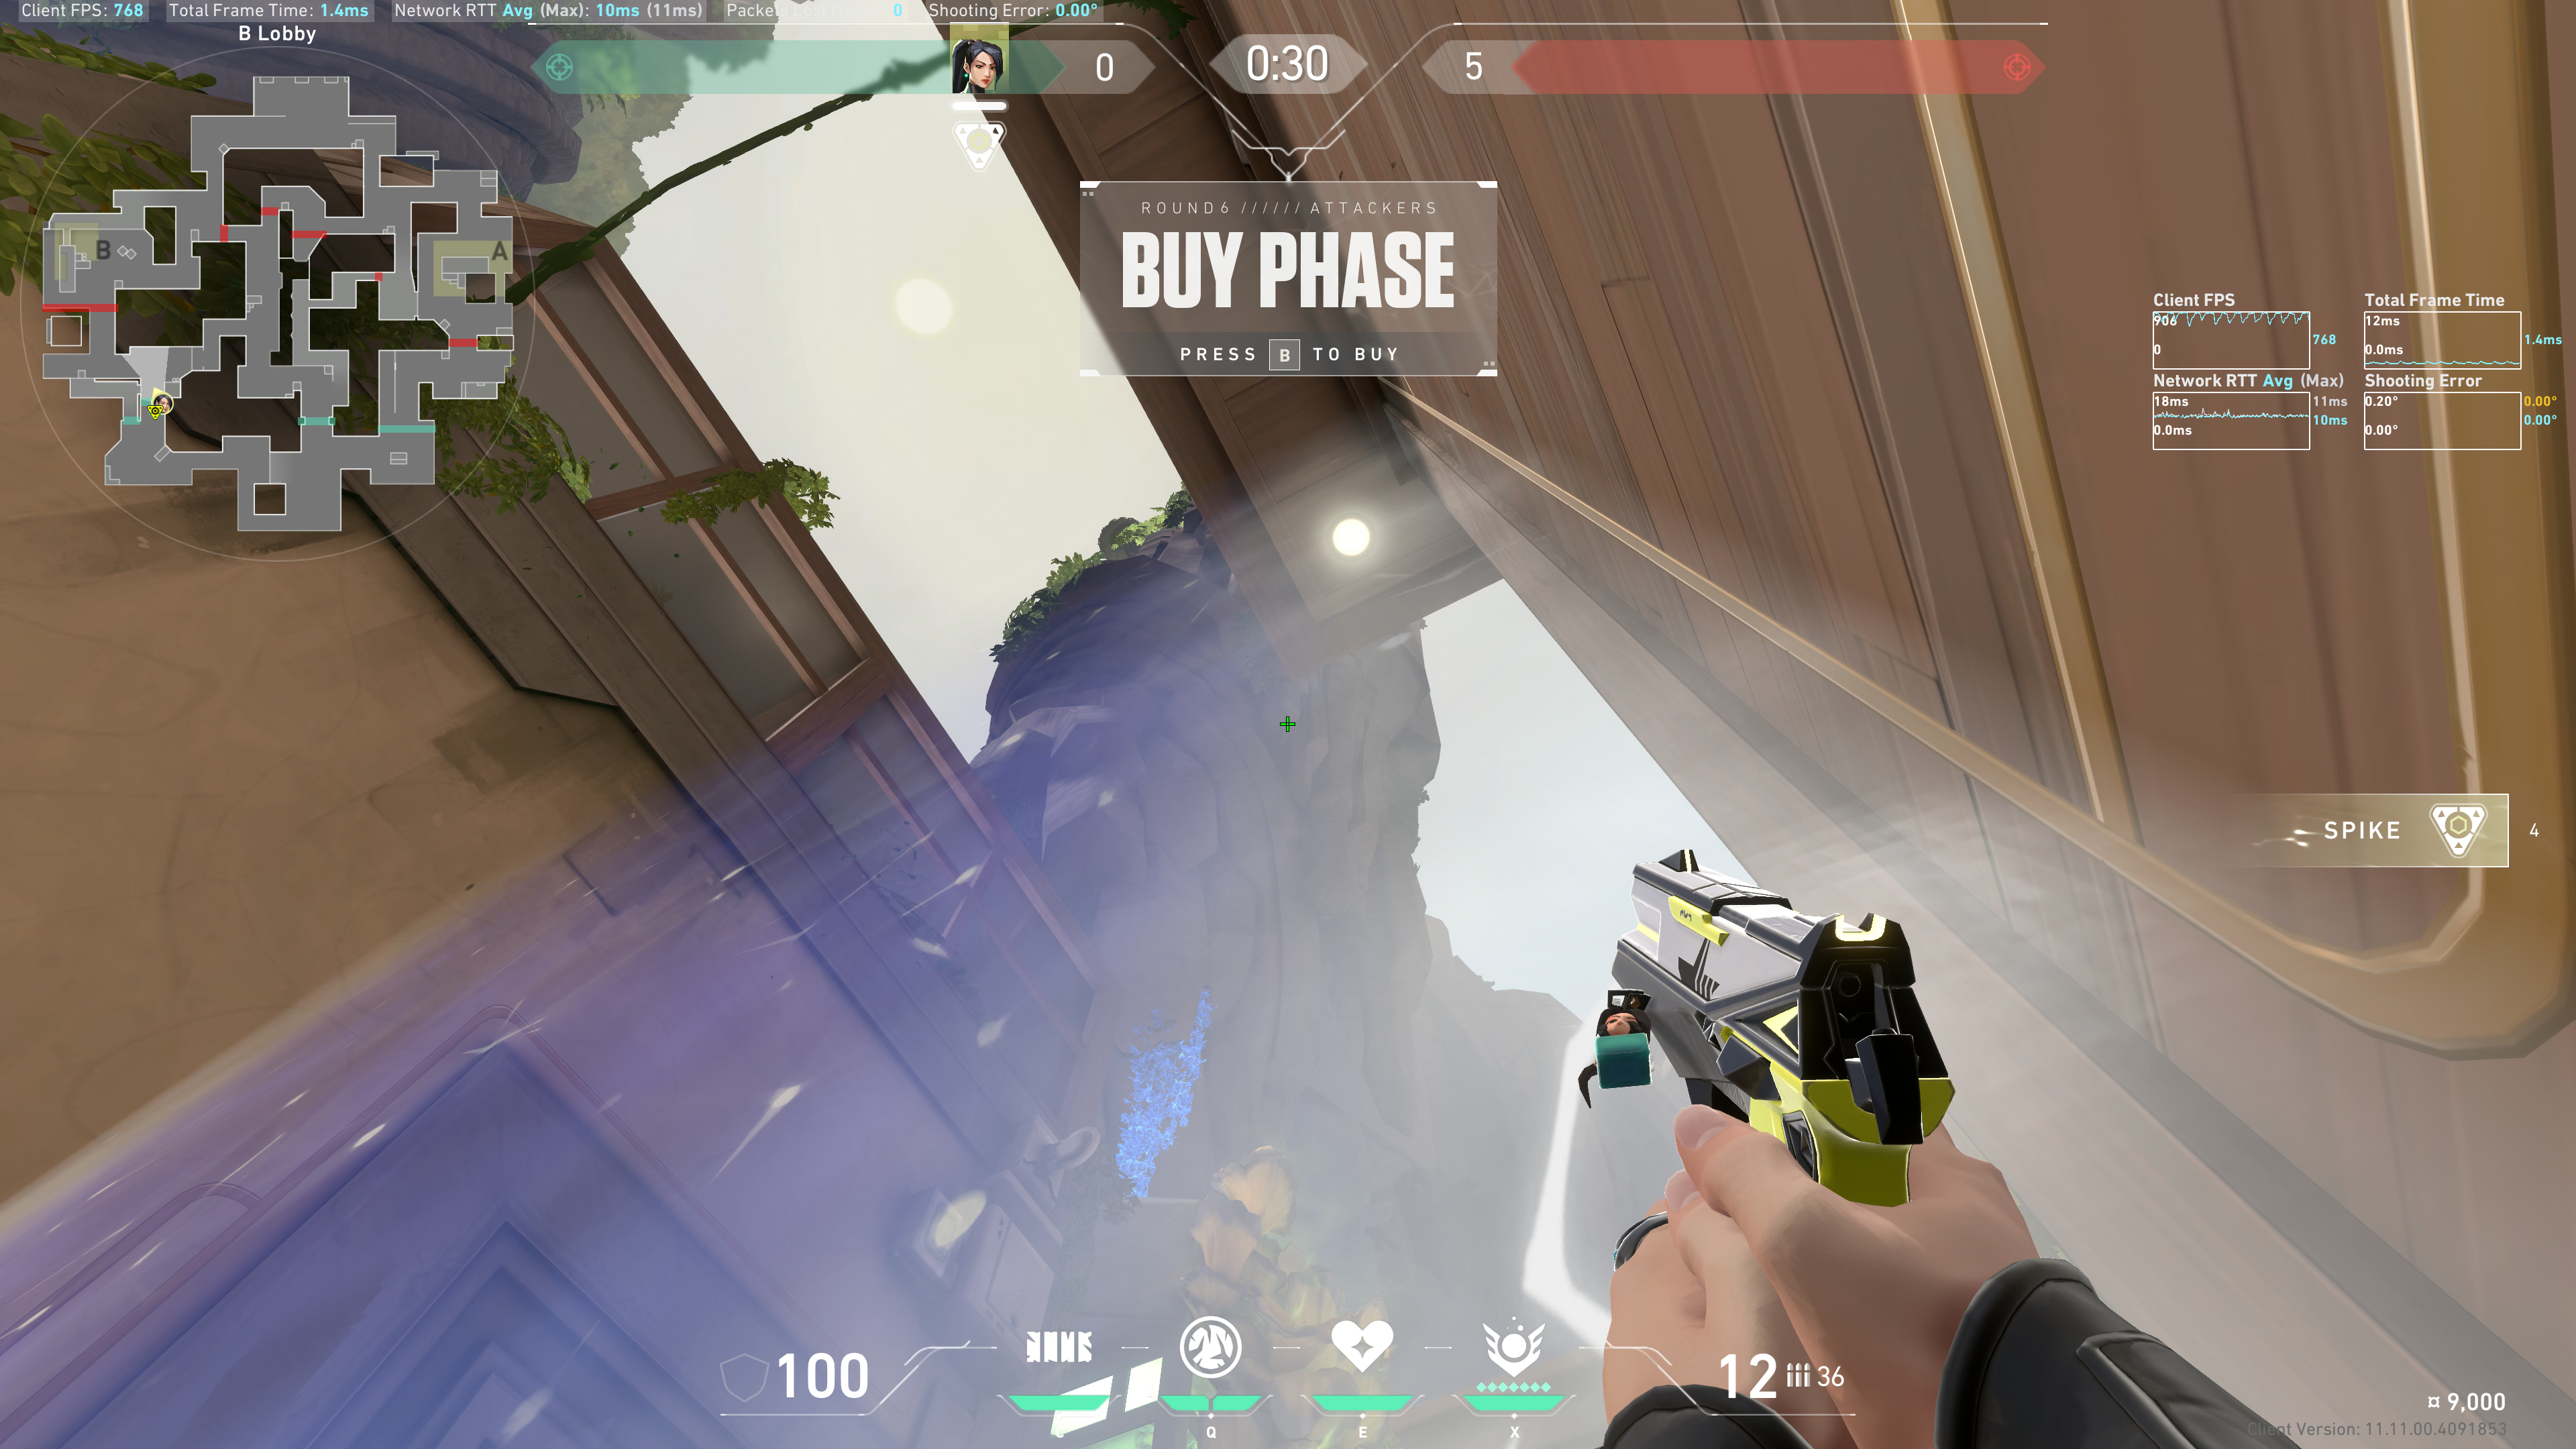
Result:
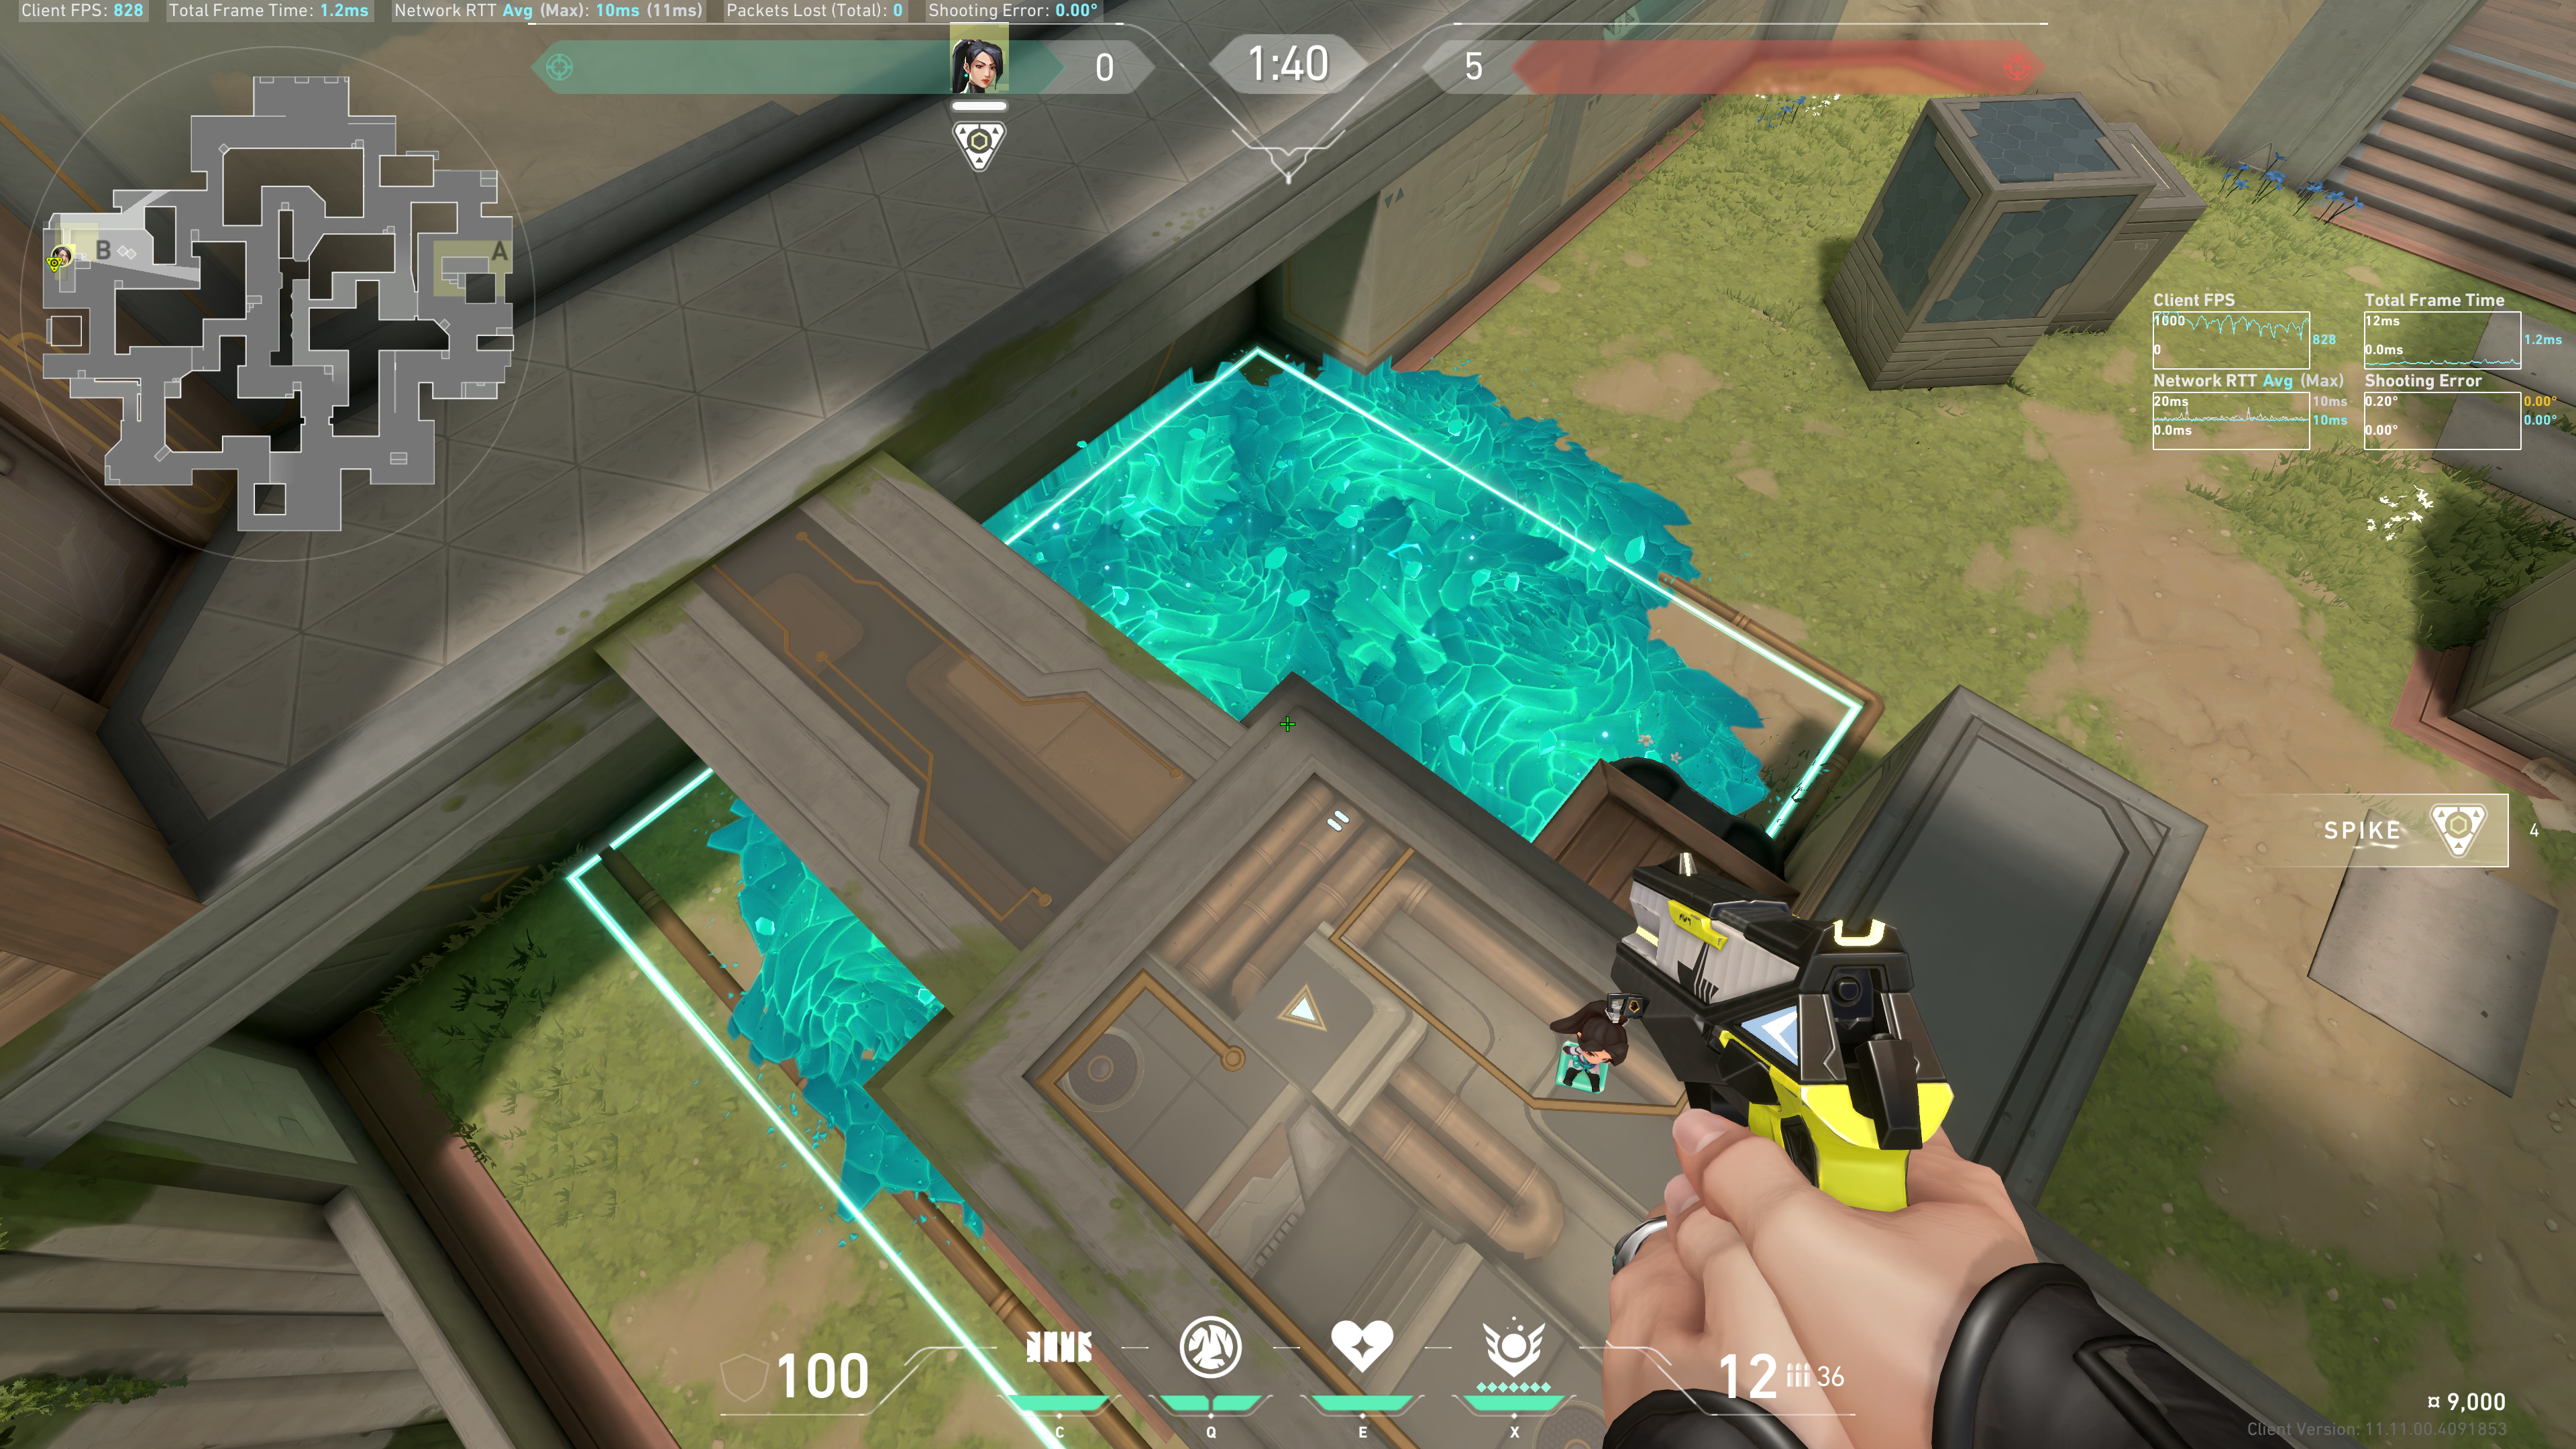
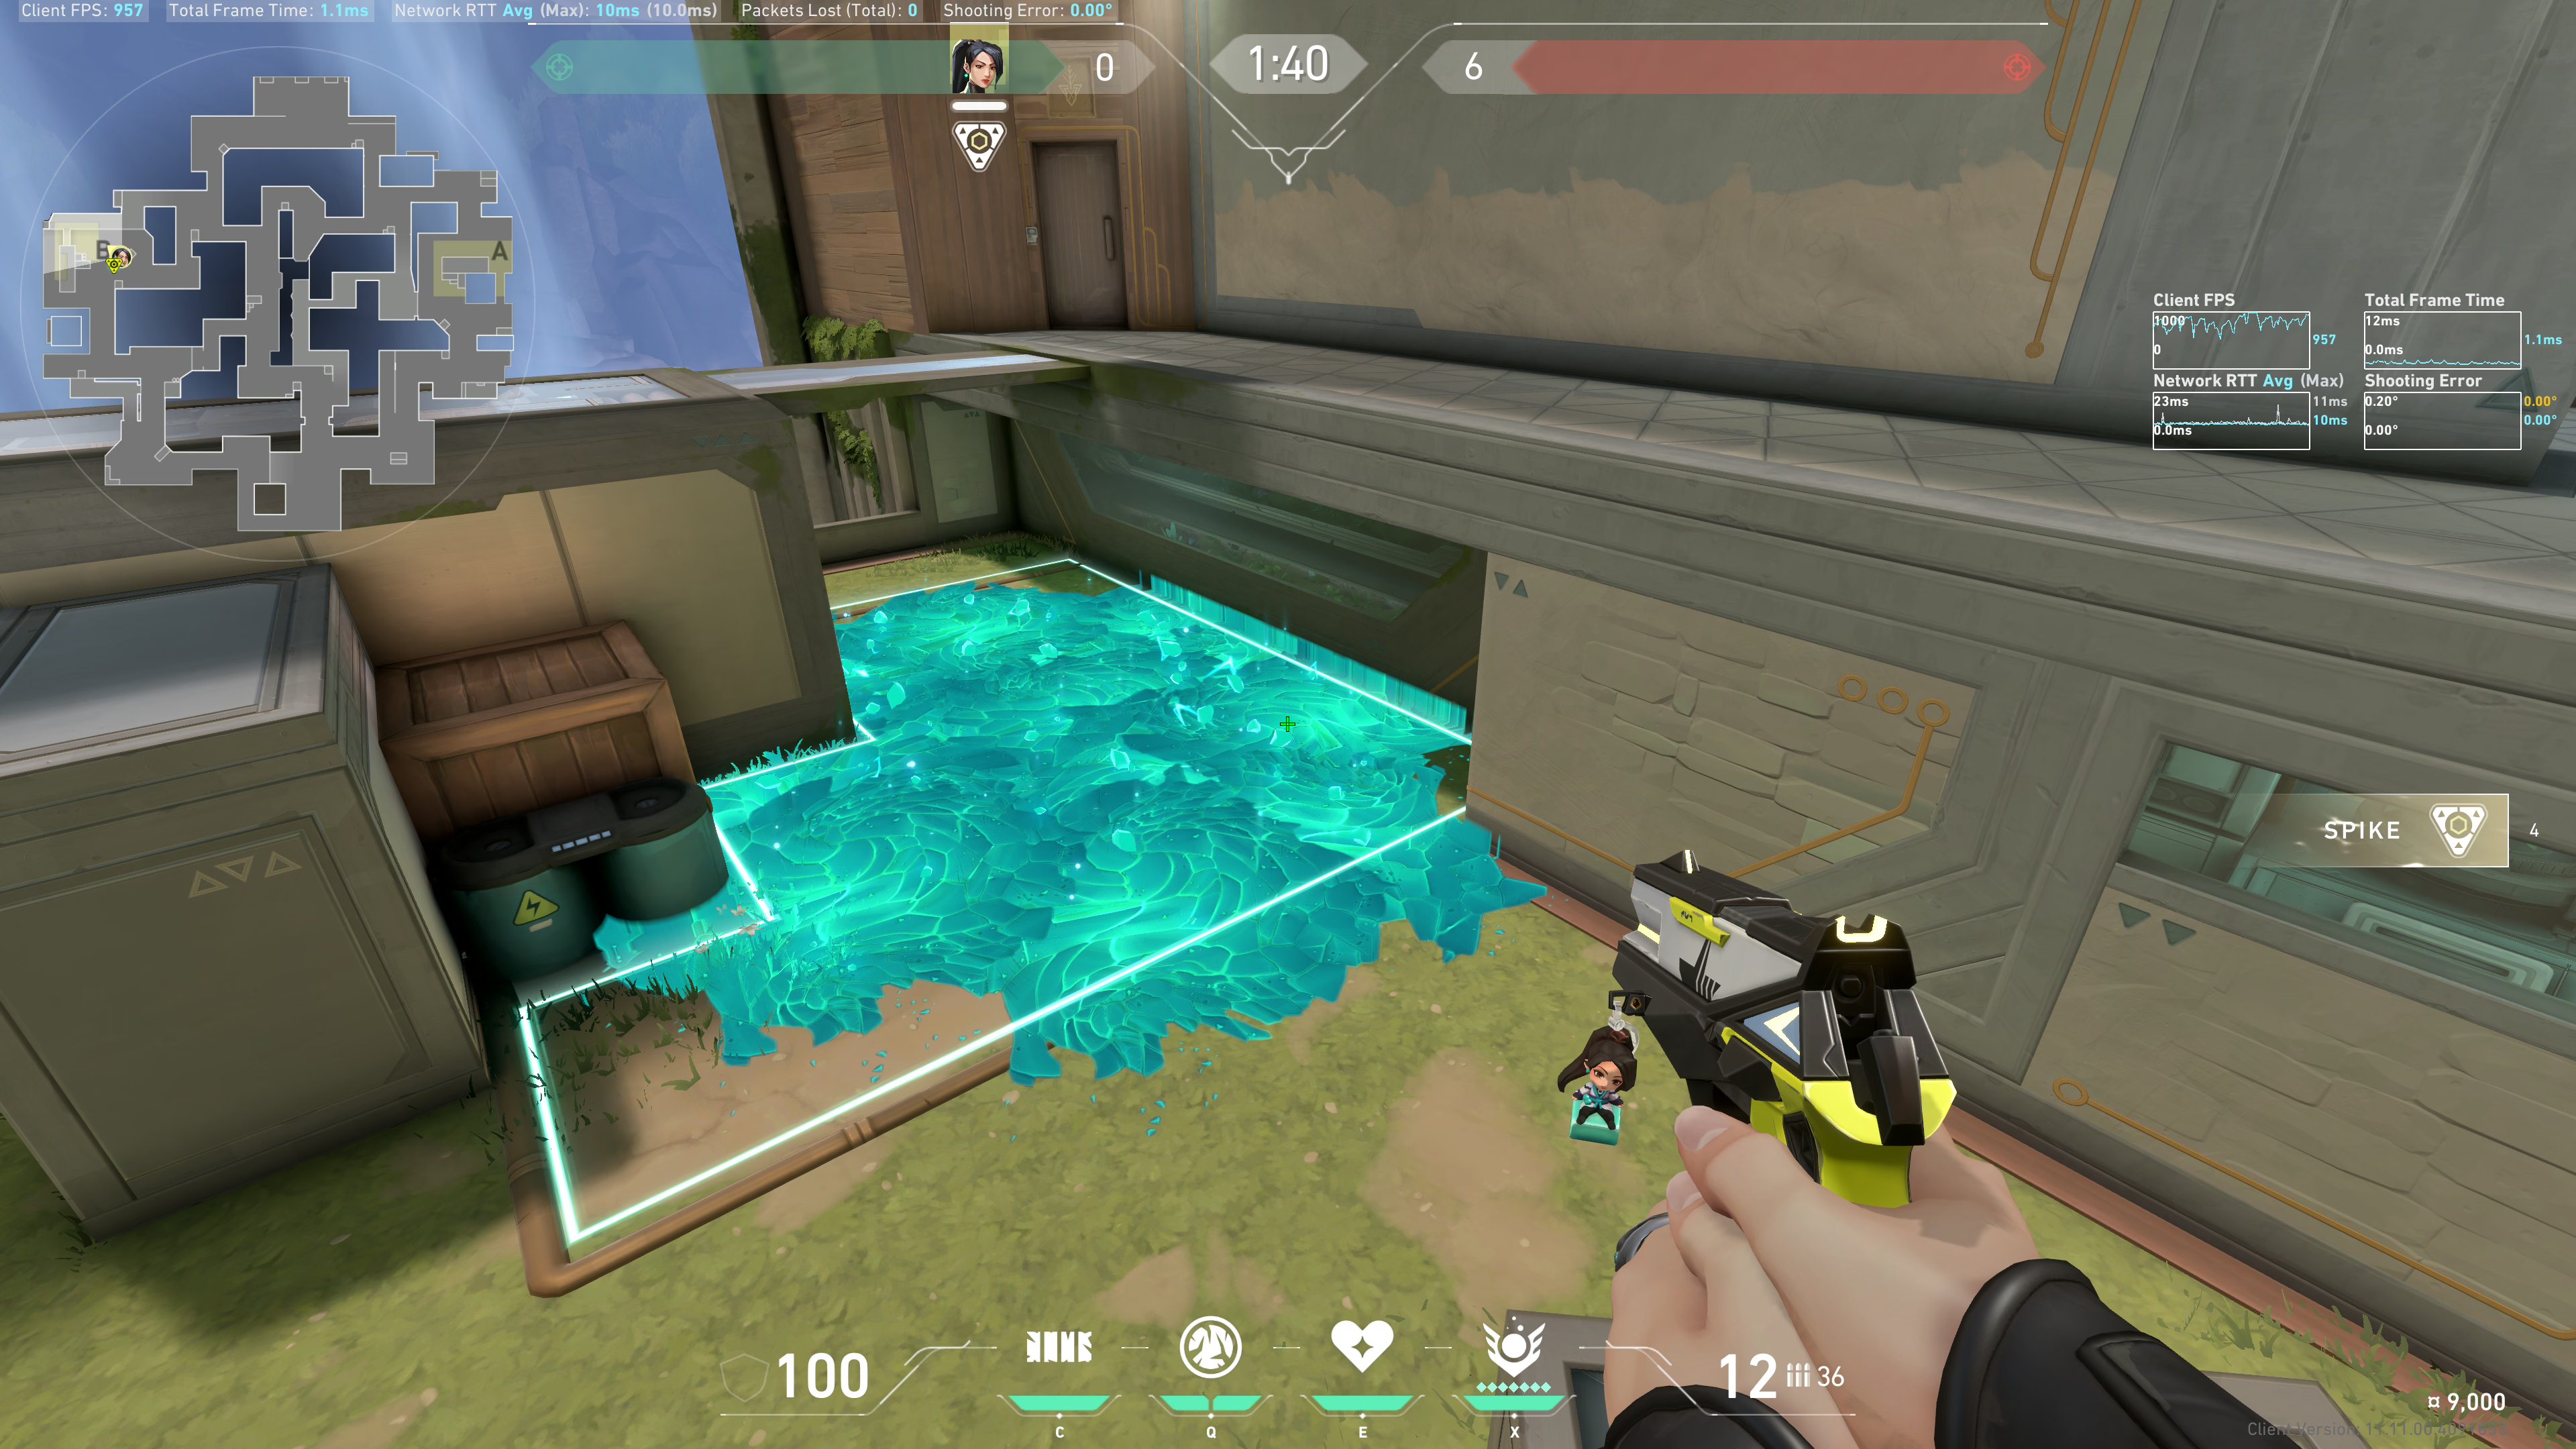
Mid
Tuck into this corner:
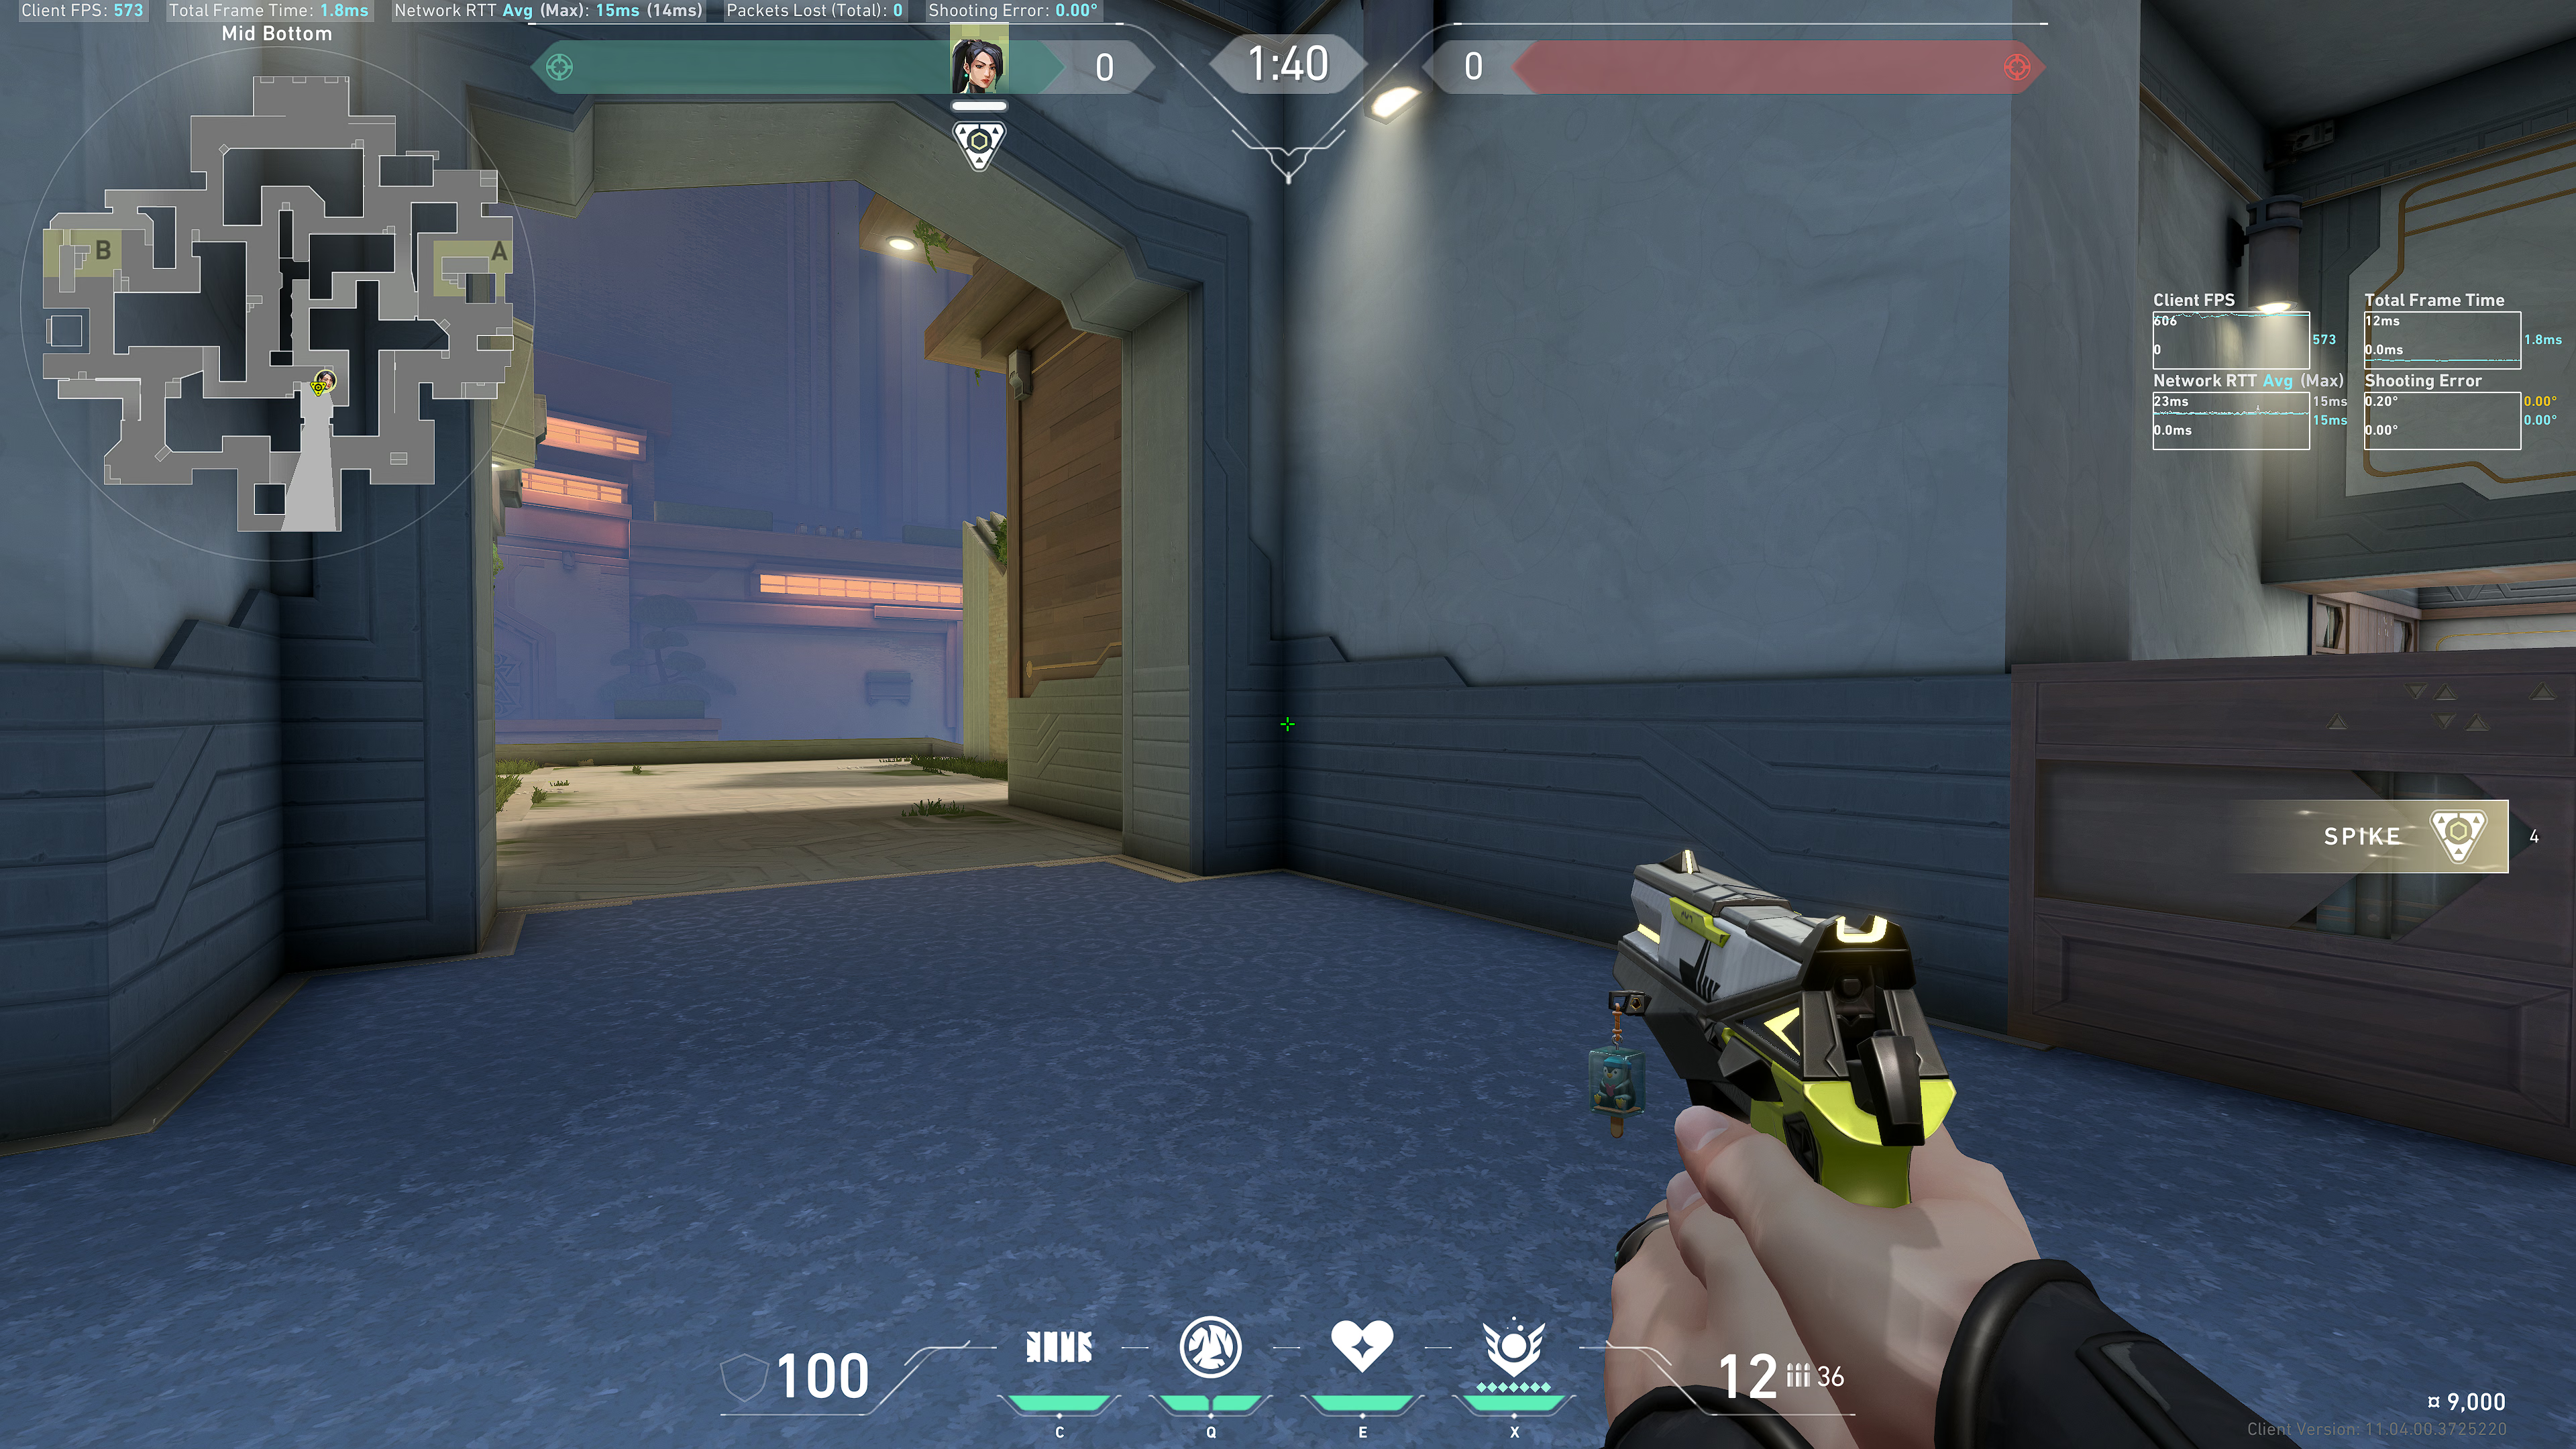
Aim at this orange thing:
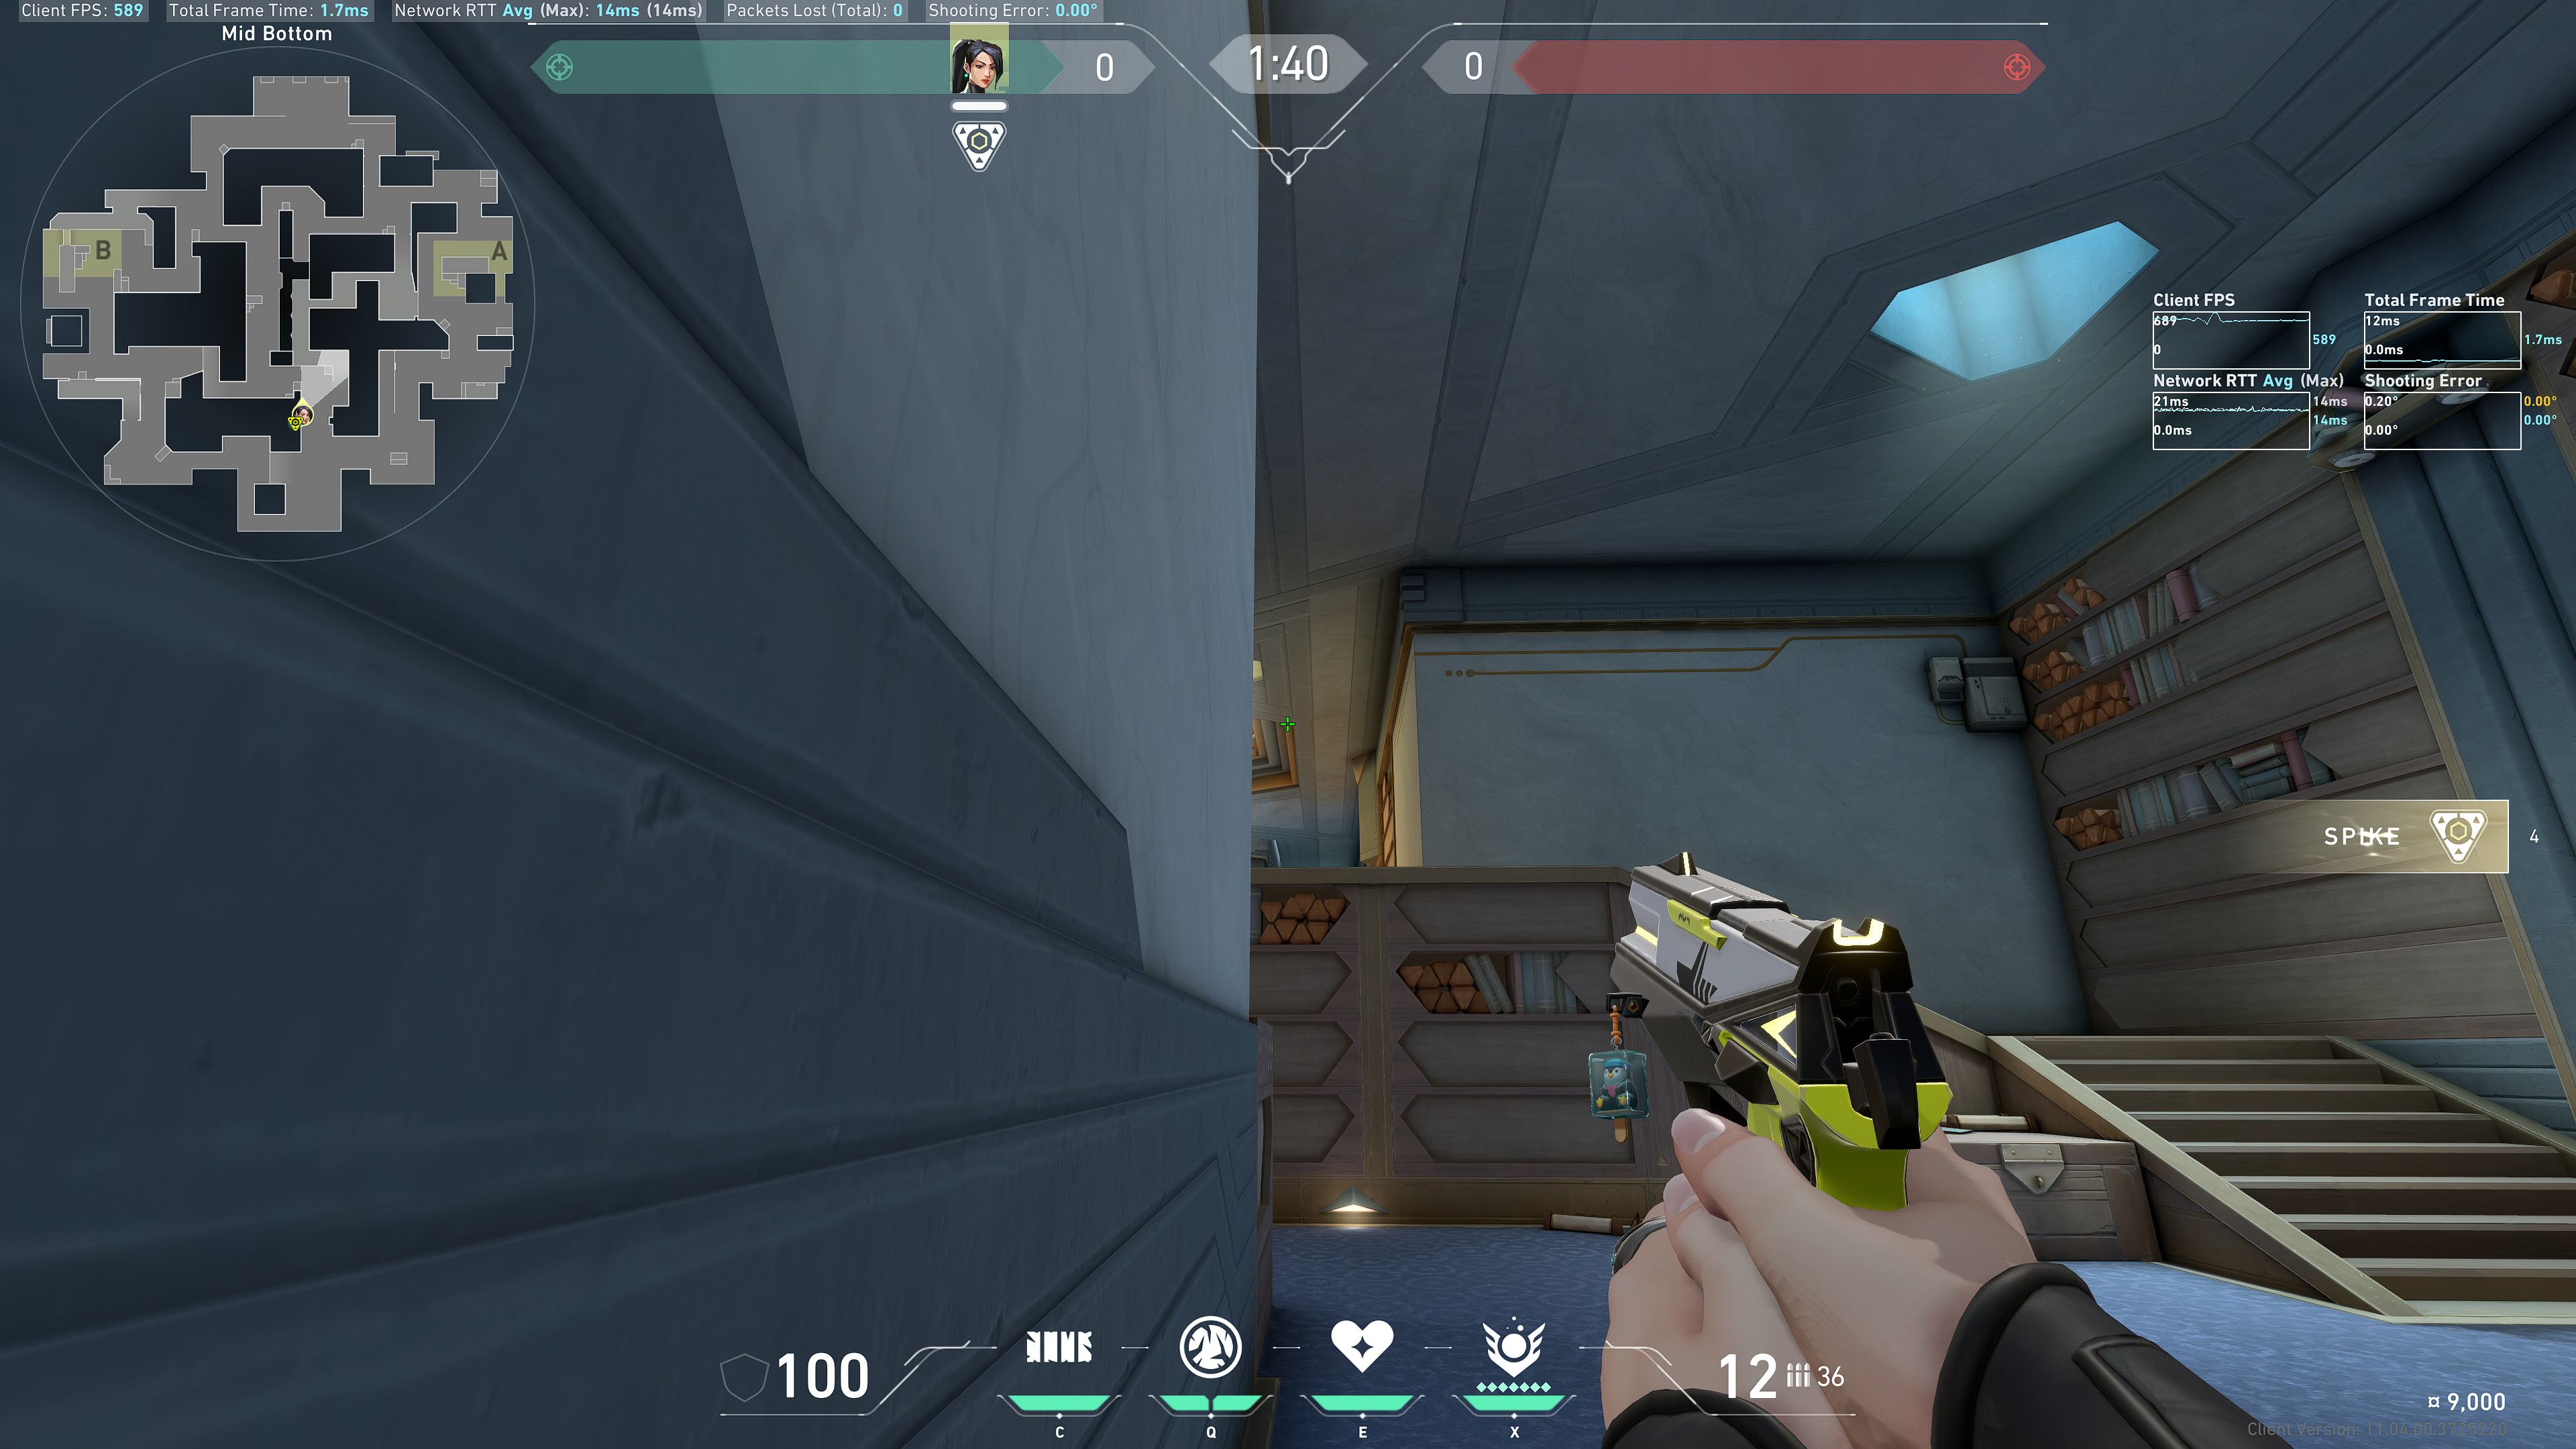
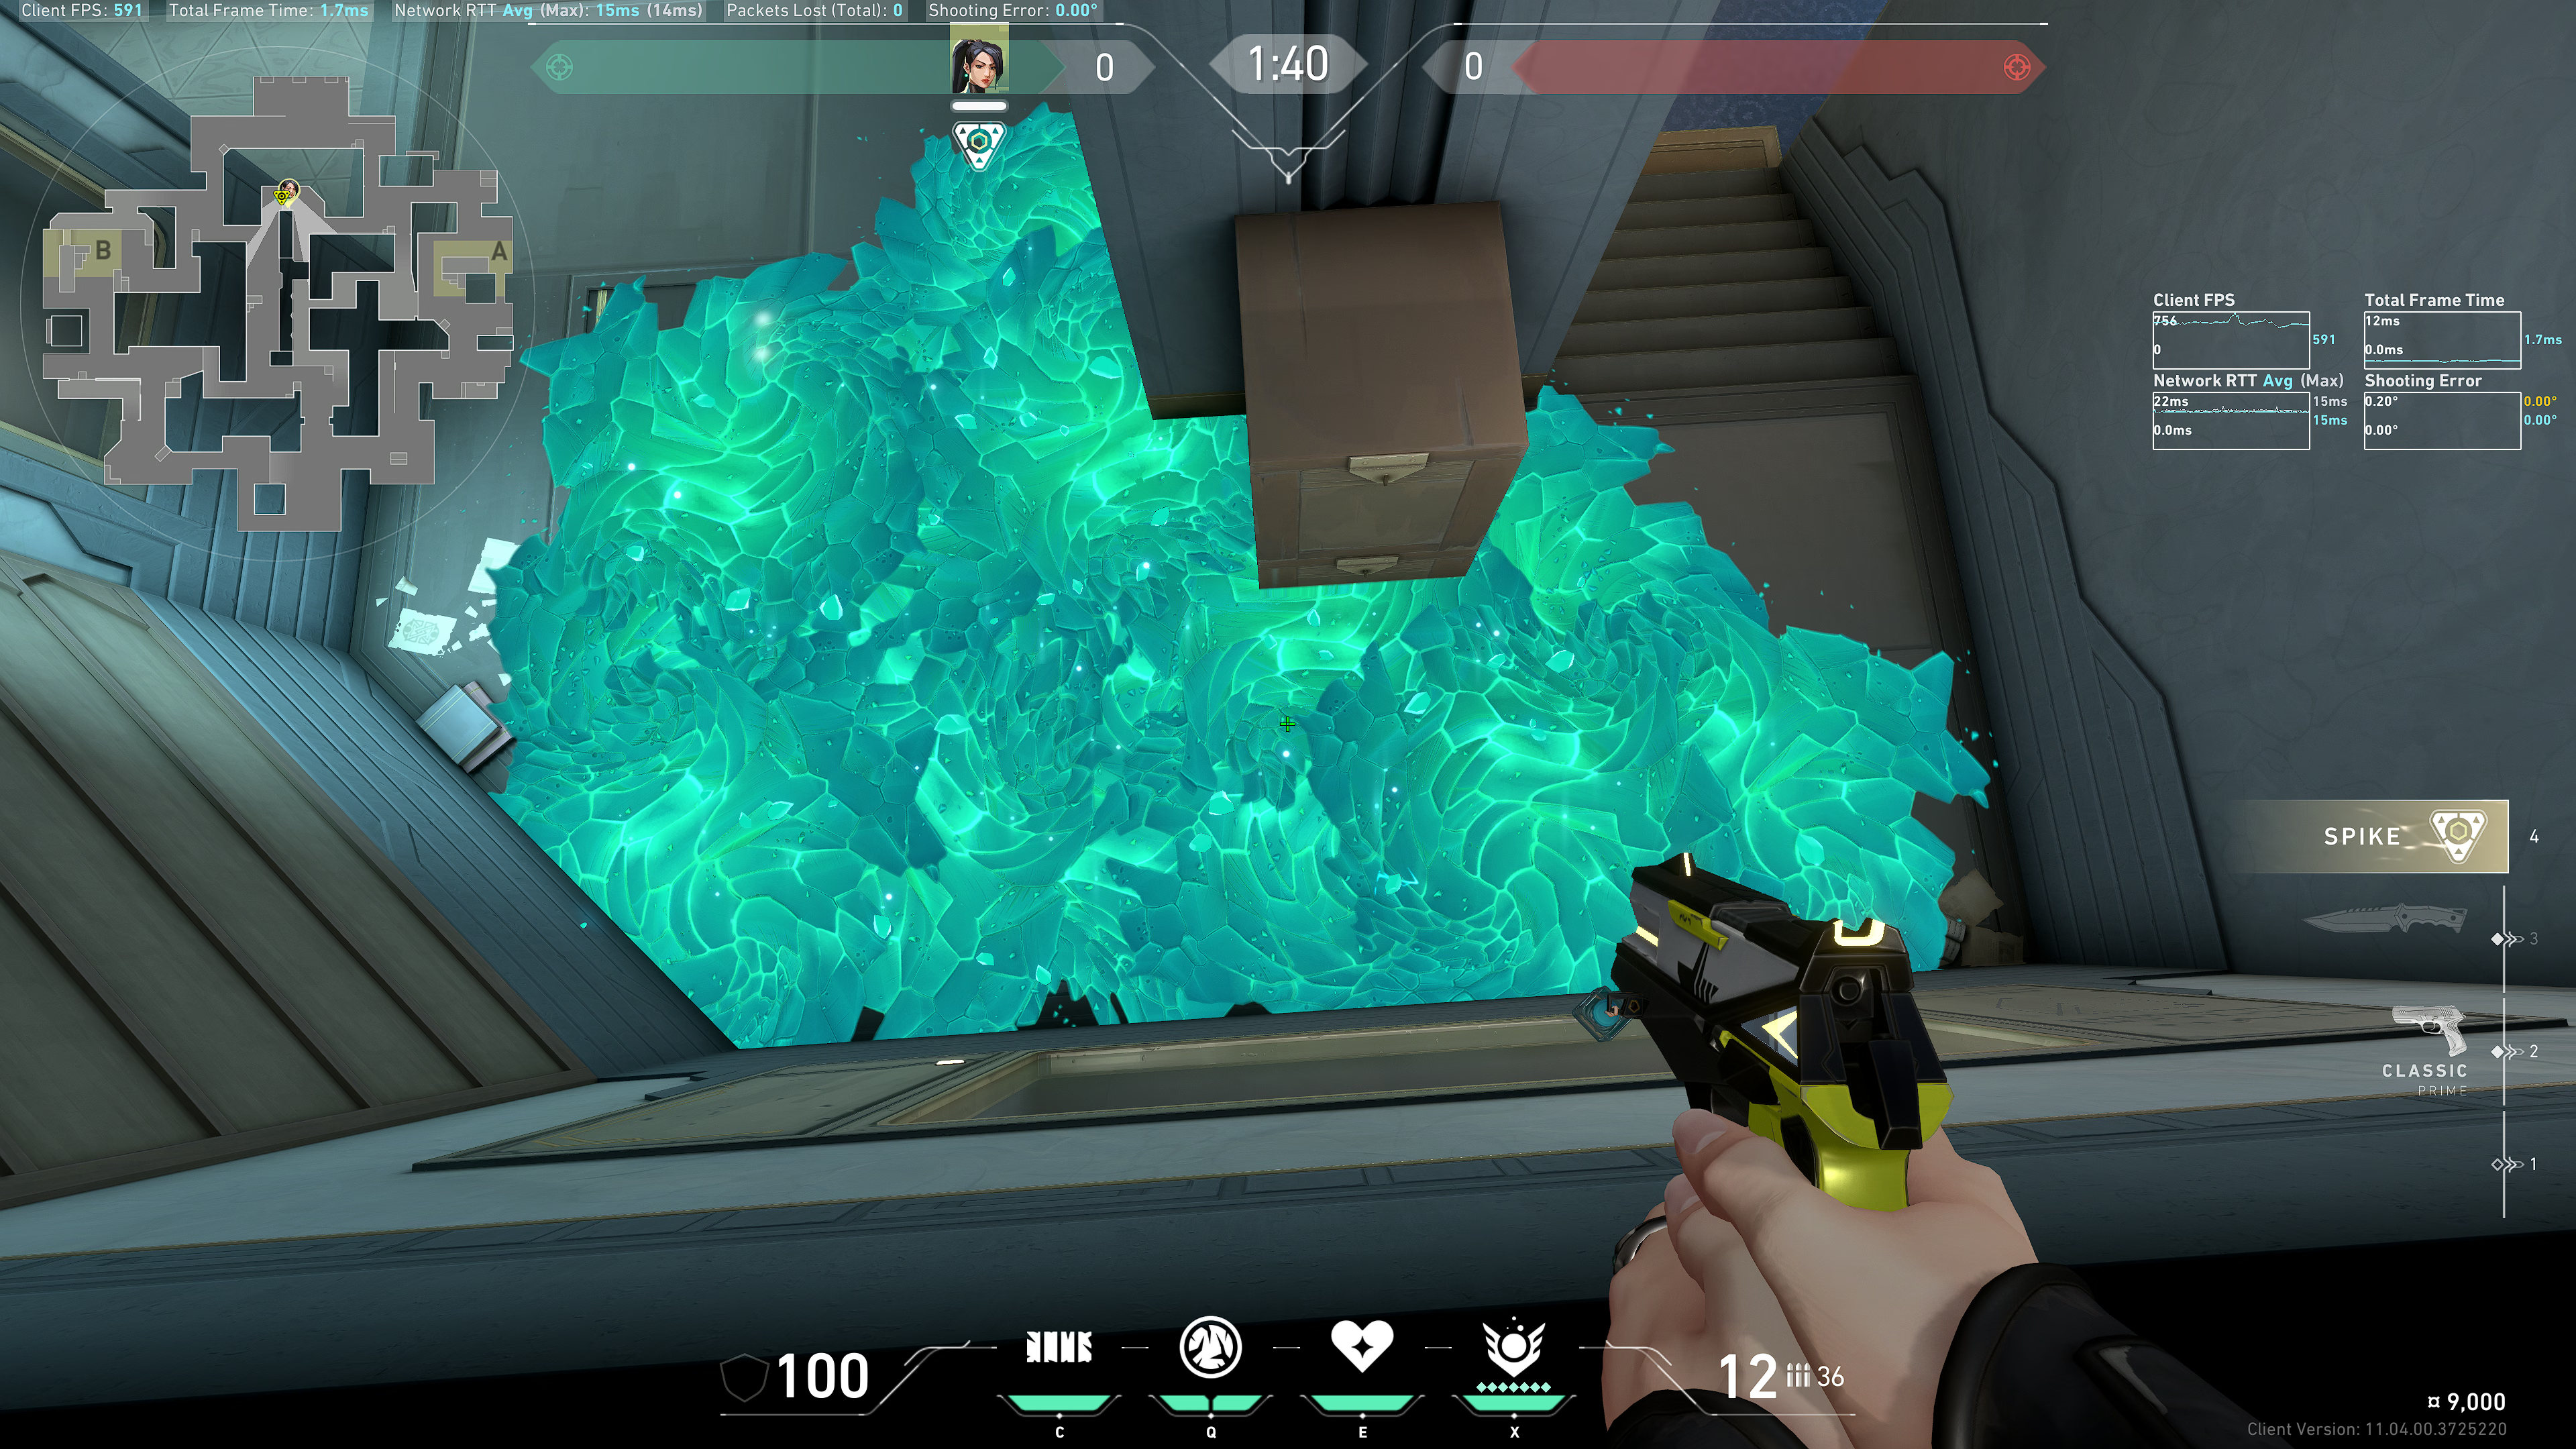
Result:
Defense
B Site Retake
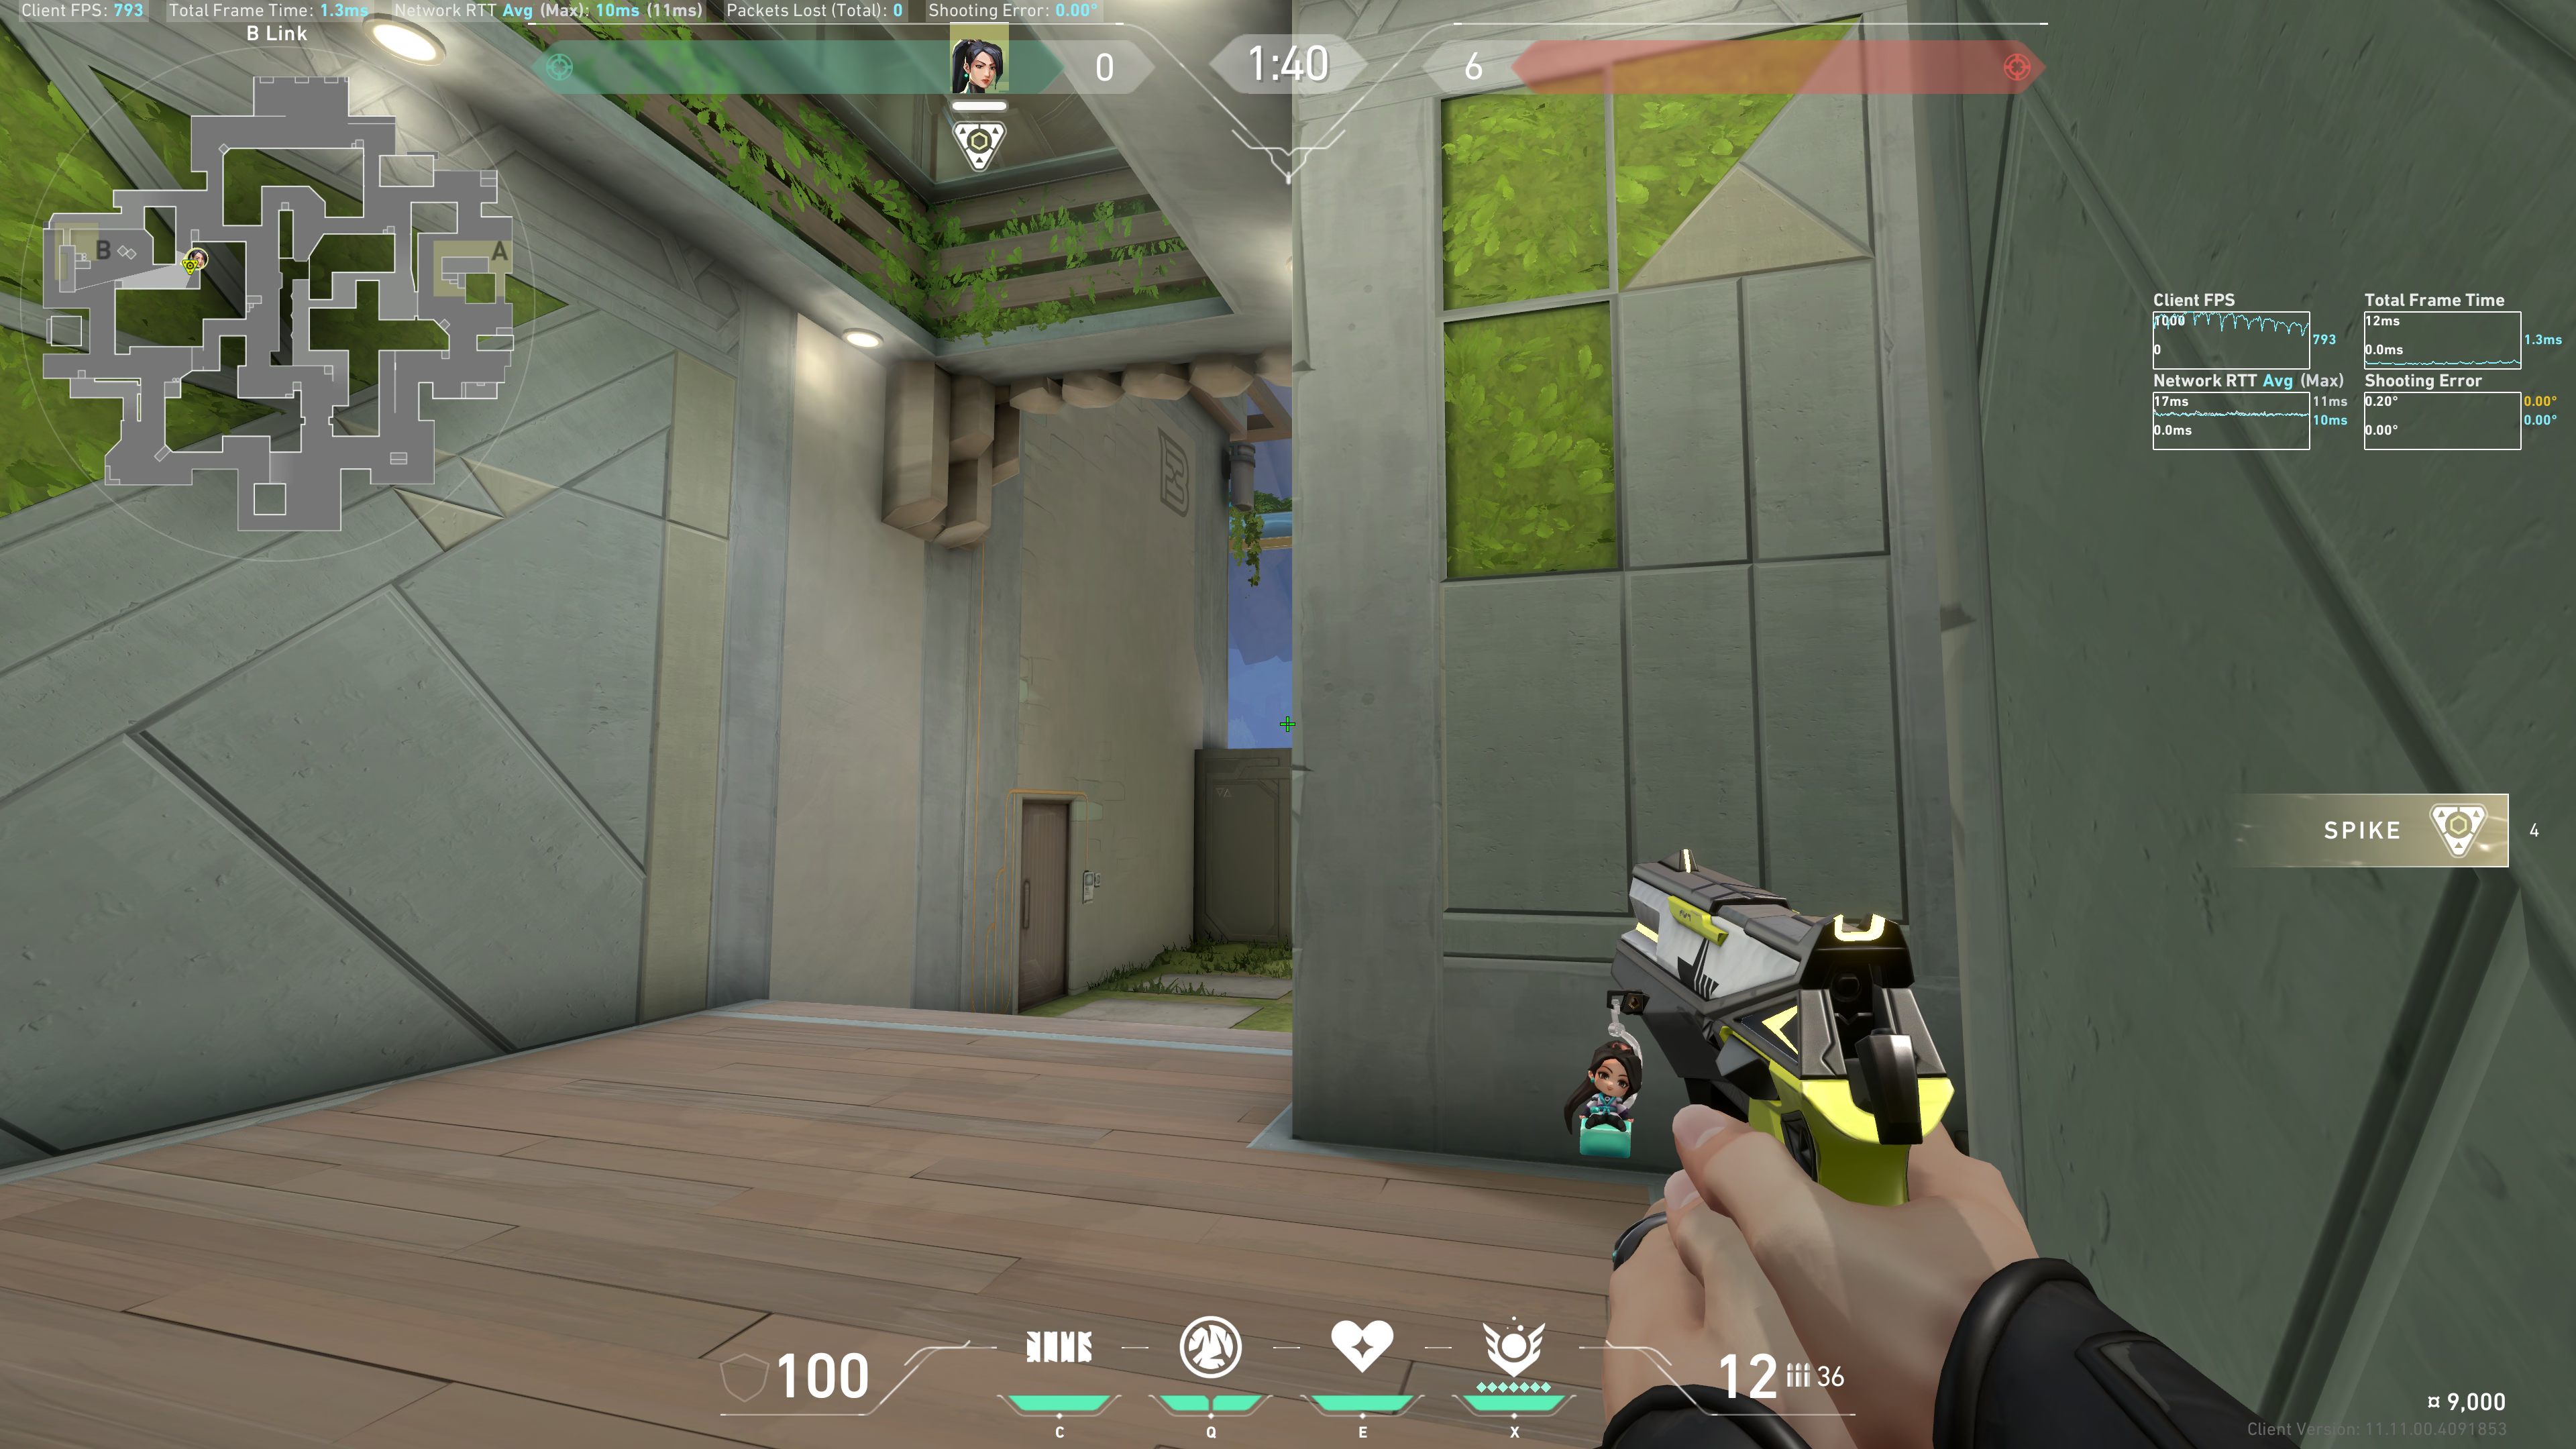
From CT part 1
Tuck into this corner:
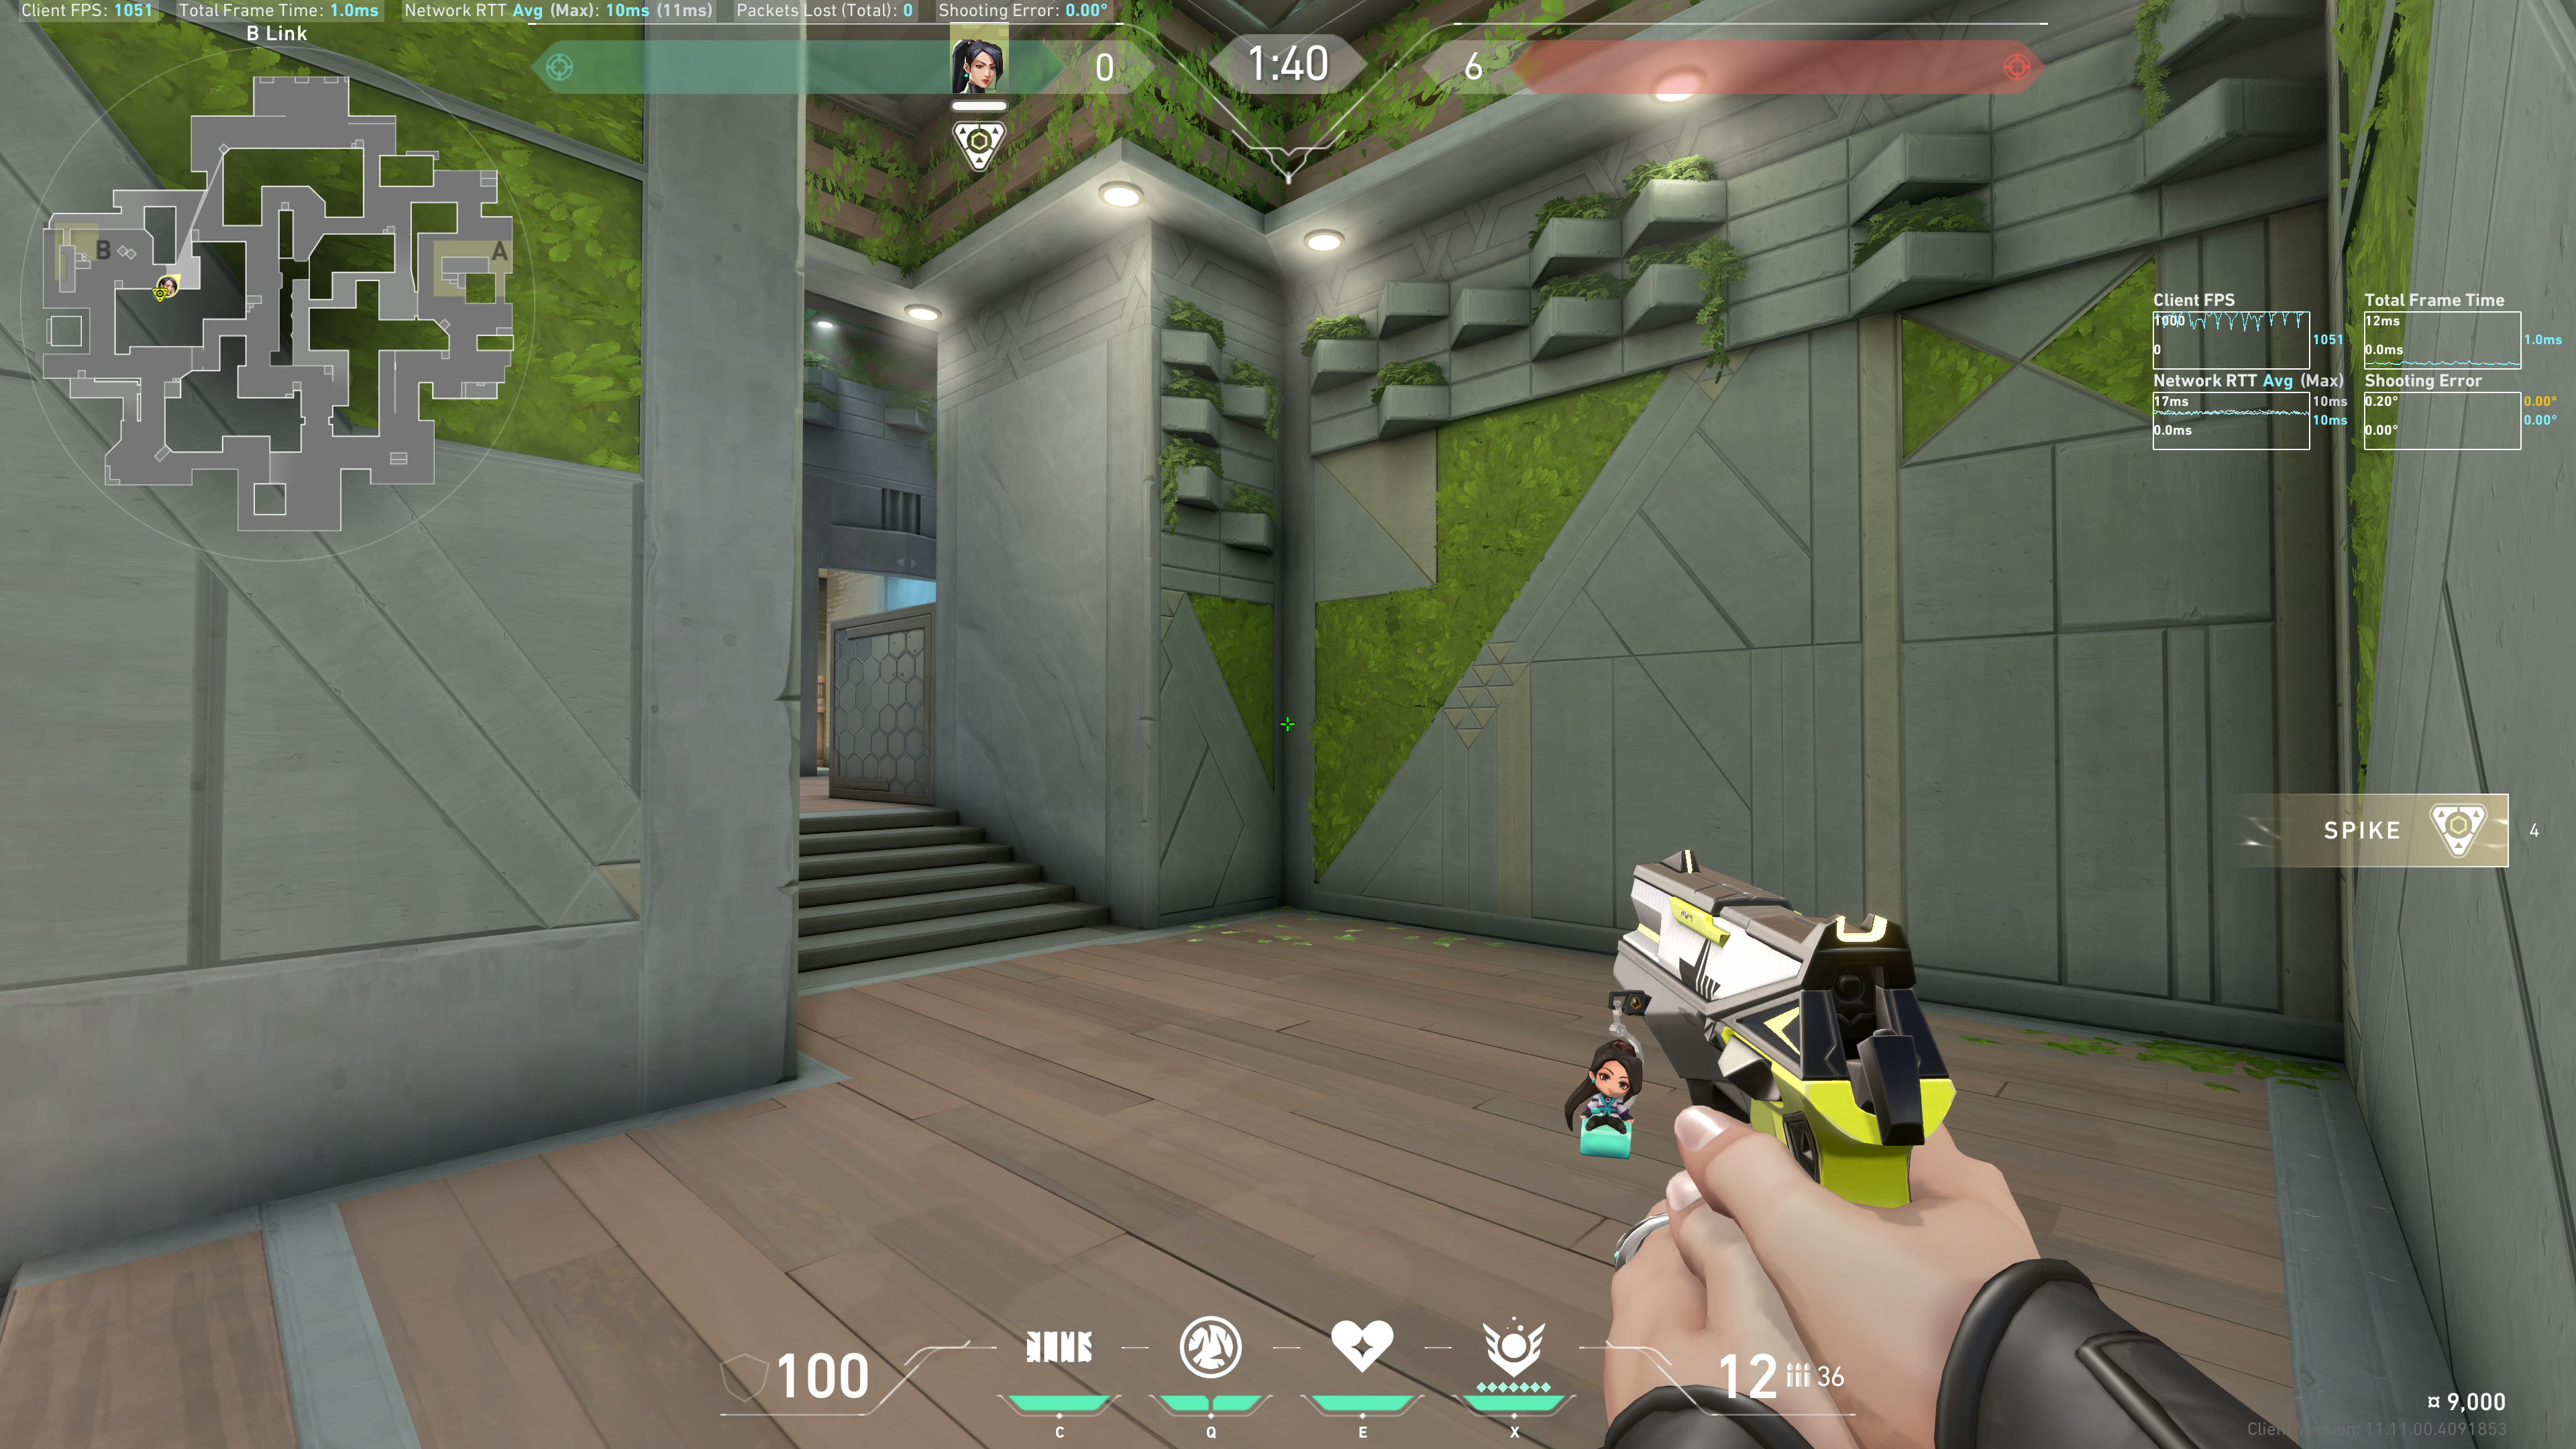
Aim about 2 crosshair lengths above this box:
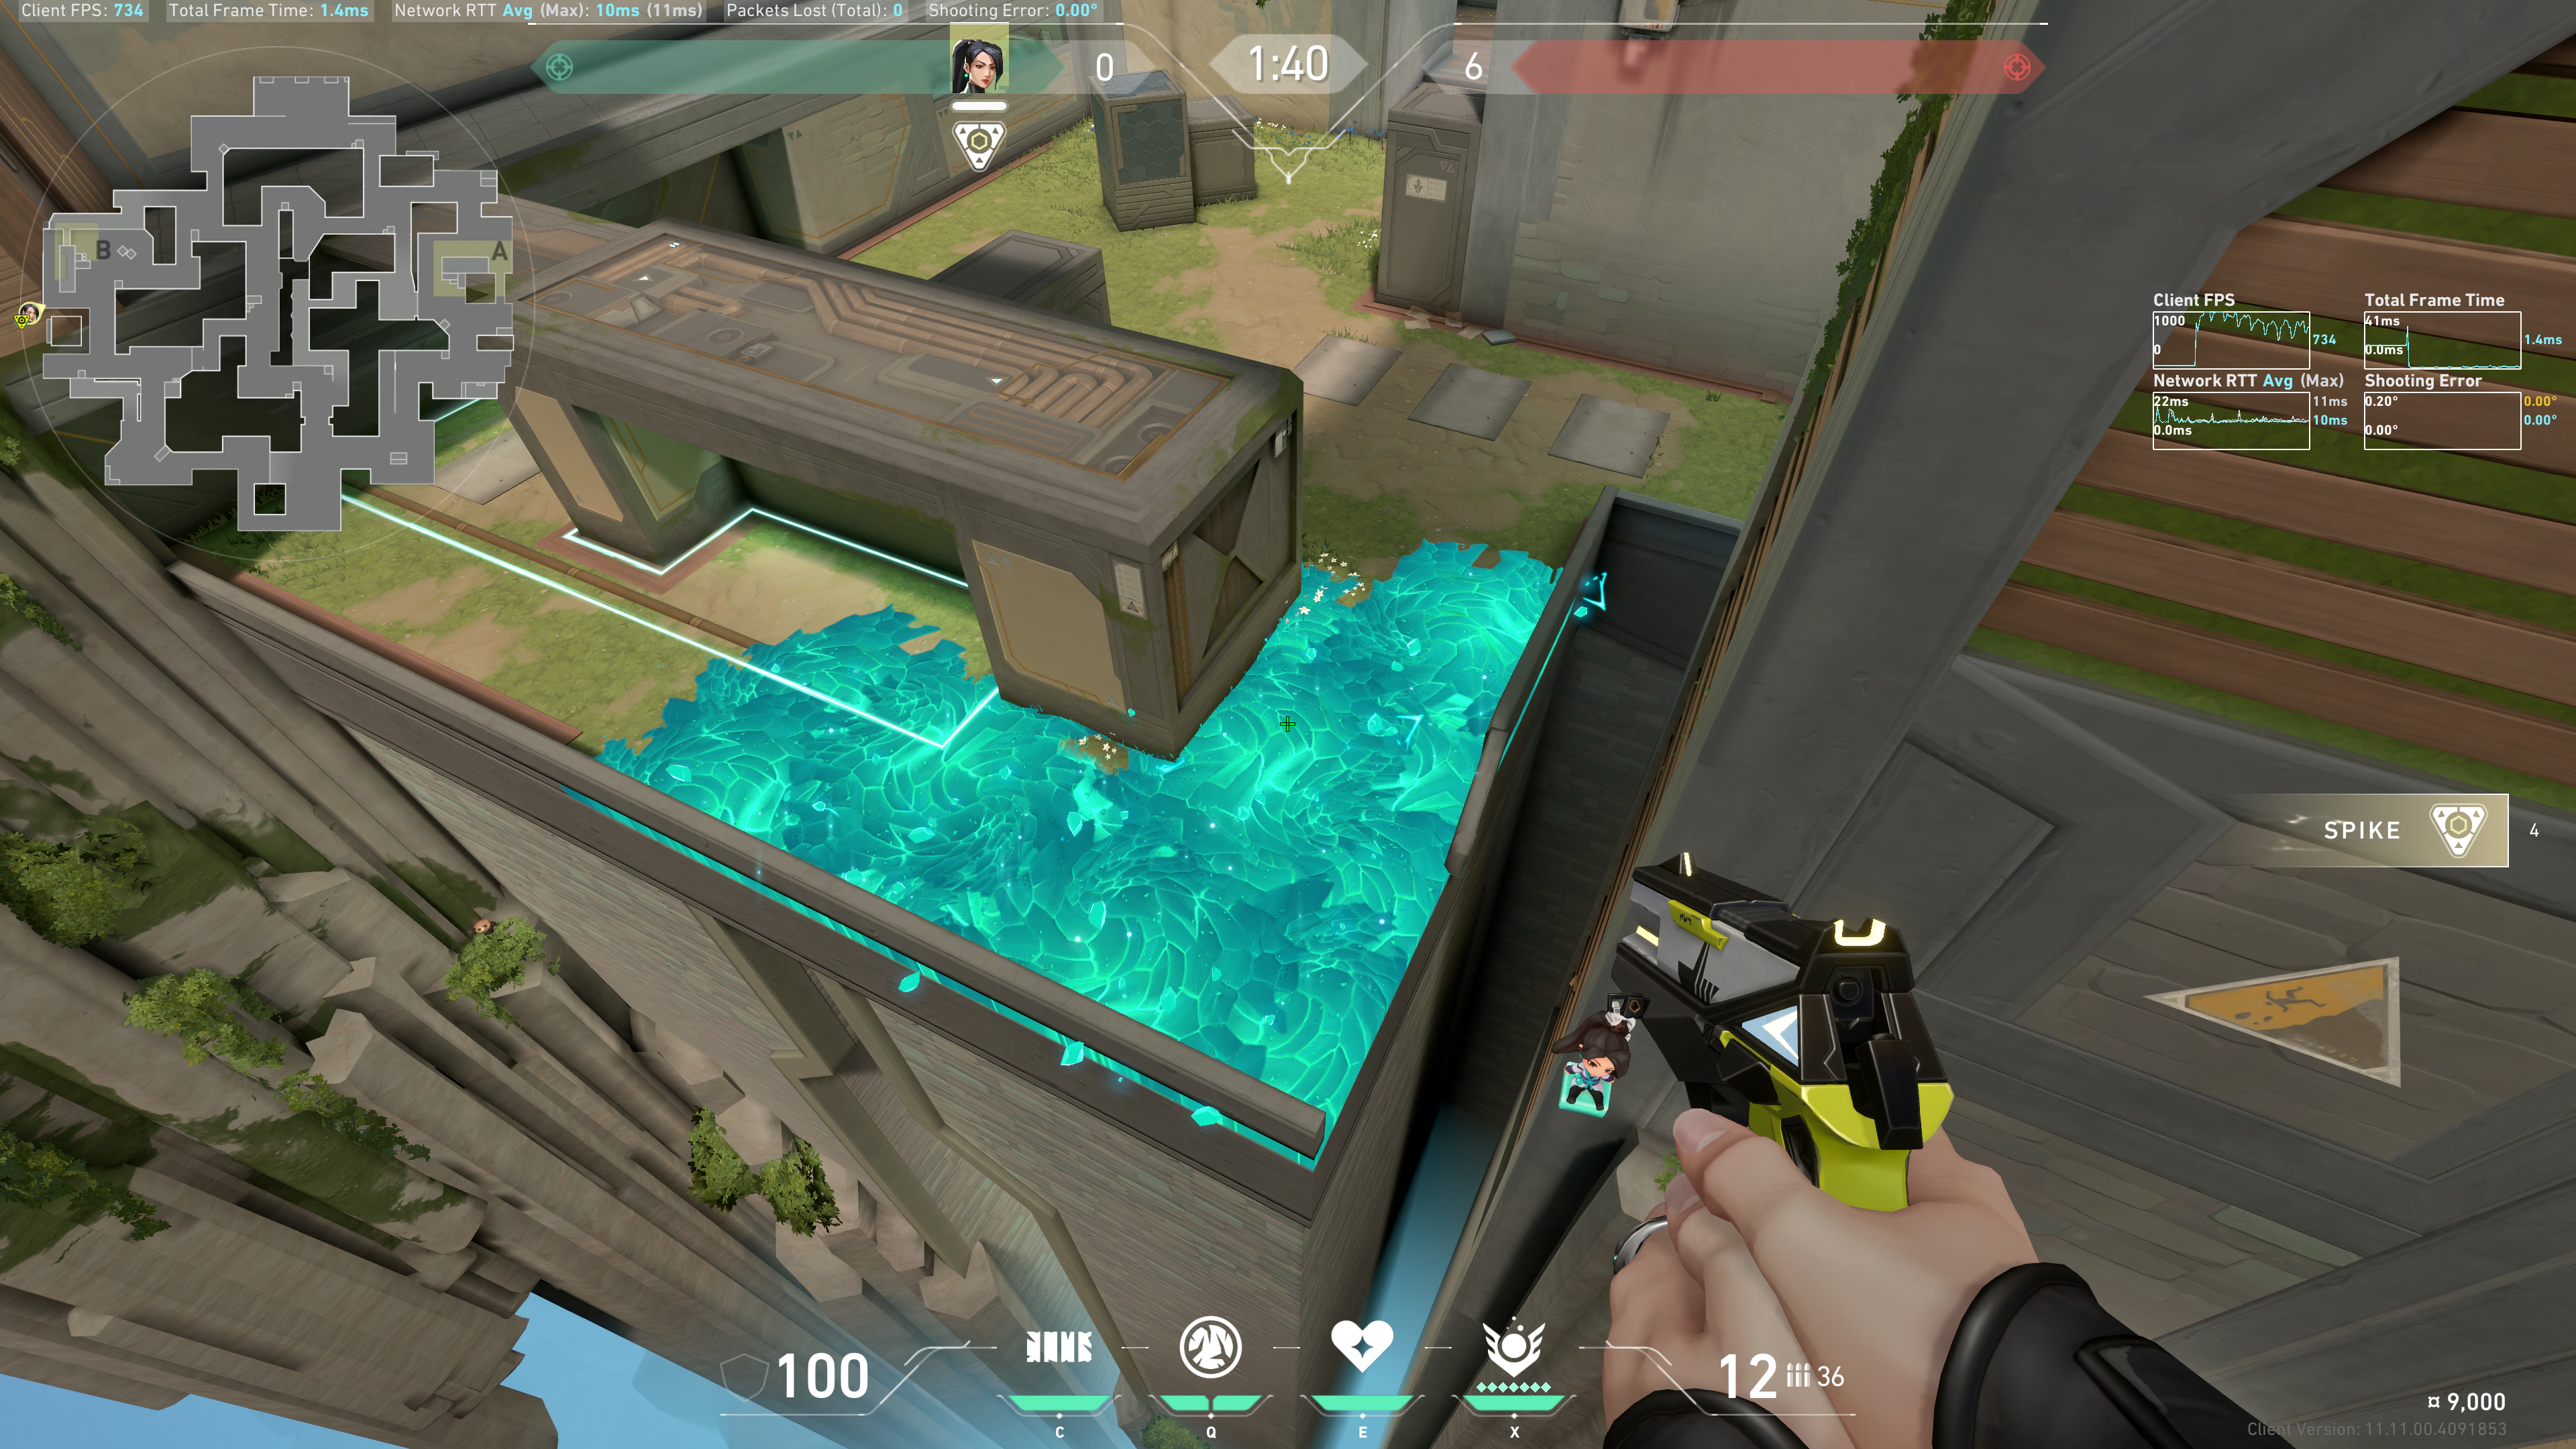
Result:
From CT part 2
Tuck into this corner:
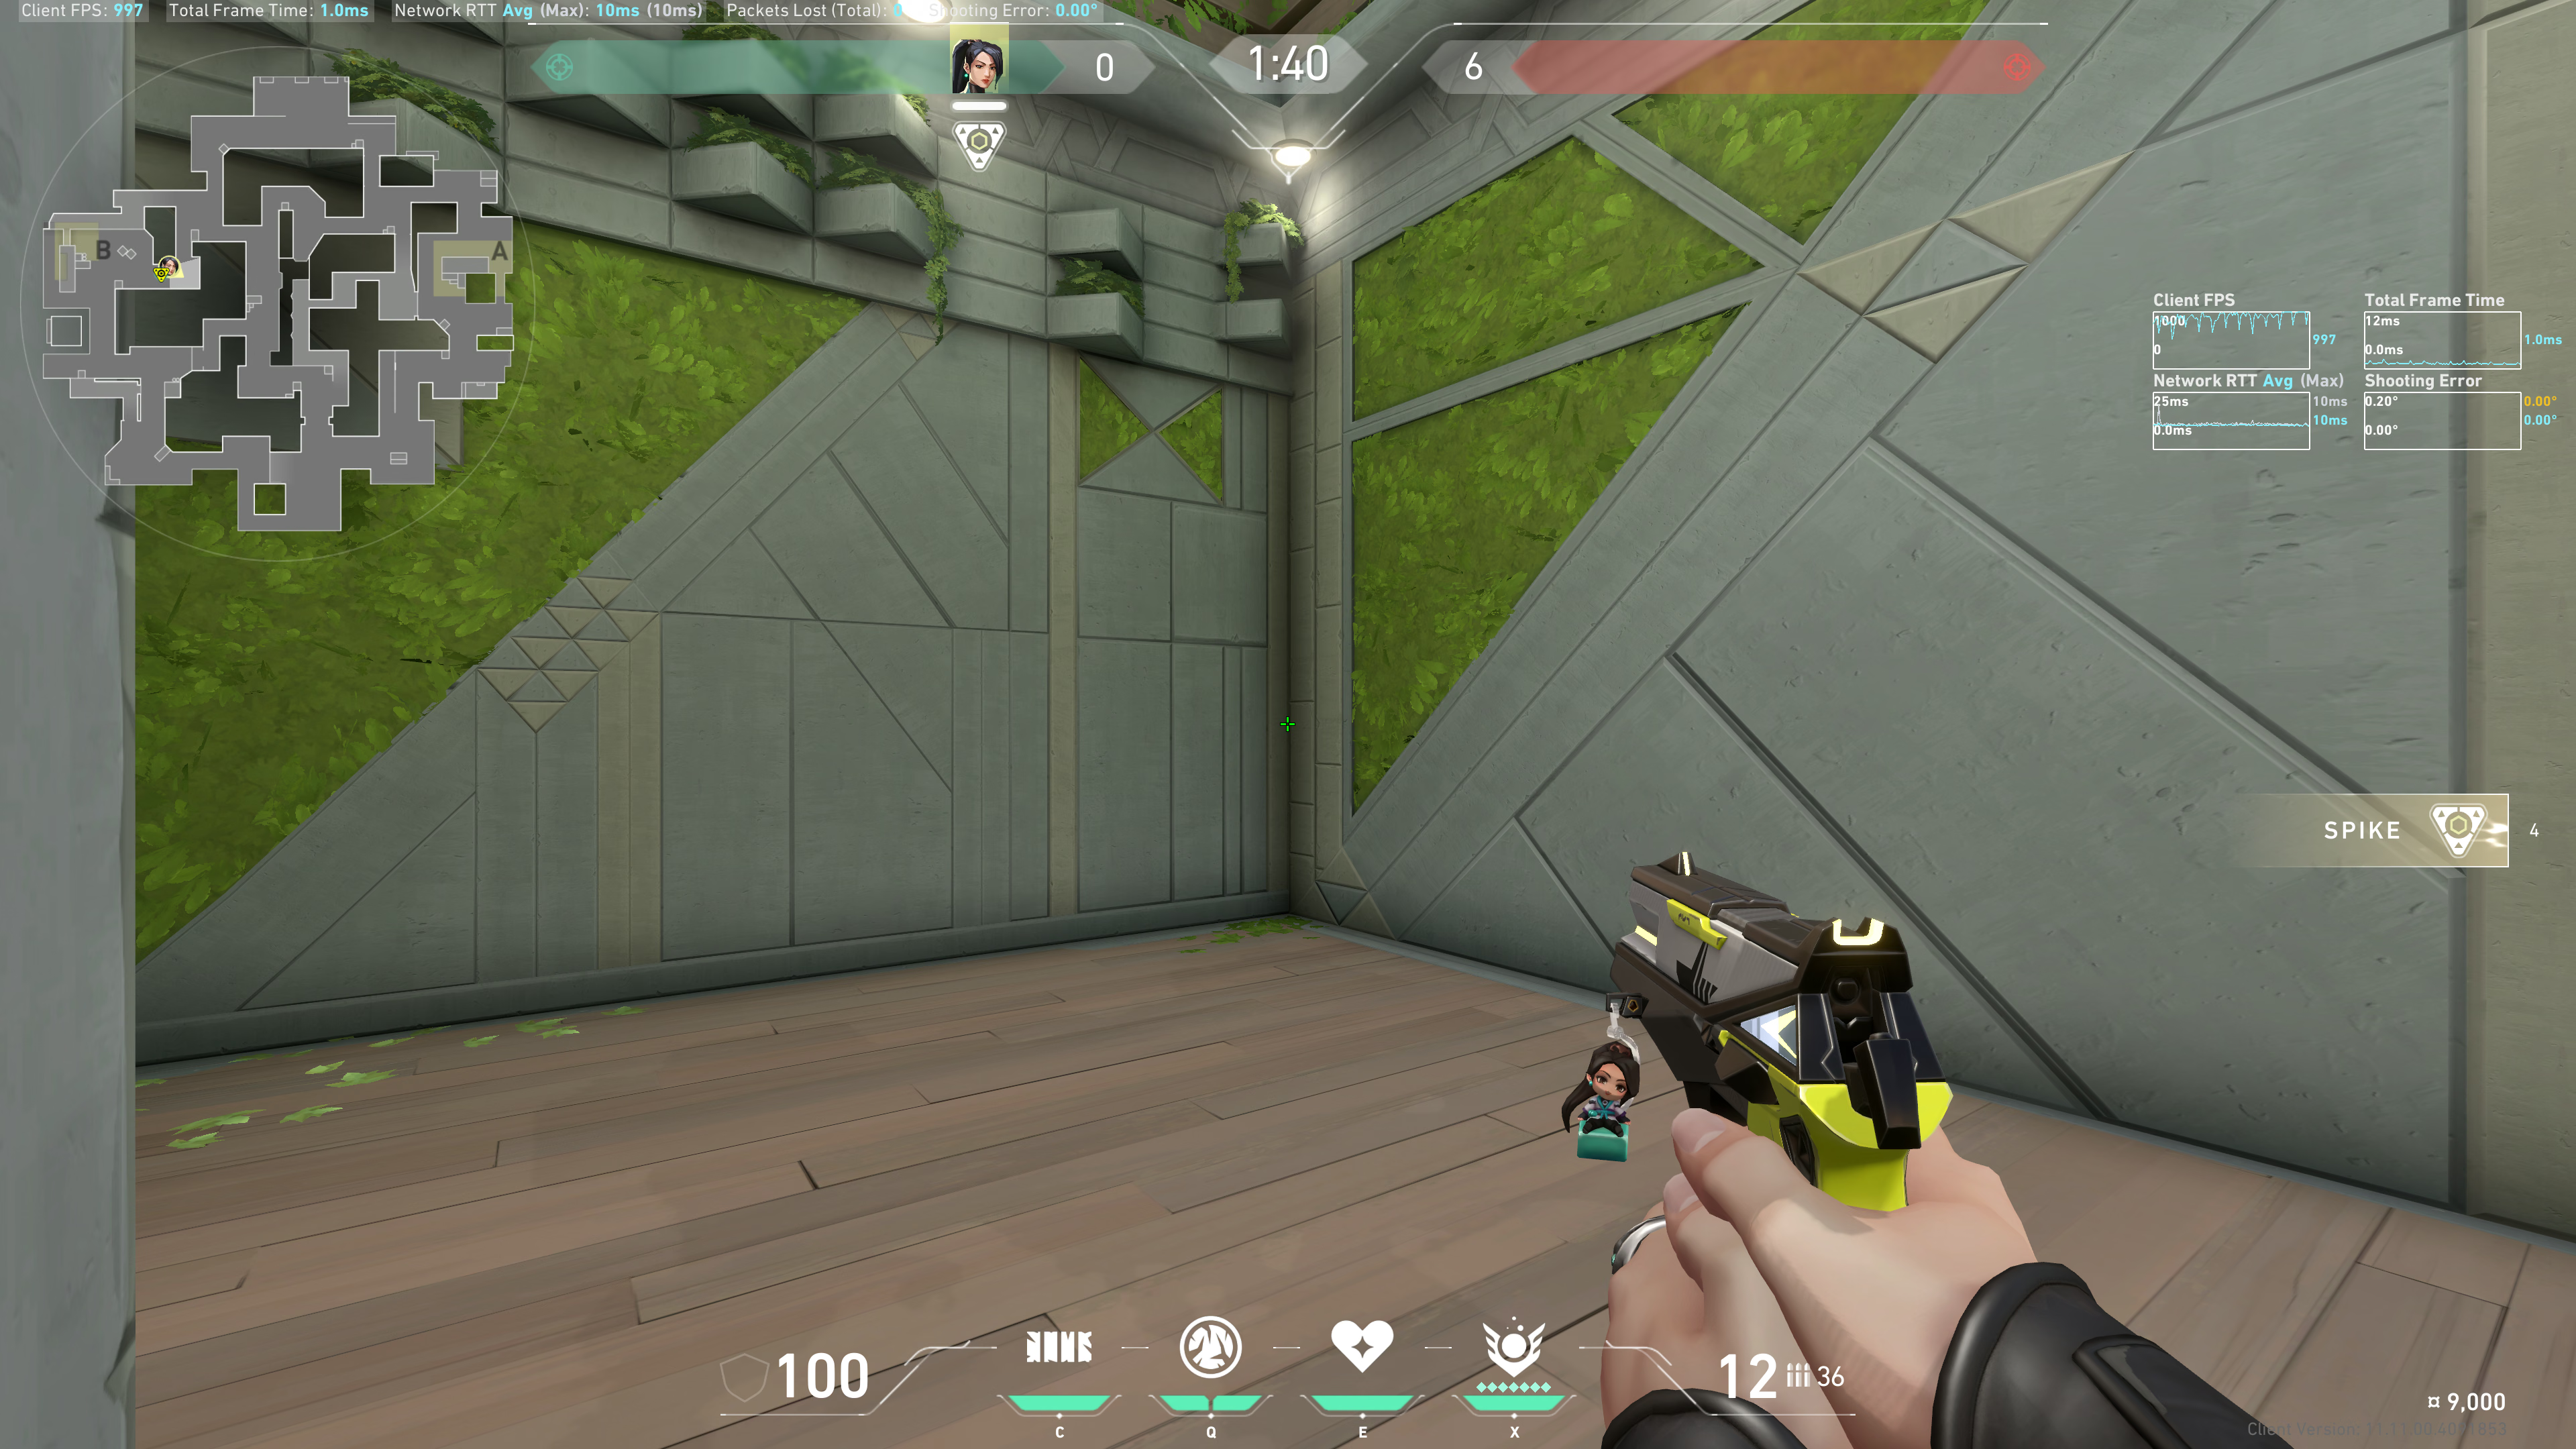
Aim in between these two dark pieces in the wall:
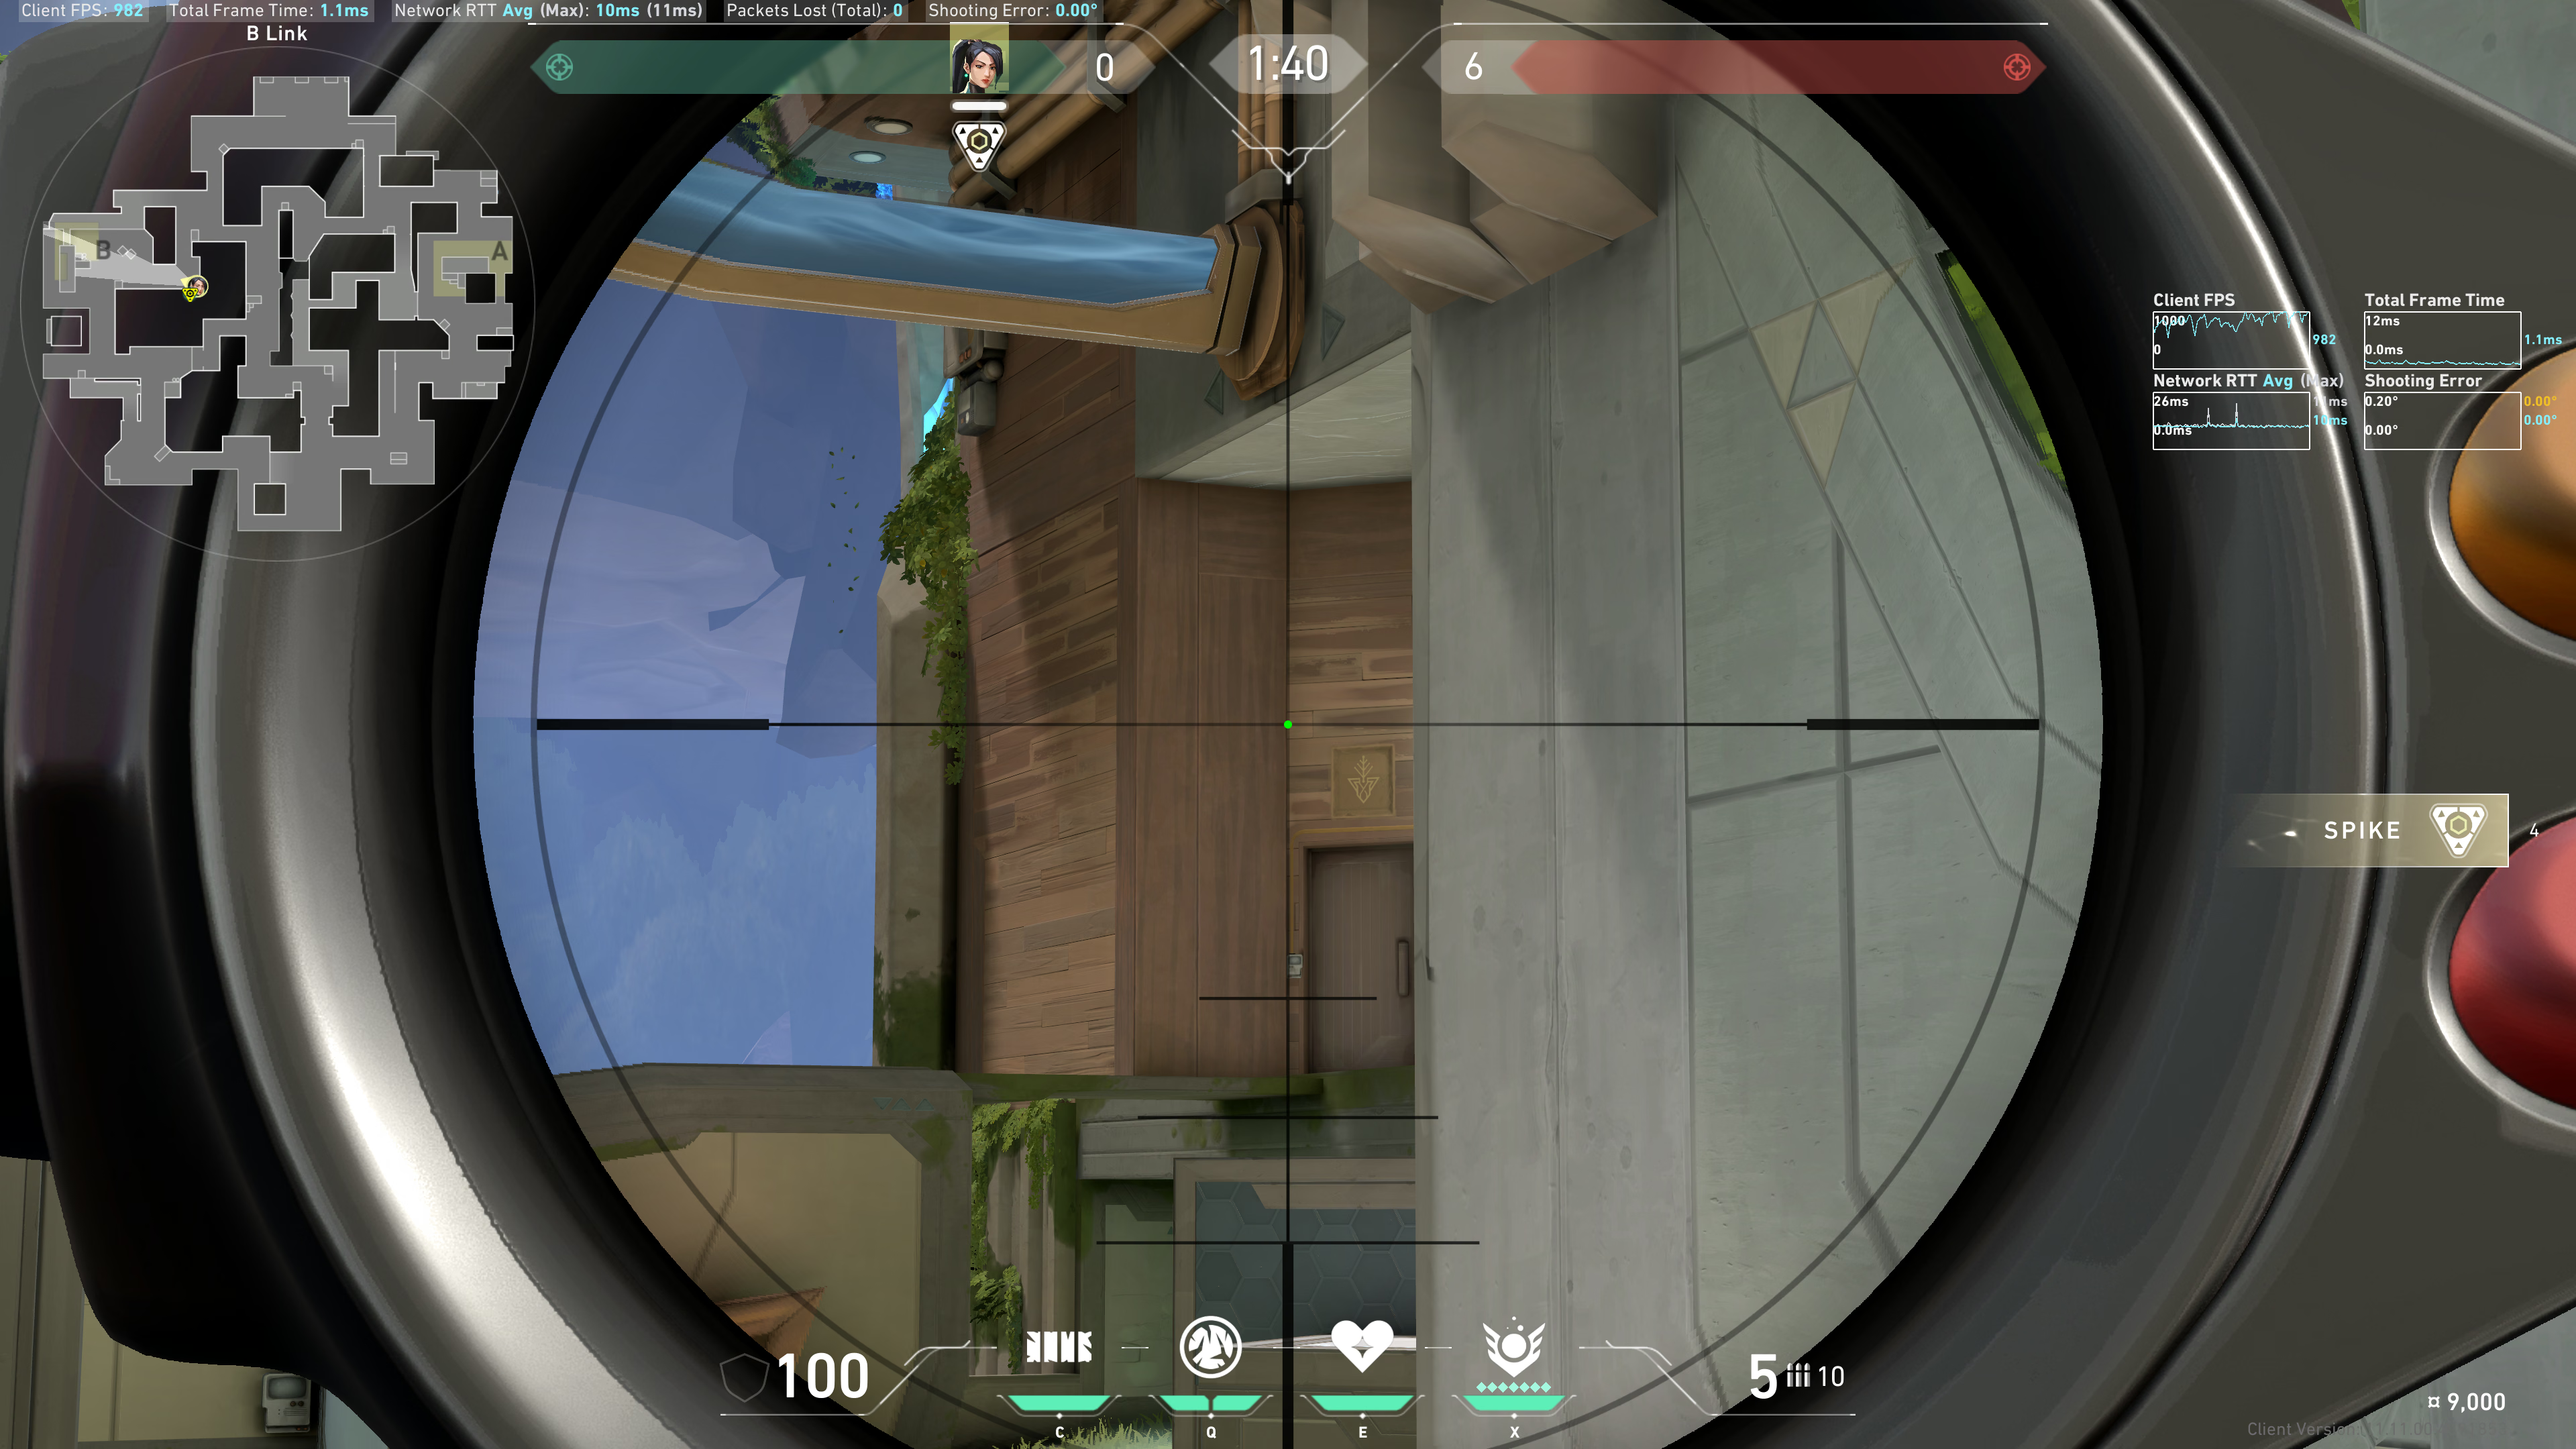
Result:
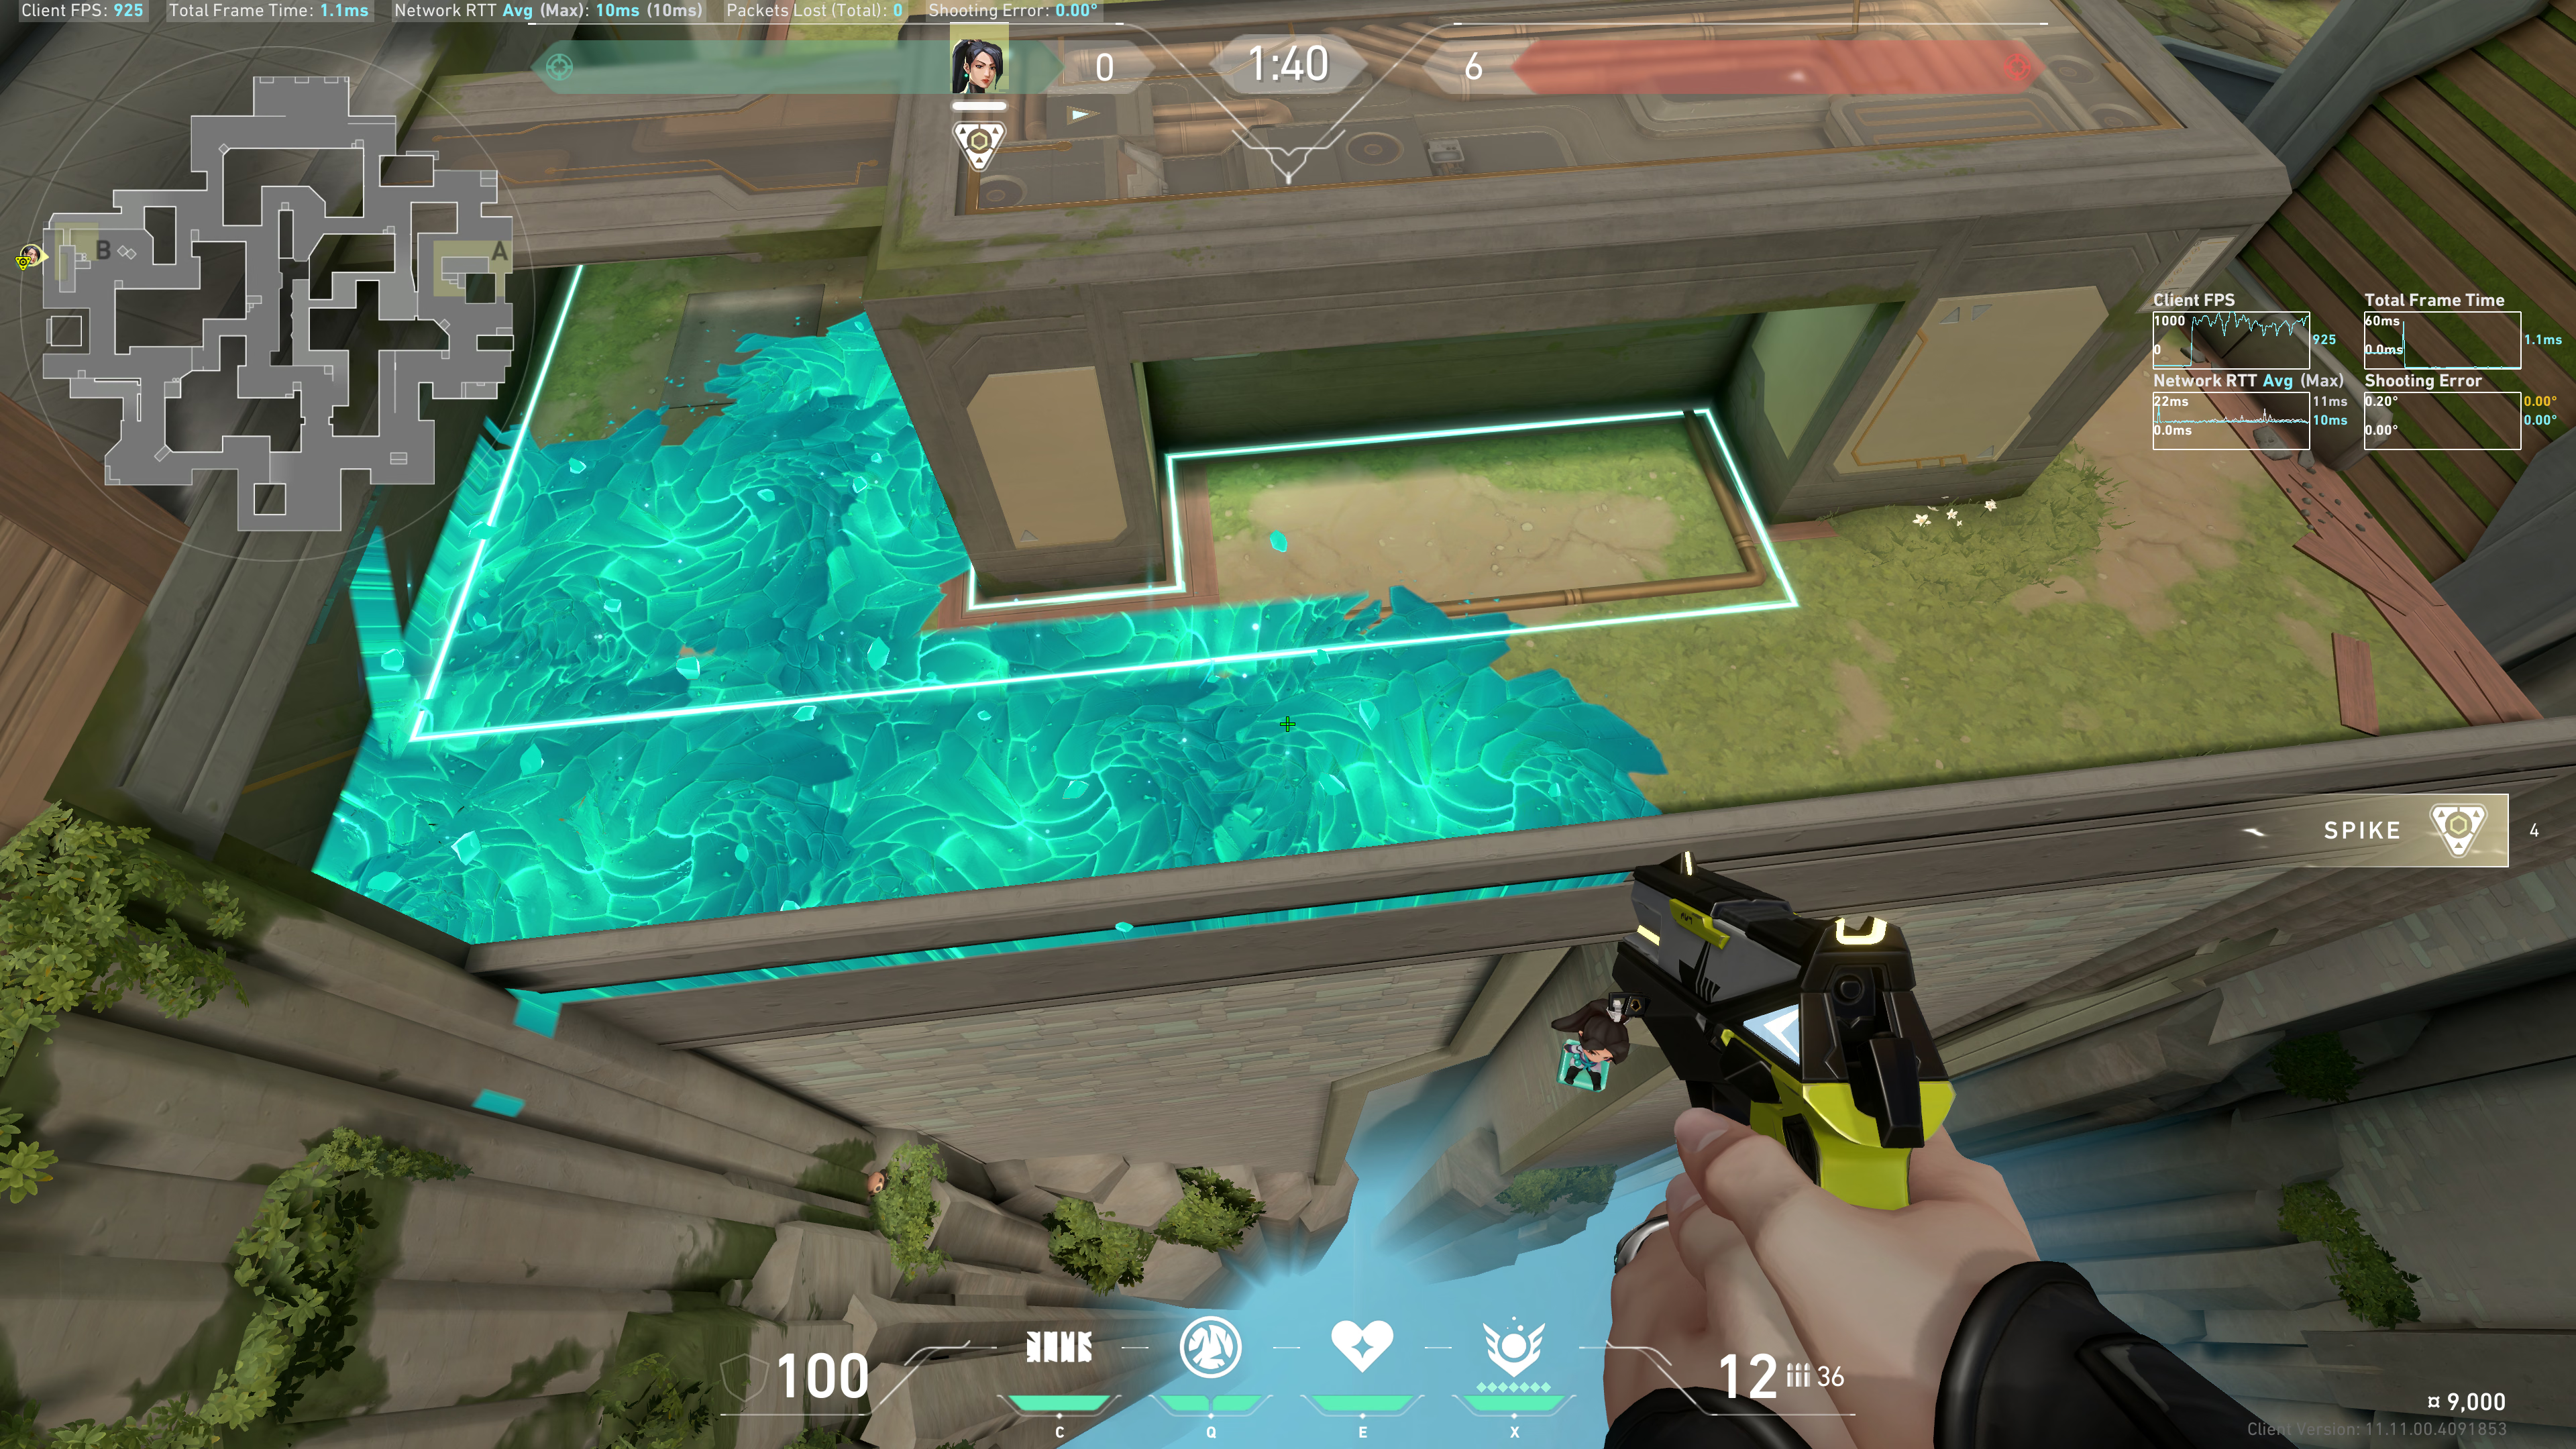
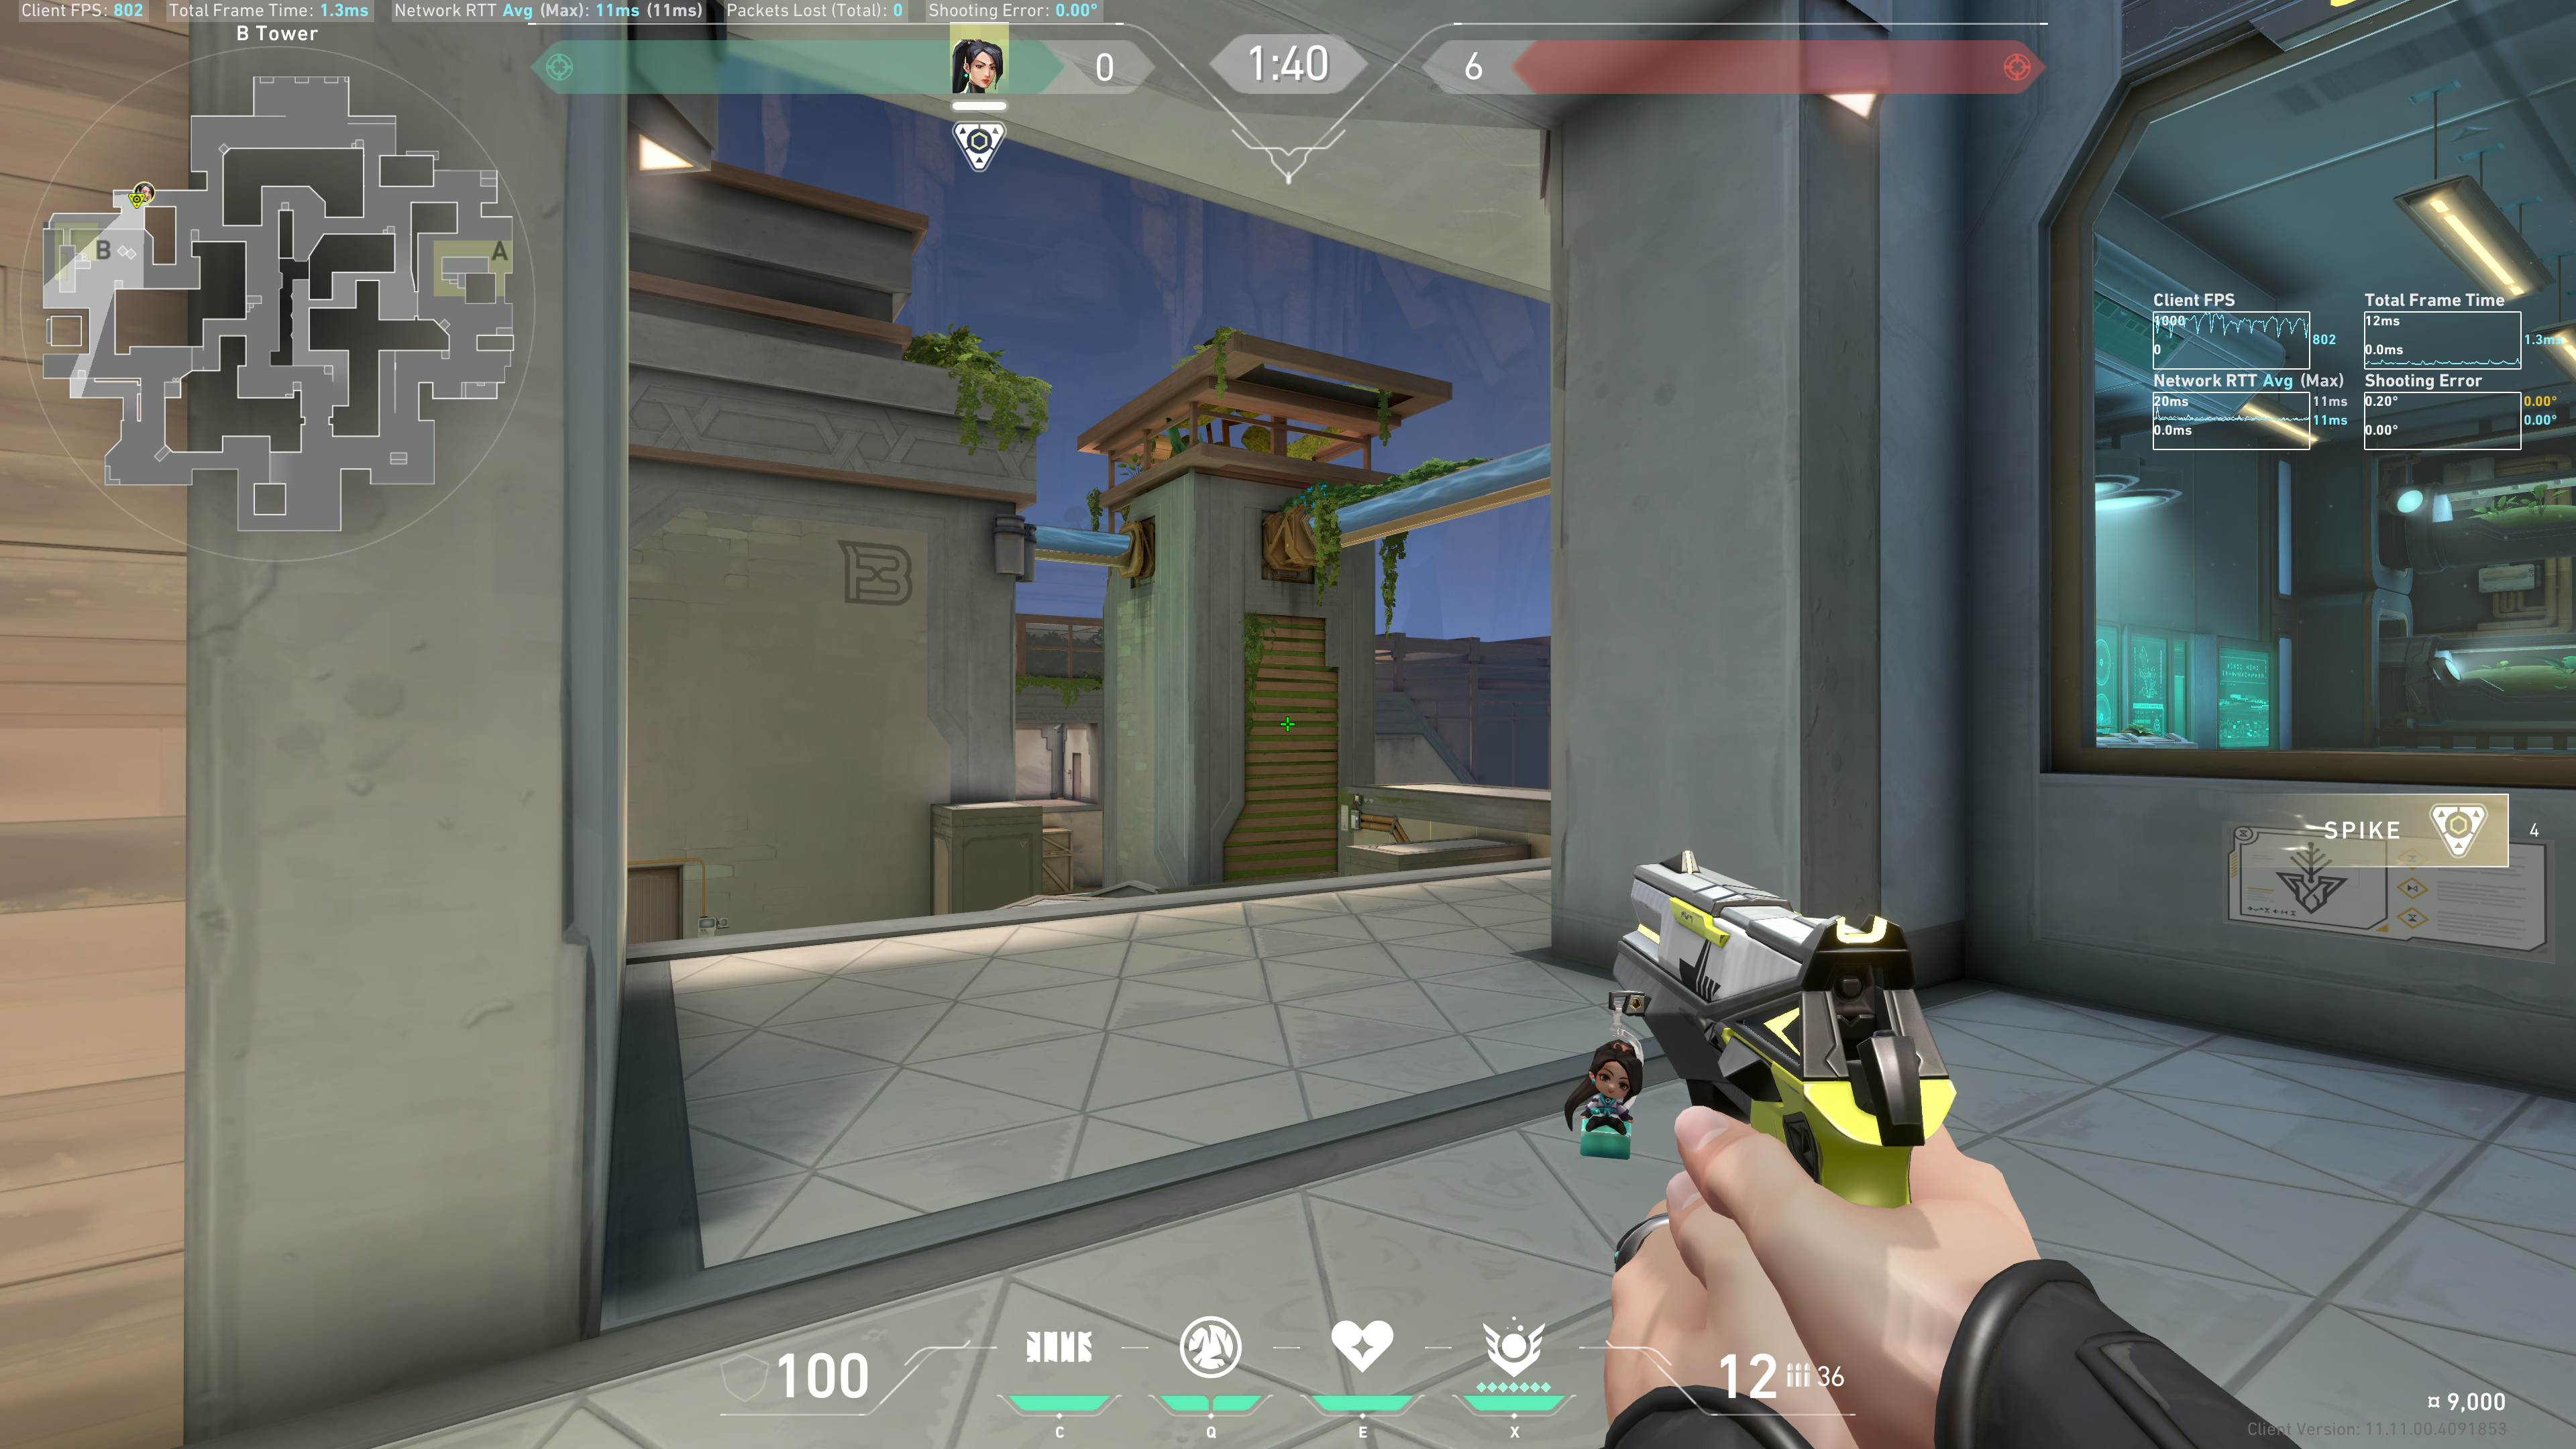
From Heaven
Simply use this tower as a backboard:
Example result (stationary):
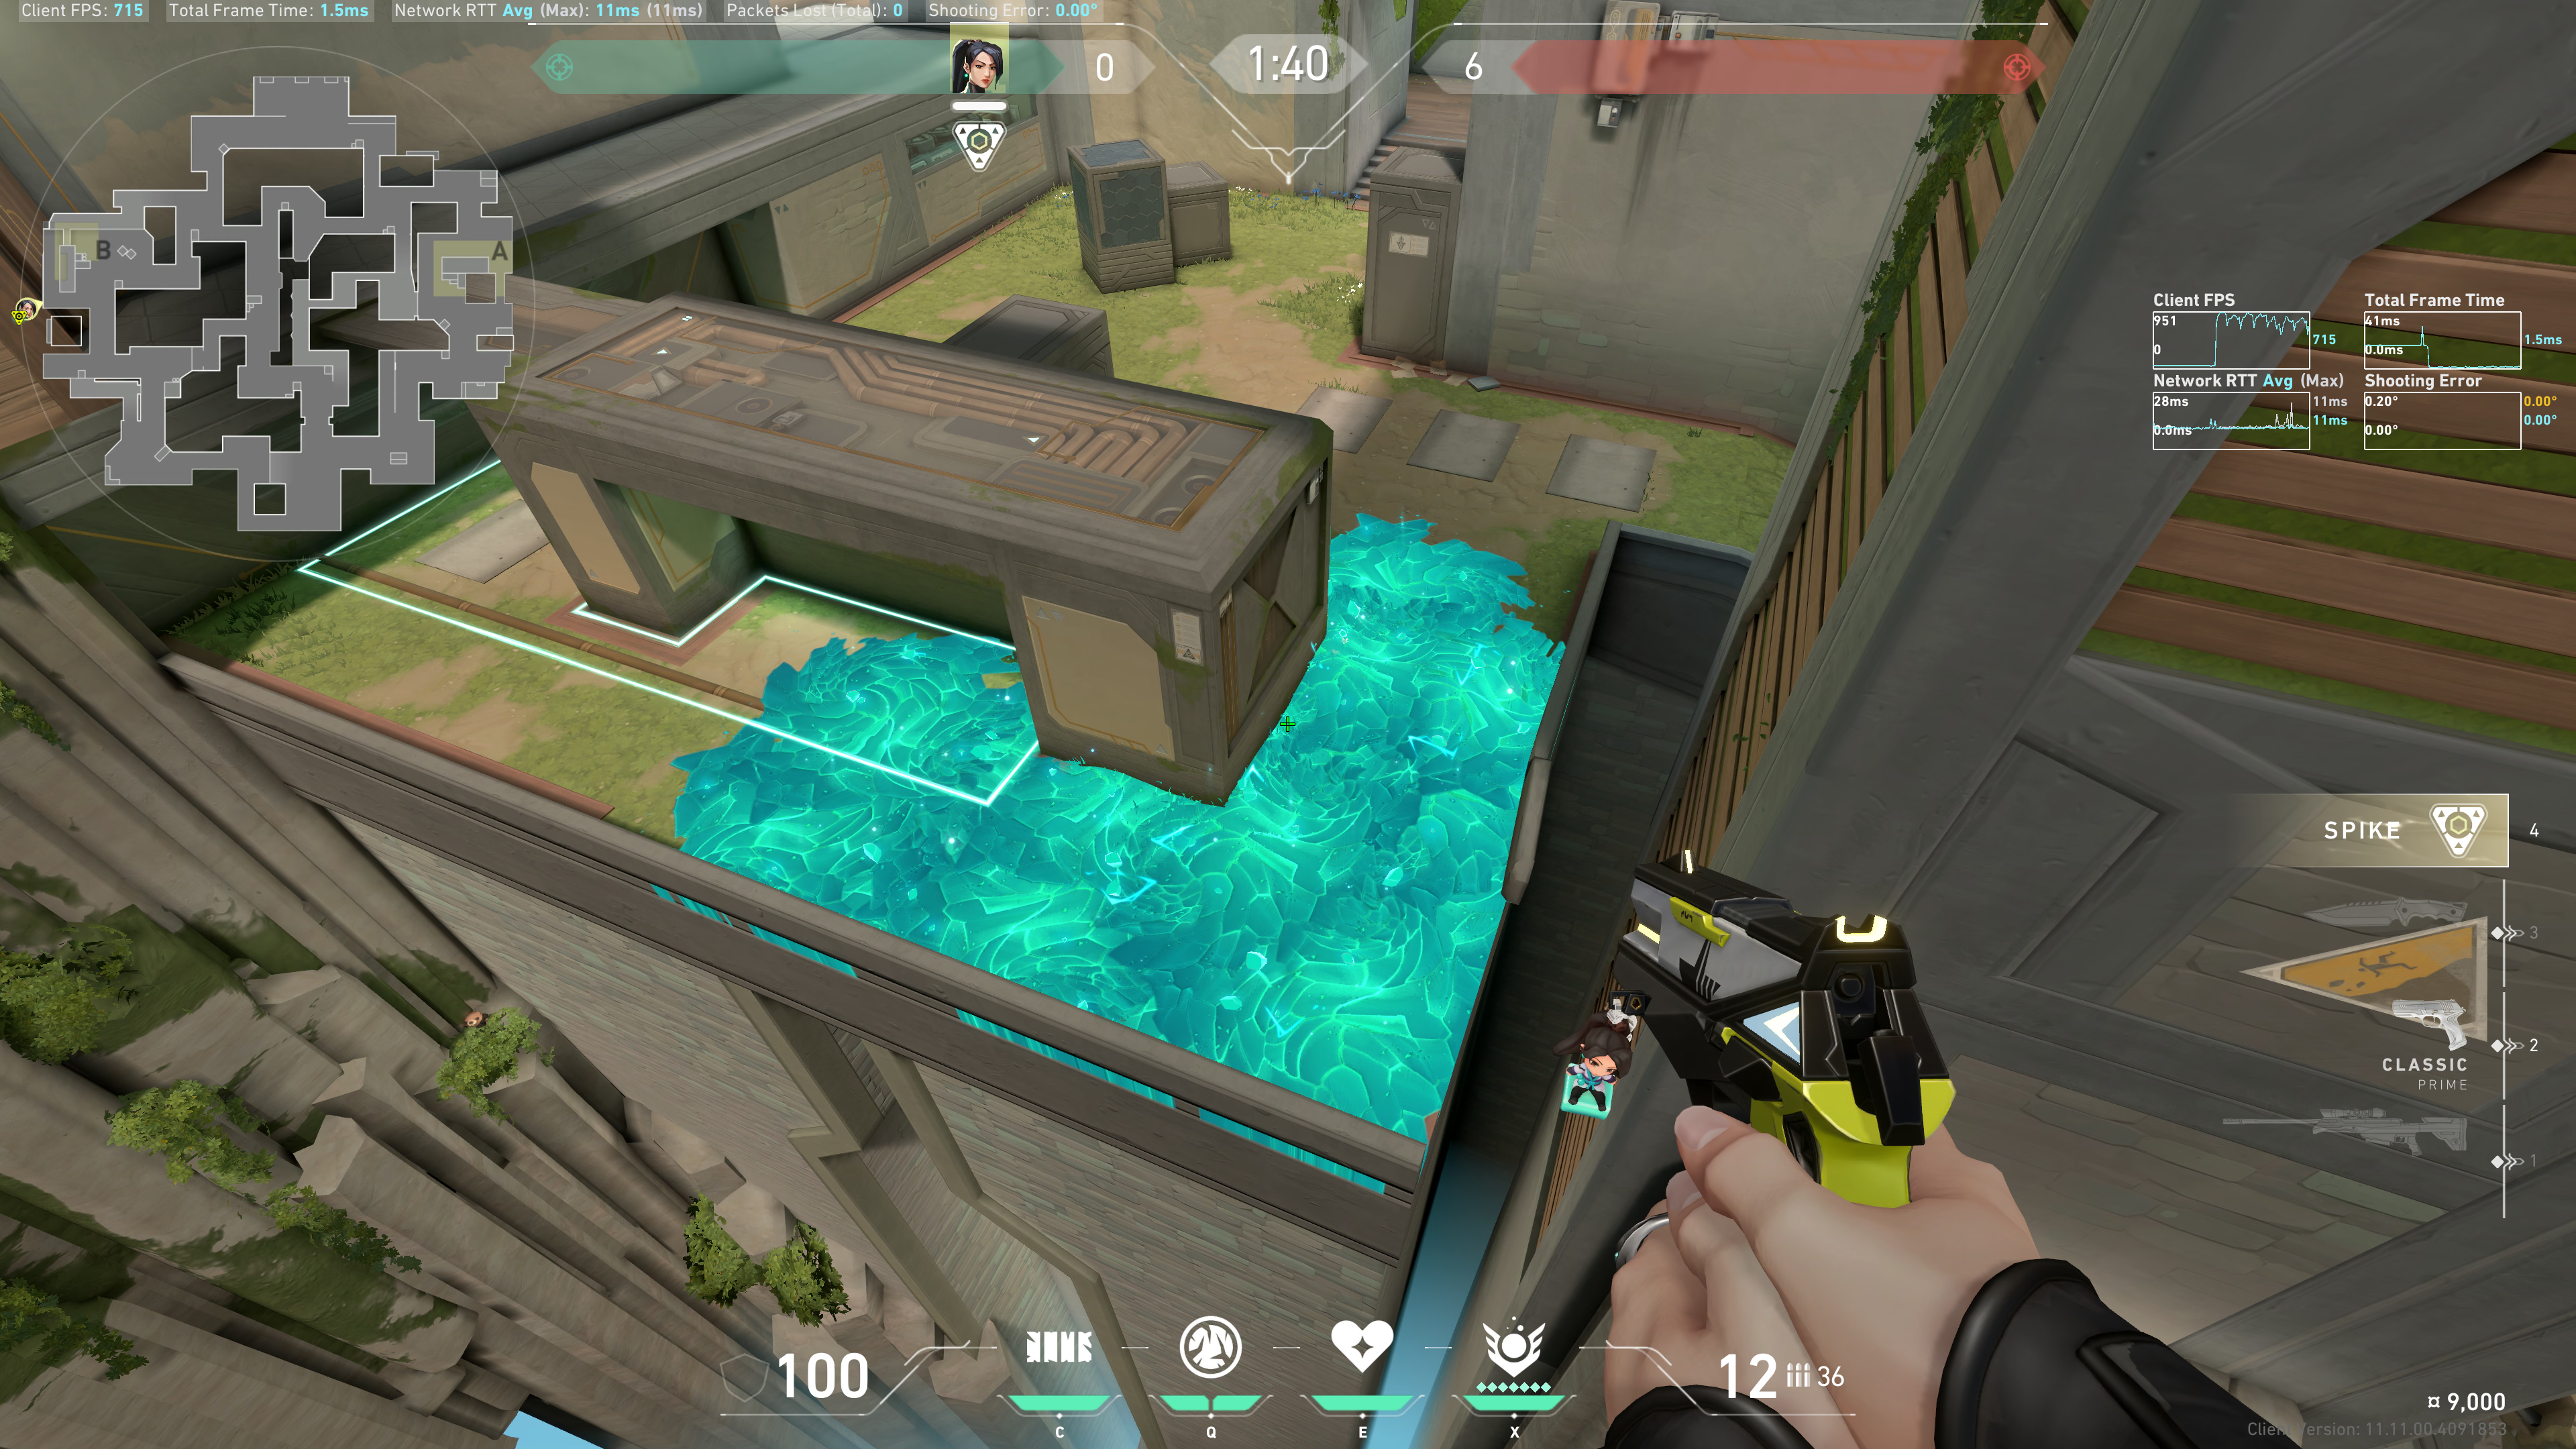
If you run while throwing, then the Ice Orb will bounce farther. If you do so, aim slightly left, so you don't accidentally throw the Ice Orb into the Abyss.
Example result (running):